• Skip to primary navigation
  • Skip to main content
  • Skip to primary sidebar
thelatinspoon.com
  • Costa Rican Recipes
  • About Mara
  • Work with me
  • Your Privacy at TLS
menu icon
go to homepage
  • Costa Rican Recipes
  • About Mara
  • Work with me
  • Your Privacy at TLS
search icon
Homepage link
  • Costa Rican Recipes
  • About Mara
  • Work with me
  • Your Privacy at TLS
×

Costa Rican-Style Chicken Empanadas

Costa Rican-Style Chicken Empanadas

Aug 13, 2026 · Leave a Comment

Three chicken empanadas opened along the side and filled with shredded cabbage and diced tomato, served with pink sauce on a white plate over a colorful tablecloth.

In Latin America, there is never a wrong time to eat an empanada. You can have one for breakfast, with a cup of coffee in the afternoon, as a quick lunch, or while walking past a street food stand and suddenly realizing you are hungry (even if you just ate) Empanadas are one of those foods that feel at home almost anywhere.

A chicken-filled empanada, served “arreglada” with cabbage and tomato and topped with pink sauce, placed on a napkin on a plate. In the background, you can see a Pyrex dish filled with empanadas.

The fillings vary from one country and family to another. Some are filled with beef, cheese, beans, chicharrón, or whatever happens to be in the kitchen. For this recipe, I am making them with seasoned shredded chicken, wrapped in corn masa and fried until golden.

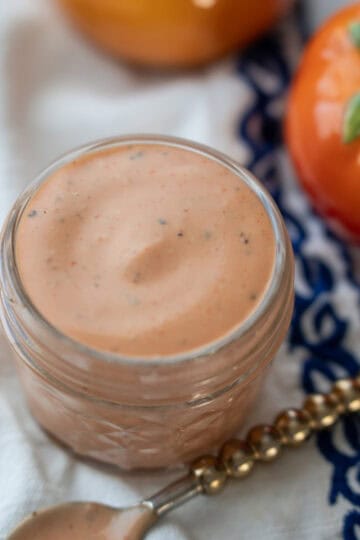
But we are not stopping there. These are empanadas arregladas, which literally means “dressed-up empanadas.” In Costa Rica, we take a freshly fried empanada, open it carefully, and fill it with extra toppings. I like mine with cabbage mixed with Salsa Rosada (or pink sauce), fresh tomatoes, and a little more sauce on top.

Of course, there is no single way to "arreglar" an empanada. You can add shredded lettuce, extra cabbage, hot sauce, avocado, or a spoonful of fresh Pico de Gallo. Once the empanadas are on the table, everyone can add what they like and make their own version.

Watch Video Here

https://www.youtube.com/watch?v=gFJheuBrCec

What You’ll Need to Make Chicken Empanadas

The recipe may look long at first, but it becomes much easier when you think of it in parts. First, we prepare the chicken filling, then the corn masa, and finally the cabbage and toppings that turn a regular empanada into an empanada arreglada.

Cooked chicken breasts, black pepper, diced bell pepper, chopped onion, one tomato, minced garlic, salt, oregano, butter, and achiote arranged in small bowls.

🍗 Chicken

You can use chicken breast or thighs. Breast is easy to shred, while thighs usually stay a little juicier and have more flavor.

🧅 Garlic, Onion, Celery, and Bell Pepper

These vegetables are added while the chicken cooks to give both the meat and the broth more flavor. Use whatever combination you have available at home. Carrots, cilantro stems, or other soup vegetables can also be added.

Do not throw away the broth after cooking the chicken. We will use some of it to season the filling and hydrate the corn masa.

🌿 Bay Leaves, Oregano, and Black Pepper

Bay leaves and oregano give the chicken a familiar homemade flavor without overpowering the filling. Black pepper adds a little warmth.

You can adjust these seasonings to your taste or add other spices your family normally uses when preparing chicken.

🍅 Fresh Tomato

As the tomato cooks, it softens and creates a light sauce that brings the shredded chicken together.

The filling should be moist but not watery. Too much liquid can soften the masa or cause the empanadas to open while frying.

🌽 Corn Masa

These empanadas are made with corn masa rather than wheat flour dough. You can use masa harina and hydrate it with the reserved chicken broth for extra flavor.

If you do not have enough broth, simply add water until you reach the required amount. The masa should feel soft and easy to shape without sticking to your hands or cracking around the edges.

🛢️ Oil for Frying

Use a neutral oil suitable for frying, such as vegetable, canola, or corn oil. You will need enough oil for the empanadas to cook evenly and develop a crisp, golden exterior.

I don’t recommend cooking empanadas in olive oil, whether it’s extra virgin or not. It can give the dough an unpleasant flavor, and because it has a relatively low smoke point, it can burn more easily..

🥬 Cabbage

Finely shredded green cabbage is one of the classic toppings for empanadas arregladas. It adds freshness and a crunchy contrast to the fried corn masa and juicy chicken.

🥫 Mayonnaise, Mustard, and Ketchup

These three ingredients are used to prepare my Salsa Rosada Recipe, which gives the cabbage its creamy, slightly tangy, and subtly sweet flavor. I suggest you give it a try 😉

💡Tips Before You Start

  • Let the chicken filling cool completely before assembling the empanadas. Warm filling can soften the corn masa and make it more difficult to shape. You can prepare the chicken a day ahead and keep it refrigerated in a covered container.
  • Let the prepared masa rest for 5 to 10 minutes before shaping it. The corn flour will continue absorbing the liquid during this time, so check its consistency afterward and make any necessary adjustments.
  • Do not be afraid to adjust the masa. Add a little more water if it feels dry or cracks when pressed, or mix in a small amount of masa harina if it feels too wet. It should be soft, easy to shape, and should not stick to your hands.
  • Place the chicken on only one half of the masa circle and leave the edges clear. Fold the masa over the filling and press the border firmly with your fingers or a fork so the empanada does not open in the oil.
  • Fry only a few empanadas at a time. Adding too many can lower the oil temperature and make them greasy.
  • A small piece of masa should begin bubbling as soon as it touches the oil without burning immediately.
Three chicken empanadas opened along the side and filled with shredded cabbage and diced tomato, served with pink sauce on a white plate over a colorful tablecloth.

How to Make Costa Rican-Style Chicken Empanadas

Making empanadas may seem complicated at first, but once you follow the process step by step, you will see how easy they are to prepare at home.

A pot with chicken breasts cooking in water with garlic, pieces of bell pepper, onion, and celery.

Step 1: Cook the chicken

Place the chicken in a pot with water, garlic, bay leaves, celery, bell pepper, onion, oregano, and black pepper. Let them cook for 25 to 30 minutes, or until the chicken is completely cooked. Remove it from the pot and reserve the broth.

A skillet with chopped onion, bell pepper, celery, and butter.

Step 2: Shred the chicken and sauté the vegetables

Shred the cooked chicken using your hands or two forks. In a large skillet, melt the butter with the achiote. Add the chopped onion, celery, and bell pepper, and cook for 2 to 3 minutes.

A skillet with a mixture of chopped onion, bell pepper, celery, and other aromatics, topped with pieces of tomato and minced garlic.

Step 3: Add the tomato and garlic

Add the chopped tomato and fresh garlic to the skillet. Cook for another 2 to 3 minutes, stirring occasionally, until the tomato softens and forms a light sauce.

A skillet with seasoned shredded chicken being stirred with a spatula.

Step 4: Add the shredded chicken

Add the shredded chicken and stir until it is evenly combined with the vegetables. Pour in a little of the reserved broth and season with oregano, black pepper, and salt. Cook until the filling reaches the desired consistency, then remove it from the heat.

A bowl of dry masa mixture while a hand sprinkles salt over it.

Step 5: Season the masa

Place the masa harina in a large bowl, add the salt, and mix it with your hands until evenly distributed.

A bowl of masa being mixed by one hand while the other hand pours water from a pitcher.

Step 6: Add the broth or water

Gradually add the reserved chicken broth while mixing the masa with your hands. If you do not have enough broth, complete the amount with water. Continue mixing until the masa is soft and easy to shape, then let it rest for 5 to 10 minutes.

A ball of masa placed between plastic sheets in a tortilla press.

Step 7: Flatten the masa

Form the masa into evenly sized balls. Place one ball between two pieces of plastic and flatten it with a tortilla press or a cutting board until you have an even circle.

A flattened masa circle filled with shredded chicken on a plastic sheet in a tortilla press, ready to be folded into an empanada.

Step 8: Fill the empanadas

Place some of the chicken filling on one half of the masa circle, leaving enough space around the edges.

Two hands press one side of the masa over the filling to form the empanada between the plastic sheets.

Step 9: Close the empanadas

Fold the masa over the chicken to form a half-moon. Firmly press the edges with your fingers or a fork until the empanada is completely sealed.

A skillet with hot oil and one empanada frying while a hand places another empanada into the oil.

Step 10: Fry the Empanadas

Heat the oil in a large skillet. Carefully lower the empanadas into the hot oil one at a time, leaving enough space between them.

A skillet with three empanadas frying while a hand uses a spoon to pour hot oil over them.

Step 11: Turn the Empanadas Over

Fry the empanadas for 3 to 4 minutes, then carefully turn them over. Continue cooking until both sides are golden and crispy. Remove them from the oil and let the excess oil drain.

A hand holding an open empanada, with a plate containing two cooked empanadas and a knife in the background.

Step 12: "Arreglar" the Empanadas

Carefully open each empanada and add your favorite toppings. You can use cabbage mixed with pink sauce, diced tomato, pico de gallo, avocado, hot sauce, or any combination you enjoy. Serve immediately.

Frequently Asked Questions About Chicken Empanadas

Is masa harina the same as cornmeal?

No. Masa harina is corn flour that has been treated and prepared specifically for making tortillas, tamales, and empanadas. Regular cornmeal has a different texture and will not produce a dough that can be shaped in the same way.

Can I use rotisserie chicken?

Yes. Rotisserie chicken is a convenient option when you want to save time. Remove the skin and bones, shred the meat, and use it to prepare the filling. I suggest tasting it before adding more salt.

Can I bake these empanadas instead of frying them?

I don't recommend baking this particular type of empanada. It all comes down to the dough. This corn masa is meant to be fried, and when baked, it can become very hard and chewy at the same time. For the best texture and results, I recommend frying these empanadas.
If you'd like to bake your empanadas instead, I recommend using a 3-2-1 dough, which works very well for both sweet and savory fillings.

Are these chicken empanadas gluten-free?

Corn masa is naturally gluten-free, but you should check the packaging to make sure the masa harina was not processed with ingredients containing gluten. It is also important to verify the sauces and seasonings if you are preparing the recipe for someone with celiac disease or a gluten intolerance.

Can I freeze chicken empanadas?

I don't recommend freezing the empanadas once they are assembled, either before or after frying. Instead, you can freeze the dough and the chicken filling separately.
If you decide to freeze the dough, don't worry if it seems to fall apart a little once it thaws. Simply knead it with your hands for about 2 minutes, and it will come back together and be ready to use.

What is the best way to reheat fried empanadas?

Like any fried food, these empanadas are best when they're freshly made. They won't have quite the same texture when reheated the next day, but if you have leftovers, you can still enjoy them.
My first choice for reheating is the air fryer, which does the best job of bringing back some of that crispy texture. The microwave is my second option when I'm in a hurry, although the corn shell will become softer.
Add the cabbage, tomato, salsa rosada, and any other cold toppings after reheating.

🥟 Made to Share and Enjoy

Empanadas are one of those foods that rarely make it to the table unnoticed. As soon as the first batch comes out of the oil, someone is usually standing nearby waiting to taste one. And honestly, that is the best part of making them.

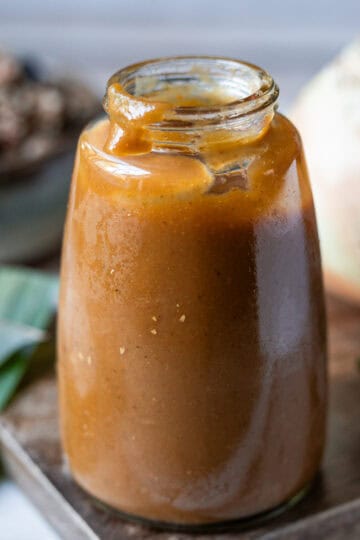
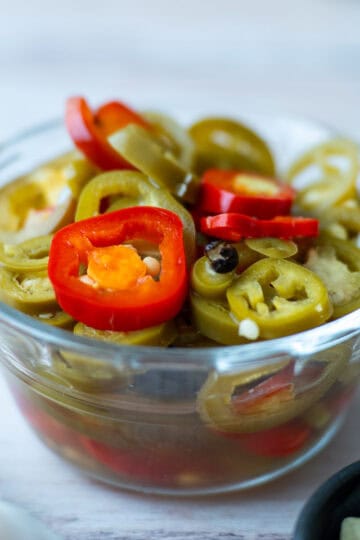
Serve them while they are still warm and place a few toppings and sauces on the table so everyone can prepare theirs differently. Try to add some Pickled Jalapeños for a tangy kick, or serve them with Homemade Lizano Sauce for an extra touch of Costa Rican flavor.

Don't forget to make:
Salsa Rosada Recipe, Pico de Gallo and Homemade Chicken Broth to elevate the flavor of your chicken empanadas.

Let me know in the comments what filling and toppings you would add to yours.

Besitos!
Mara

Three chicken empanadas opened along the side and filled with shredded cabbage and diced tomato, served with pink sauce on a white plate over a colorful tablecloth.

Costa Rican-Style Chicken Empanadas

These Costa Rican-style chicken empanadas are made with seasoned shredded chicken and homemade corn masa, then fried until golden and crispy. Open them while warm and add cabbage, pink sauce, fresh tomato, pico de gallo, or your favorite toppings.
Print Recipe Pin Recipe
Prep Time 20 minutes mins
Cook Time 45 minutes mins
Total Time 1 hour hr 5 minutes mins
Course Appetizer, Lunch, Snack
Cuisine Latin American
Servings 12 units

Equipment

  • Large mixing bowl
  • Large skillet
  • large pot
  • Cutting board and knife
  • Measuring cups and spoons
  • tortilla press Cutting board works fine
  • Plastic bags

Ingredients
  

Ingredients for Cooking the Chicken:

  • 2 bone-in chicken breasts
  • ½ medium onion
  • ½ bell pepper
  • 2 celery stalks
  • 4 fresh garlic cloves
  • 2-3 bay leaves
  • 1 teaspoon oregano
  • 1 teaspoon ground black pepper

Ingredients for the Chicken Filling:

  • 2 tablespoons butter
  • ½ teaspoon achiote
  • ½ medium onion
  • ½ bell pepper
  • 2 celery stalks
  • 3 fresh garlic cloves
  • 1 medium tomato
  • ½ cup chicken broth
  • ½ teaspoon oregano
  • ¼ teaspoon ground black pepper
  • 1 teaspoon salt

Ingredients for the Masa:

  • 4 cups masa harina
  • 8 cups liquid
  • 1 teaspoon salt

Ingredients for the Slaw:

  • ½ medium head of cabbage
  • 2 medium tomatoes
  • 2 cups Salsa Rosada

Instructions
 

  • Place the chicken breasts in a large pot. Add the onion, bell pepper, celery, garlic, bay leaves, oregano, and black pepper. Cover with water and cook for 25 to 30 minutes, or until the chicken is fully cooked. Remove the chicken and reserve the broth.
  • Shred the cooked chicken, set it aside. Melt the butter with the achiote in a large skillet, then add the chopped onion, celery, and bell pepper. Cook for 2 to 3 minutes.
  • Add the tomato and garlic. Cook for another 2 to 3 minutes, stirring occasionally, until the tomato softens.
  • Add the shredded chicken, ½ cup of the reserved broth, oregano, black pepper, and salt. Stir until well combined and cook until the filling is moist but not watery. Remove from the heat and let it cool.
  • Place the masa harina in a large bowl, add the salt, and mix well.
  • Gradually pour in the reserved chicken broth, water, or a combination of both. Mix with your hands until the masa is soft and easy to shape.
  • Divide the masa into balls. Place one ball between two pieces of plastic and flatten it with a tortilla press, or cutting board to form a circle.
  • Place some of the chicken filling on one half of the masa circle, leaving the edges clear. Fold the masa over the filling to form a half-moon. Press the edges firmly to seal the empanada.
  • Fill a pot with vegetable oil and heat to 375°F. Corn oil or another neutral oil can also be used. Olive oil is not recommended. Carefully place the empanadas in hot oil, frying only a few at a time.
  • After 2-3 minutes turn the empanadas as needed and fry until both sides are golden and crispy. Cook for a total of 7-8 minutes. Remove them from the oil and drain on paper towels.
  • Combine some of the sauce with the shredded cabbage. Carefully open each empanada and fill it with the cabbage salad, diced tomato, and additional toppings or sauce. Serve immediately.

Video

https://www.youtube.com/watch?v=gFJheuBrCec

Notes

  • Make sure the chicken filling has cooled before assembling the empanadas.
  • Keep the prepared masa covered with a damp kitchen towel while shaping the empanadas to prevent it from drying out.
  • Cook the chicken until it reaches an internal temperature of 165°F (74°C).
  • Fry the empanadas in batches so the temperature of the oil does not drop. Drain them on paper towels after frying.
  • Store leftover empanadas without the toppings in an airtight container in the refrigerator for up to 3 to 4 days. Reheat them in the oven or air fryer for the best texture.
✨ If you enjoyed this recipe, visit thelatinspoon.com or The Latin Spoon on YouTube for more delicious recipes.
Keyword Homemade

Bacon-Wrapped Stuffed Jalapeños

Aug 8, 2026 · Leave a Comment

Bacon-wrapped stuffed jalapeños served next to a small bowl of ranch dressing.

I have to admit that, for a long time, I assumed any recipe made with whole jalapeños would be far too spicy for me. Just looking at them was enough to make me think twice. But once I learned that removing the seeds and membranes makes a big difference, stuffed jalapeños became much less intimidating.

Bacon-wrapped stuffed jalapeños served next to a small bowl of ranch dressing.

The first time I prepared them this way, I realized that the jalapeño was only one part of the experience. The creamy cheese filling softens the heat, while the bacon adds a salty, crispy layer that brings everything together. They disappeared so quickly that I knew this was one of those recipes worth making again.

Now I love serving them when I want something a little different for a gathering. They look impressive, but they are surprisingly easy to prepare, and everyone can enjoy them according to their preferred level of heat. You can remove all the membranes for a milder version or leave a little behind if you want that extra kick.

Watch the video here:

Ingredients You’ll Need

You only need a few simple ingredients to make these bacon-wrapped stuffed jalapeños. And a lot of them can be substituted by others in case you cannot find them.

On a countertop, bacon, jalapeños, cream cheese, Parmesan cheese, black pepper, salt, and garlic powder are arranged in separate small bowls.

🌶️ Jalapeños:

I used fresh, firm jalapeños with smooth, bright green skin. Larger peppers are easier to fill and wrap with bacon. Remove the white membranes for less heat or leave some inside for a spicier result. You can substitute mini sweet peppers for a mild version.

🧀 Cream cheese:

I used regular full-fat cream cheese because it creates a rich, creamy filling that holds its shape during cooking. Let it soften at room temperature before mixing so the ingredients combine evenly. Reduced-fat cream cheese can be used, although its higher moisture content may make the filling slightly softer.

🧀 Grated Parmesan cheese:

I used grated Parmesan to add a salty, savory flavor to the creamy filling. Freshly grated Parmesan blends more easily, but packaged grated cheese also works. You can substitute it with cheddar, Monterey Jack, pepper Jack, or another flavorful cheese you enjoy.

🥓 Bacon:

I used one strip of bacon for each jalapeño half, although the amount may vary depending on the size of the pepper and the length of the bacon. Regular-cut bacon wraps more easily and cooks more evenly than thick-cut bacon, which may remain soft before the jalapeño is fully cooked. As the bacon cooks, its fat renders and helps brown the outside of the pepper. Turkey bacon can be used for a lighter alternative, but it contains less fat and may not become as crisp.

🧄 Garlic powder:

I used garlic powder because it blends evenly into the cream cheese filling. You can substitute it with onion powder or a small amount of finely minced fresh garlic. You can also add oregano, paprika and chili powder for extra flavor.

⚫ Black pepper

Black pepper adds a mild warmth and complements the flavor of the jalapeños. You can replace it with smoked paprika, cayenne pepper, chili powder, or another seasoning you enjoy.

Bacon-wrapped stuffed jalapeños served next to a small bowl of ranch dressing.

💡Tips for Perfect Bacon-Wrapped Jalapeños

  • Wear disposable gloves when preparing the jalapeños, and avoid touching your eyes or face. Wash your hands, knife, cutting board, and spoon thoroughly afterward.
  • Choose jalapeños of a similar size so they cook at approximately the same rate. Do not overfill the jalapeño halves. Leave a little space around the edges to prevent the cheese mixture from spilling as it heats.
  • Wrap the bacon at a slight angle and overlap it gently as you move along the jalapeño. Place the end of the strip underneath so the weight of the pepper helps keep it in place while cooking.
  • Arrange the jalapeños in a single layer without overcrowding the air fryer basket or baking sheet. This allows the hot air to circulate and helps the bacon brown evenly. If you need to cook them in batches, keep the remaining stuffed jalapeños refrigerated until it is their turn to cook.
  • Let them rest for a few minutes before serving. The filling will be extremely hot immediately after cooking and will thicken slightly as it cools.

How to Make Bacon-Wrapped Stuffed Jalapeños

Once the ingredients are ready, the recipe comes together in just a few steps. You can cook the jalapeños in the air fryer or use the oven if you need to prepare a larger batch.

A glass bowl containing cream cheese is held with one hand while the other stirs it with a spoon. A small bowl of garlic powder sits beside it.

Step 1: Create a creamy base

Place the cream cheese in a medium bowl and stir for about 2 minutes, or until smooth and creamy. If it is too cold, microwave it for 10 to 15 seconds to soften it.

One hand holds a small bowl of black pepper while the other adds it with a measuring spoon to a bowl containing cream cheese and Parmesan cheese. A spatula is inside the bowl.

Step 2: Build the flavor

Add the Parmesan cheese, garlic powder, black pepper, and salt to the softened cream cheese.

One hand holds the bowl while the other mixes the ingredients with a spatula.

Step 3: Bring the filling together

Stir everything until the ingredients are evenly distributed and the filling looks smooth and creamy.

On a cutting board, two hands remove the membranes from a jalapeño cut in half. A knife is beside it.

Step 4: Get the jalapeños ready

Wash and dry the jalapeños, then cut them in half lengthwise. Remove the seeds and inner membranes with a spoon and fill each half with the cream cheese mixture.

One hand holds a stuffed jalapeño half while the other wraps a strip of bacon around it. In the background, a wooden plate holds the stuffed jalapeño halves, and another plate contains strips of bacon.

Step 5: Wrap with bacon

Wrap a strip of bacon around each stuffed jalapeño. Make sure it holds the filling in place and tuck the end underneath.

Stuffed jalapeños are inside an air fryer basket while two hands place more jalapeños into the basket.

Step 6: Cook until crispy

Arrange the jalapeños in the air fryer basket, leaving a little space between them. Cook at 350°F (175°C) for 11 to 12 minutes, or until the bacon is fully cooked and crispy.

Let them rest for a few minutes before serving.

💡Questions You May Have Before Making This Recipe

Can I prepare the stuffed jalapeños ahead of time?

Yes. You can assemble the jalapeños several hours in advance and keep them covered in the refrigerator until you are ready to cook them. For the best texture, wait until shortly before serving to place them in the air fryer.

Can I cook them in the oven instead?

Yes. Arrange the stuffed jalapeños on a baking sheet and bake them at 375°F (190°C) for approximately 18 to 20 minutes, or until the bacon is fully cooked. Cooking time may vary depending on the thickness of the bacon and the size of the jalapeños.

Why is my bacon not getting crispy?

This can happen when the bacon is too thick or the jalapeños are placed too close together. Regular-cut bacon works best for this recipe because it has enough time to crisp while the jalapeños cook. If necessary, add a few more minutes and check them frequently to prevent burning.

How do I know when the jalapeños are ready?

The bacon should look browned and fully cooked, and the jalapeños should be tender without completely losing their shape. The cheese filling may bubble slightly around the edges.

What is the best way to reheat them?

Reheat the jalapeños in the air fryer at 350°F (175°C) for 3 to 5 minutes, or until warmed through and the bacon becomes crisp again. Avoid reheating them for too long because the filling can become very hot and begin to spill out.

✨ More Appetizers to Share

These jalapeños are a great addition to a table filled with different appetizers, especially when you want to offer both warm and cold options. You can serve them alongside:

  • A Creamy Corn Dip
  • A fresh and colorful Tilapia Ceviche
  • And some delicious Pico de Gallo

And if you are simply a jalapeño lover, take a look at my Pickled Jalapeños Recipe, where I show you how to prepare them at home. They are delicious for adding a spicy, tangy touch to tacos, sandwiches, burgers, and many other dishes.

If you prepare these bacon-wrapped stuffed jalapeños, let me know in the comments how spicy you made them. And if there is another recipe you would like to see on the channel, I would love to hear your suggestions.

Besitos!
Mara

Bacon-wrapped stuffed jalapeños served next to a small bowl of ranch dressing.

Bacon-Wrapped Stuffed Jalapeños

These bacon-wrapped stuffed jalapeños combine a creamy Parmesan filling with crispy bacon. They are easy to prepare in the air fryer and perfect for serving as an appetizer at parties, family gatherings, or game nights.
Print Recipe Pin Recipe
Prep Time 10 minutes mins
Cook Time 12 minutes mins
Total Time 22 minutes mins
Course Appetizer, Snack
Cuisine Latin American
Servings 12 porciones

Equipment

  • 1 Medium mixing bowl
  • 1 Spoon or spatula
  • 1 Cutting board and knife
  • 1 Air fryer

Ingredients
  

  • 6 jalapeño peppers
  • 8 ounces cream cheese
  • ¼ cup grated Parmesan cheese
  • ½ teaspoon garlic powder
  • ½ teaspoon ground black pepper
  • ½ teaspoon salt
  • 12 slices bacon

Instructions
 

  • Place the cream cheese in a medium bowl and stir for about 2 minutes, or until smooth and creamy. If necessary, microwave it for 10 to 15 seconds to soften it.
  • Add the grated Parmesan cheese, garlic powder, black pepper, and salt.
  • Stir until all the ingredients are evenly combined and the filling is smooth and creamy.
  • Wash and dry the jalapeños. Cut them in half lengthwise and remove the seeds and membranes with a small spoon. Fill each half with the cream cheese mixture.
  • Wrap one strip of bacon around each stuffed jalapeño and tuck the end underneath to keep it in place.
  • Arrange the jalapeños in a single layer in the air fryer basket. Cook at 350°F (175°C) for 11 to 12 minutes, or until the bacon is fully cooked and crispy.
  • Let the jalapeños rest for a few minutes before serving, as the filling will be very hot.

Video

Notes

  • For an oven version, bake them at 375°F (190°C) for 18 to 20 minutes, or until the bacon is fully cooked.
  • Store leftovers in an airtight container in the refrigerator for up to 3 days.
  • Reheat them in the air fryer at 350°F (175°C) for 3 to 5 minutes.
  • For a milder version, substitute the jalapeños with mini sweet peppers.
  • Turkey bacon can be used, although it may not become as crispy as regular bacon.
  • Cooking times may vary slightly depending on the size of the peppers and the thickness of the bacon.
📍 For more delicious step-by-step recipes, visit www.thelatinspoon.com and The Latin Spoon YouTube channel.
Keyword Jalapeño poppers

Fish Ceviche with Mango and Passion Fruit

Jul 24, 2026 · Leave a Comment

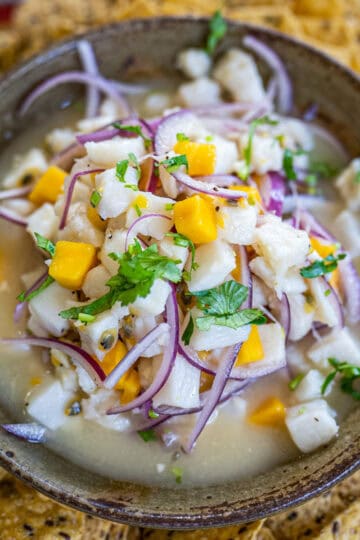
A ceramic bowl filled with tropical ceviche made with mango, red onion, passion fruit, and cilantro. Tortilla chips and lemon wedges are visible in the background.

This tropical ceviche is a fresh and colorful variation of traditional ceviche. In this recipe, we combine fresh fish with mango, passion fruit, and lime to create a delicious balance of tangy, sweet, and refreshing flavors.

If you have never tried ceviche with fruit, I truly recommend giving it a chance. This recipe has a very special flavor. My younger sister, Lisa, taught me how to make it, and it is a fresh and different ceviche with a delicate tropical touch that is definitely worth trying.

🎥Watch Video Here

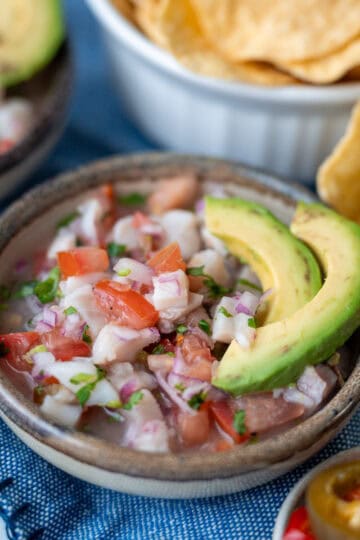
If you've never tried ceviche with fruit and would rather start with a more traditional version, I recommend my Tilapia Ceviche recipe. It's made with fresh fish, lime juice, red onion, cilantro, and tomatoes, giving you the classic flavors many people know and love. Once you've mastered the traditional version, come back and give this tropical twist a try!

Ingredients for Tropical Ceviche

Remember that many of the ingredients in this recipe can be adjusted to taste, especially the lime juice, salt, sugar, and amount of fruit. This is what I used to prepare mine.

🐟 Fish

I used both tilapia and sea bass, but you can use tilapia, sea bass, shrimp, cod or any available fresh fish available to you and your budget. The important thing is to cut the fish into evenly sized pieces so they cure at approximately the same rate in the lime juice.

🧄 Garlic

Finely chop the garlic before adding it to the ceviche. This ingredient is completely optional. I like it because it adds plenty of flavor, but you can leave it out if you do not enjoy raw garlic.

🍋 Lime juice

Key limes are traditionally used for ceviche because of their tart, intense flavor, but Persian limes work just as well and are often easier to find. I have also made this recipe with lemons, and although the flavor is slightly different, the ceviche is still absolutely delicious. Use whichever citrus is available where you live. The important thing is to add enough juice to completely cover the fish without using more than necessary.

🧅 Red onion

I like to use thinly sliced red onion for this recipe. In addition to adding delicious flavor, it gives the ceviche a beautiful color.

🥭 Mango

For this recipe, use a mango that is starting to ripen but is still firm—not completely green or fully ripe. At this stage, it adds flavor and freshness while holding its shape nicely in the ceviche.

🟠 Passion fruit

You can add the passion fruit pulp with the seeds or strain it and use only the juice. Both options give the ceviche a delicious tropical flavor. I love to add the seeds because they add an extra crunchiness to the ceviche.

🥤 Sprite or another clear lemon-lime soda

A small amount of soda adds a touch of sweetness and helps balance the acidity of the lime juice. It is best to use a clear soda so it does not alter the color of the ceviche.

An overhead photo showing the ingredients: fish in a small bowl, Sprite in a measuring cup, one red onion, one mango, three passion fruits, four limes, black pepper in a small bowl, three garlic cloves, sugar, and salt.

💡 Extra Tips for Delicious Tropical Ceviche

  • Place the sliced red onion in ice water. This helps it stay crisp and softens its sharp raw flavor.
  • Drain the onion thoroughly before adding it to the ceviche so it does not introduce excess water into the mixture.
  • After adding the lime juice, allow the fish to rest for 10 to 15 minutes or until the outside begins to turn opaque.
  • When removing the passion fruit pulp, avoid scraping the white part of the rind because it can add a slightly bitter flavor.
  • Refrigerate the ceviche before serving. This resting time allows the flavors to come together and creates a more balanced result.

How to Make Tropical Ceviche

This tropical ceviche comes together in just a few simple steps. Here's how to make it.

A cutting board with a bowl of ice water beside it. On the board, one hand cuts a red onion with a knife while the other holds the remaining half.

Step 1: Crisp the red onion

Thinly slice the red onion and immediately place it in a bowl of ice water.

On a cutting board, one hand holds strips of fish while the other cuts across them with a knife to form cubes. Beside the board are a bowl of sliced onions in ice water, several garlic cloves, and a bowl containing cubed fish.

Step 2: Cut the fish

Cut the fish lengthwise into strips and then into evenly sized cubes so the pieces cure at approximately the same rate so they cure evenly in the lime juice.

One hand squeezes a lime over a bowl containing fish and garlic. Several limes and a spatula are beside the bowl.

Step 3: Add the garlic, lime juice, and salt

Place the fish in a bowl and add the finely chopped garlic. Pour in enough lime juice to completely cover the fish, add one teaspoon of salt, and let it rest for about 15 minutes.

A bowl with a spatula inside. Above it, two hands hold a small bowl of diced mango. Surrounding the bowl are sliced red onion, salt, black pepper, passion fruit, and a measuring cup of Sprite.

Step 4: Prepare the mango

Peel the mango and cut it into cubes, thin strips, or your preferred shape. Add it to the ceviche.

A bowl containing cubed fish, sliced red onion, and diced mango. Above it, one hand holds a small bowl of passion fruit pulp and seeds ready to be added. A measuring cup of Sprite, salt, and sugar are beside the bowl.

Step 5: Add the red onion and passion fruit

Drain the red onion thoroughly before adding it to the bowl. Then add the passion fruit pulp or strained juice.

Un tazón con pescado, mango, cebolla y maracuyá; por encima, una tacita con azúcar mientras una cuchara medidora la incorpora. Al lado se ven pimienta, sal y Sprite en una taza de medida.

Step 6: Finish and refrigerate

Add the Sprite, sugar, salt, and black pepper to taste. Mix well, cover, and refrigerate the ceviche for 30 minutes before serving.

💡 Juicy Questions You May Have

What if I don't want to use mango or passion fruit?

No problem! This recipe is a tropical variation of ceviche that combines fresh fruit with the bright acidity of lime juice and the savory flavor of garlic. If you prefer a more traditional version without fruit, be sure to check out my Tilapia Ceviche recipe. It is made with tomatoes and classic ceviche ingredients while still being fresh, flavorful, and easy to prepare.

Is this tropical ceviche too sweet?

No. Although it contains mango, passion fruit, a little sugar, and lemon-lime soda, it is not meant to taste like a sweet dish. The goal is to create a pleasant balance between the acidity of the lime and passion fruit and the natural sweetness of the mango.

Can I prepare it ahead of time?

Yes, but it is best to prepare it on the same day you plan to serve it. This helps the fish and fruit maintain their freshness and texture.

Are the passion fruit seeds very noticeable?

Not really. The passion fruit primarily adds a delicate tropical flavor. However, you can strain the pulp and use only the juice if you prefer the ceviche without seeds.

How long can I keep tropical ceviche in the refrigerator?

For the best flavor, freshness, and texture, I recommend enjoying it on the same day it is prepared. Keep it covered and refrigerated until serving, and avoid leaving it at room temperature for extended periods.

How can I serve it for a beautiful presentation?

Serve the ceviche in individual glasses, small appetizer cups, or a large serving dish. You can accompany it with saltine crackers, patacones, tortilla chips, or tostadas. This is one of those recipes that looks beautiful without requiring a complicated presentation.

🍴 A Different Ceviche Worth Trying

This tropical ceviche is one of those recipes that surprises you from the very first bite. It has the freshness of traditional ceviche, but the delicate mango and passion fruit flavors make it feel light, refreshing, and very special.

Another delicious way to enjoy it is in a ceviche caldosa, a popular Costa Rican way of serving ceviche. The ceviche is poured directly into a bag of chips or crunchy snacks and mixed together, creating a fresh, crunchy combination filled with flavor. And if you enjoy seafood as much as I do, be sure to check out my:

Tuna Salad Recipe using canned tuna. A super fast and delicious recipe.
Shimp and Rice or Arroz con pollo the Costa Rican way.

If you prepare this tropical ceviche, let me know how it turned out and who you shared it with. Also, tell me in the comments if there is another recipe you would like to see on the channel.

Besitos! (Kisses)

Mara

A ceramic bowl filled with tropical ceviche made with mango, red onion, passion fruit, and cilantro. Tortilla chips and lemon wedges are visible in the background.

Tropical Ceviche

This tropical ceviche is a fresh and colorful variation of traditional ceviche. It combines fresh fish with mango, passion fruit, and lime to create a delicious balance of tangy, sweet, and refreshing flavors.
Print Recipe Pin Recipe
Prep Time 15 minutes mins
Cook Time 15 minutes mins
Cooling Time 30 minutes mins
Total Time 1 hour hr
Course Appetizer
Cuisine Latin American
Servings 8 people

Equipment

  • Cutting board and knife
  • bowls
  • measuring spoons and cups

Ingredients
  

  • 2.2 pounds white fish
  • ½ red onion
  • 2-3 garlic cloves
  • 10-12 limes
  • 1 teaspoon salt
  • 2 teaspoons granulated sugar
  • 2-3 passion fruit
  • 1 mango
  • 12 ounces lemon-lime soda
  • 1 teaspoon black pepper

Instructions
 

  • Finely slice the red onion and place it in a bowl of ice water while you prepare the remaining ingredients. This helps mellow its sharp flavor and keeps it crisp.
  • Cut the fish into evenly sized cubes so it cures evenly. Transfer it to a large bowl.
  • Add the minced garlic, enough lime juice to completely cover the fish, and the salt. Stir well, then let it rest for 10 to 15 minutes, or until the fish turns opaque.
  • Peel the mango and cut it into cubes, strips, or any shape you like. Add it to the bowl along with the drained red onion and the passion fruit pulp.
  • Pour in the Sprite or another clear soda, then add the sugar. Season with salt and black pepper to taste, and gently stir until everything is evenly combined.
  • Cover the ceviche and refrigerate for at least 30 minutes before serving so the flavors have time to blend. Serve chilled with tortilla chips, crackers, or enjoy it Costa Rican-style in a caldosa.

Video

Notes

  • Cut the fish into evenly sized cubes so it cures evenly in the lime juice.
  • Use only enough lime juice to completely cover the fish. Adding too much can overpower the other flavors.
  • Fresh passion fruit adds the best flavor, but frozen passion fruit pulp can also be used if fresh is unavailable. 
  • The mango should be ripe but still firm so it holds its shape when mixed into the ceviche. 
  • Taste the ceviche before refrigerating and adjust the salt, sugar, or black pepper if needed.  
  • For the best flavor, refrigerate the ceviche for at least 30 minutes before serving.
 
✨ If you enjoy recipes like this one, visit thelatinspoon.com or the The Latin Spoon YouTube channel to discover many more.


Keyword Tropical

Sweet and Spicy Glazed Chicken Breasts

Jul 17, 2026 · Leave a Comment

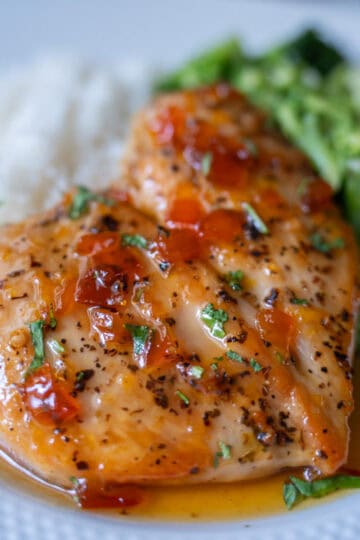
A white plate with rice served in the background, broccoli on the right, and jam-glazed chicken in the center. The jam and small pieces of cilantro can be seen on top of the chicken.

If you love the combination of sweet and spicy, this recipe is for you. Sweet fruit jam, habanero peppers, and juicy chicken come together to create a beautifully caramelized glaze that's packed with flavor. It is one of those recipes that looks impressive, but it comes together with just a handful of ingredients and very little effort.

A white plate with rice served in the background, broccoli on the right, and jam-glazed chicken in the center. The jam and small pieces of cilantro can be seen on top of the chicken.

Lately, I have been looking for ways to make cooking more practical without sacrificing flavor. Cooking quickly is one thing, but eating boring food is something completely different. That is why I love keeping versatile ingredients in my pantry, the kind you can use in different meals to turn something simple into something truly delicious.

One of those ingredients is fruit jam. It may sound a little unusual at first, but a good sweet and spicy jam can become an incredible glaze for chicken in just a few minutes. There is no need to make a sauce from scratch because the jam does all the work for you.

🎥Watch Video Here

For this recipe, I used Profanity Jam, a line of fruit jams made with habanero peppers. They have that beautiful balance of sweet, spicy, and savory flavors. Simply cook the chicken, add the jam to the pan, and it melts into a glossy, flavorful glaze that coats every piece beautifully.

Ingredients for Juicy and Flavorful Chicken

This recipe uses just a handful of simple ingredients. The star of the recipe is the fruit jam, which creates the sweet and spicy glaze. Feel free to use your favorite flavor, as any fruit jam will work beautifully in this recipe.

Ingredient photo for jam-glazed chicken with labeled ingredients for easy identification.

🍗 Chicken

For this recipe, you can use the part of the chicken you like best: chicken breast, thighs, boneless chicken, or bone-in chicken. I used large chicken breasts because they cook quickly and pair beautifully with the jam.

🧂 Salt, Pepper, Garlic, and Oregano

A simple seasoning blend that enhances the chicken without overpowering the sweet and spicy glaze. Fresh garlic adds plenty of flavor, while the oregano, salt, and pepper complement the jam instead of competing with it.

🌶️ Fruit Jam

Profanity Jam already has the perfect balance of sweet fruit and habanero peppers, making it ideal for this recipe. In the video, I used both the passion fruit and cherry flavors to show how different jams create slightly different glazes, but any flavor will work beautifully.

This recipe is part of a paid partnership with Profanity Jam. I chose to work with them because their jams are made with 100% natural ingredients and contain no preservatives or artificial flavors.

🍚 Rice & 🥦 Broccoli

I served this jam-glazed chicken with white rice and broccoli. The rice is perfect for soaking up the sweet and spicy glaze, while the broccoli adds a fresh, simple side. Feel free to swap them for brown rice, quinoa, potatoes, or your favorite vegetables or salad.

Un plato cuadrado negro, con una porcion de arroz blanco con dos pedazos de pollo con mermelada de cereza, la mermelada tiene un color oscuro

💡Tips for Juicy Chicken with More Flavor

  • Heat the pan well before adding the chicken. This helps the chicken brown better and develop more flavor. At the beginning, try not to move it too much so it can form that delicious golden crust.
  • Add the jam right after flipping the chicken. With the heat, the jam loosens up and turns into a sweet, spicy, glossy sauce without needing to prepare anything separately.
  • Try different jam flavors. Each one can give the chicken a different touch, which is a very easy way to repeat the same recipe without it feeling the same.
  • Do not overcook the chicken, especially if you are using chicken breast, because it can dry out easily.
  • Use the sauce left in the pan. When serving, spoon a little extra over the chicken, rice, or vegetables because that is where so much flavor stays.

How to Make Jam Glazed Chicken

Follow each step calmly and you will see how simple this recipe really is.

A white cutting board with a chicken breast on top. The left hand holds a piece of chicken while the right hand trims the excess fat from the breast.

Step 1: Prepare the Chicken Breast.

Cut the chicken breasts into the size and thickness you prefer. Remove any skin, cartilage, or unwanted pieces from the chicken.

A transparent glass bowl containing small pieces of raw chicken. On top, you can see the oil and the spices used to marinate the chicken.

Step 2: Season the Chicken.

Add the oil, finely chopped fresh garlic, dried oregano, black pepper, and salt. Mix with a spoon or with your hands until everything is well distributed.

A transparent glass bowl containing the marinated chicken. A thin layer of plastic wrap is placed over the bowl to cover the chicken before refrigerating it.

Step 3: Let It Rest.

Place the chicken in a bowl and cover it with plastic wrap. Refrigerate for at least 30 minutes. This also helps prevent strong smells in the fridge.

A stainless steel skillet holding 3 pieces of chicken. A right hand is turning the chicken to cook it on the other side.

Step 4: Brown One Side.

Heat a pan over medium-high heat, around 6 or 7 if your stove has numbers. Once the pan is hot, add the chicken breasts and cook for 3 to 5 minutes, depending on the thickness of your chicken.

A stainless steel skillet in which three pieces of chicken are cooking. One of the pieces has been turned over, showing its golden-brown sear, while the other two pieces still appear raw.

Step 5: Flip and Continue Cooking.

Cooking the chicken over higher heat helps create a delicious golden crust on the surface. This adds flavor and gives the chicken a better texture.

A stainless steel skillet containing 3 pieces of chicken can be seen in the background. Closer to the camera, two hands are holding a jar of jam.

Step 6: Add the Jam.

As soon as you flip the chicken, add the Profanity Jam flavor of your choice.

Four pieces of chicken in a stainless steel skillet, cooking with pineaplle habanero jam, showing the jam’s bright, vibrant color.

Step 7: Cook the Second Side.

The jam will begin to melt and loosen with the heat. Cook for another 3 to 5 minutes, or until the chicken is golden on both sides and cooked through.

Four pieces of chicken in a stainless steel skillet, cooking with cherry jam, showing the jam’s bright, vibrant color.

Step 8: Thicken the Sauce.

Remove the chicken from the pan so it stays juicy and does not dry out. If the jam sauce is still too thin, continue cooking it for a little longer until it reaches the thickness you like.

💡Useful Questions Before Making This Recipe

Is habanero jam very spicy?

It has that little spicy kick from the habanero, but it is also balanced by the sweetness of the fruit. It does not taste like a sauce that is only spicy. It is sweet, fruity, flavorful, and slightly spicy. You can find the jams here.

What can I do if I do not have time to marinate the chicken?

You can cook it right away. Letting it rest helps the chicken absorb more flavor, but this recipe still works very well when you are in a hurry because the jam adds so much flavor at the end.

What should I do if the jam gets too thick?

Add a teaspoon of water to the pan and mix it with the jam to loosen it a little. This helps bring it back to a sauce-like texture so you can spoon it over the chicken, rice, or vegetables.

How long does this chicken last after cooking?

Once cooked, you can store this chicken in an airtight container in the refrigerator for 3 to 4 days. It is best to let it cool slightly and refrigerate it without leaving it at room temperature for too long.

Can I marinate the chicken with the jam from the beginning?

Yes, you can, but my recommendation is to add the jam mostly toward the end of the cooking process. Since it contains fruit and sweetness, it can burn more quickly in the pan or caramelize too much before the chicken is fully cooked.

✨ An Easy Dish That Feels Special

This recipe can be a quick lunch with rice and broccoli, or it can become the base for other delicious meals, like a sandwich, a bowl with vegetables, or a more complete dinner to share with friends without making things complicated.

I want to thank our sponsor, Profanity Jam, for helping me continue sharing easy, delicious recipes that truly work. If you try the jams, let me know which flavor was your favorite.

You can serve this chicken with:

Freshly cooked white rice
A Costa Rican heart of palm salad
And you can finish the meal with a delicious fig cake with condensed milk glaze.

Let me know in the comments if there is another recipe you would like to see on the channel.

Besitos!

Mara

Jam Glazed Chicken

This Habanero Jam Glazed Chicken is an easy, flavorful recipe made with juicy chicken, simple seasonings, and a sweet and spicy habanero fruit jam that turns into a glossy sauce right in the pan.
Print Recipe Pin Recipe
Prep Time 10 minutes mins
Cook Time 10 minutes mins
Cooling Time 30 minutes mins
Total Time 50 minutes mins
Course Main Course
Cuisine Fusion
Servings 8 people

Equipment

  • Cutting board and knife
  • Mixing bowl
  • Measuring cups and spoons
  • Stainless steel skillet or frying pan
  • spatula

Ingredients
  

  • 2 Chicken breasts 30 oz
  • 2 tablespoons oil
  • 1 teaspoon finely chopped fresh garlic
  • ½ teaspoon black pepper
  • ½ teaspoon oregano
  • 1½ teaspoon of salt
  • 4 tablespoons Profanity Jam

Instructions
 

  • Cut the chicken breasts into the size and thickness you prefer. Remove any excess fat, skin, cartilage, or unwanted pieces.
  • Place the chicken in a bowl and add the oil, finely chopped fresh garlic, oregano, black pepper, and salt. Mix well until the chicken is evenly coated with the oil and seasonings.
  • Cover the bowl with plastic wrap and refrigerate for at least 30 minutes.
  • Heat a stainless steel skillet or frying pan over medium-high heat. Once the pan is hot, add the chicken pieces and cook for 3 to 5 minutes on the first side, depending on the thickness of the chicken.
  • Flip the chicken and add the Profanity Jam to the pan. Any fruit will taste delicious with the chicken. Continue cooking for another 3 to 5 minutes, or until the chicken is golden on both sides and fully cooked.
  • Remove the chicken from the pan. If the jam sauce is still too thin, let it cook for a little longer until it thickens.
  • Serve the chicken with the jam sauce on top, accompanied by rice, broccoli, or your favorite side dish.

Video

Notes

  • You can use chicken breast, thighs, or drumsticks, bone-in or boneless. Adjust the cooking time depending on the thickness of the chicken pieces.
  • The 30 minute resting time helps the chicken absorb the flavors of the marinade better, but if you are short on time, you can cook it right away.
  • Add the jam after flipping the chicken. This helps prevent the fruit sugars from burning during cooking.
  • If the sauce becomes too thick, add a teaspoon of water and mix until you reach the desired consistency.
  • Leftovers can be stored in an airtight container in the refrigerator for 3 to 4 days.
  • Use the sauce left in the pan to serve over the rice or vegetables, because it holds a lot of the flavor from the recipe.
 
Get your jams at www.profanityjam.com and find more recipes at www.thelatinspoon.com 
 
Keyword Tropical

Creamy Corn Dip Recipe

Jul 10, 2026 · Leave a Comment

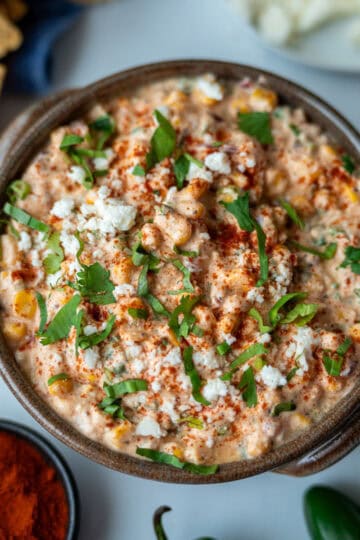
A deep bowl filled with corn dip, decorated on top with paprika, chopped cilantro, and cheese. The photo is taken from above; toasted tortilla chips and a small bowl of paprika can be seen on the side.

Some recipes are created because you're craving something delicious. Others are inspired by someone you love. This creamy corn dip is a little bit of both.

A deep bowl of corn dip, topped with paprika, chopped cilantro, and cheese. The photo is taken from above, with toasted tortilla chips and a small bowl of paprika on the side.

As I'm writing this recipe, we're right in the middle of World Cup season. One day, my nephew Gabriel was craving something made with corn that we could snack on while watching the game. He wanted something creamy, easy to scoop with tortilla chips, and perfect for sharing.

That little craving inspired this creamy corn dip. Sweet corn, queso fresco, jalapeño, lime, and a creamy base come together to make a dip that's fresh, flavorful, and hard to stop eating. The best part? If you're using canned corn, there's no cooking involved.

Whether you're hosting friends for game day, having a family movie night, or simply looking for an easy appetizer to share, this dip comes together in just a few minutes and is always a crowd favorite.

Watch Video Here

The best part is that you probably already have most of the ingredients in your kitchen. And if you're missing one or two, they're easy to find and well worth it. Once you try this dip, you'll probably find yourself making it again and again.

Photo taken from above with the ingredients for preparing the dip: a cup of sweet corn, a whole red onion, a whole lemon, a bunch of cilantro and culantro, a small bowl of mayonnaise, another one with sour cream, paprika, sugar, black pepper, salt, mustard, a small plate with round fresh cheese, and a jalapeño pepper.

Ingredients for This Corn Dip

🌽 Yellow corn

For this recipe, I used canned yellow corn because it is practical, tastes good, and does not need to be cooked. But if you prefer to use fresh corn, you can absolutely do that. Just cook it first, let it cool, and then add it to the mixture.

🧅 Red onion

Red onion adds color, freshness, and great flavor. In this recipe, we mix it first with a little lime juice to soften the strong flavor of raw onion. Try to chop it into small, even pieces so it blends better throughout the dip and you do not get large pieces in each bite.

🌿 Cilantro and culantro

I like using both because they add a fresh, vibrant flavor to the dip. I usually chop them together, but you can use whichever one you have on hand, or adjust the amount to your taste.

🌶️ Jalapeño

This ingredient is completely optional, but it gives the dip a really nice flavor. The amount will depend on how spicy the jalapeño is and how much heat you enjoy. If you want it milder, remove the seeds and veins before chopping it.

🍋 Lime juice

We use just a little bit to soften the onion and add freshness to the dip. If you add too much, the mixture may become too loose, so it is better to start with a small amount and adjust to your taste.

🥄 Mayonnaise and sour cream

These two ingredients create the creamy base of the dip. In Costa Rica, we often use natilla, which is a type of cultured cream, but sour cream works beautifully here. The mayonnaise adds flavor, while the sour cream keeps the dip fresh, smooth, and creamy.

💛 Mustard

This adds a very nice touch of flavor and helps balance the creaminess of the mayonnaise and sour cream. It does not taste strong, but it gives the dip a delicious little something.

🧀 Cheese

I like using queso fresco in this recipe. If you do not have it, you can also use cotija, cheddar, or another cheese you already have at home.

⚫ Paprika, black pepper, sugar and salt

Paprika gives the dip a beautiful color and a mild flavor, while black pepper helps bring all the ingredients to life. A little sugar enhances the natural sweetness of the corn and balances the acidity from the lime. Add the salt at the very end, after mixing everything together, since the cheese may already add enough saltiness to the dip. Taste and adjust as needed.

A deep bowl of corn dip, topped with paprika, chopped cilantro, and cheese. The photo is taken from above; on the side, there are toasted tortilla chips, a small bowl of paprika, and whole jalapeño peppers, while a hand holds a chip with dip.

💡Details That Make a Difference

  • For the best texture, try to chop the fresh ingredients very finely. This helps them blend better with the creamy base and allows the flavor to be distributed more evenly in every bite.
  • With the jalapeño, remember that the seeds and veins are usually the spiciest parts. If you want a milder flavor, remove them with a spoon before chopping.
  • When you mix the onion with the lime juice, let it rest for a few minutes while you prepare the cheese or the rest of the ingredients. That little resting time helps soften the onion.
  • Add the salt at the end, after mixing all the ingredients, because the cheese can change how salty the dip tastes. Start with a small amount, taste, and adjust as needed.
  • You can serve this dip right away, but refrigerating it for at least 2 hours before serving gives it a better texture and allows the flavors to come together. Plus, it tastes even more delicious when it is nice and cold.
  • If you are preparing it ahead of time, cover it well before placing it in the refrigerator. This helps preserve the flavor and prevents it from absorbing other food odors.
  • If you have leftover chopped onion, cilantro, culantro, or jalapeño, store them in small covered containers in the refrigerator. That way, they will not leave strong flavors or smells in the fridge, and they will already be ready for another recipe.

How to Make This Corn Dip

This recipe is very simple and does not require any cooking if you use canned corn. The idea is to prepare the fresh ingredients first, mix them with the creamy base, and then let the dip chill well before serving.

A cutting board with a red onion being sliced. One hand is holding the onion while the other holds the knife. Around it, there is a small bowl of sweet corn, a bunch of cilantro, and a lemon.

Step 1: Chop the onion.

Start by chopping the red onion into small pieces. Then add it to the bowl where you will mix all the dip ingredients.

Una tabla de picar con culantro siendo cortado. Una mano sostiene el culantro y la otra sostiene el cuchillo. Alrededor se ve una tacita con maíz dulce, una cebolla morada y un limón.

Step 2: Chop the cilantro and culantro

Finely chop the cilantro and culantro. Add them to the bowl with the onion.

A cutting board with a knife on the side. On the board, there is a jalapeño diced into small cubes, and next to it there is a cup of sweet corn and a lemon.

Step 3: Prepare the jalapeño.

Cut the jalapeño in half and remove the seeds and veins with a spoon. Then cut it into thin strips and chop it into small cubes. Add it to the bowl.

A bowl with red onion, culantro, and cilantro. Above it, two hands can be seen: one holding a measuring cup and the other squeezing half a lemon to add the juice into the cup. Next to the bowl, there are sweet corn, cheese, and seasonings in small bowls.

Step 4: Add the lime juice

Add the lime juice to the bowl and mix it with the onion, cilantro, culantro, and jalapeño. Let it rest for a few minutes while you continue with the rest of the recipe.

A bowl with red onion, culantro, cilantro, jalapeño pepper, sour cream, mayonnaise, and mustard, with a spatula inside. Next to the bowl, there is sweet corn in a cup, paprika, and salt.

Step 5: Add the mayonnaise, sour cream, and mustard.

Mix well so they combine with the fresh ingredients and begin forming the creamy base of the dip.

A bowl with the dip mixture and paprika sprinkled on top. One hand is holding a small bowl of black pepper, while the other hand holds a measuring spoon with black pepper. Next to the bowl, there is a small bowl of sweet corn.

Step 6: Season the mixture.

Add the paprika, black pepper, and sugar, if using. Mix well until the dip looks creamy and has a beautiful color.

A bowl with the dip mixture and corn on top. Above the bowl, two hands are holding a cup of fresh cheese. On the side, there are small bowls of salt and black pepper.

Step 7: Add the corn, cheese, and adjust

Add the well-drained yellow corn and the cheese. Mix until everything is fully combined. Taste the dip before refrigerating it and adjust the salt little by little. You can start with ½ teaspoon and add more if needed.

A bowl of corn dip with a hand on top adding paprika to add color. Jalapeños and tortilla chips are shown in the background

Step 8: Refrigerate, decorate, and serve

Transfer the dip to the serving dish. Cover it with plastic wrap and refrigerate for at least 2 hours. Before serving, remove the plastic wrap, smooth the surface, and decorate with paprika, cheese, and cilantro or culantro.

Questions Before Making This Corn Dip

What can I serve with this corn dip?

You can serve it with tortilla chips, corn chips, crackers, tostadas, or fresh vegetables cut into sticks. It is also delicious as a side for grilled meats, chicken, tacos, or a snack board.

Can I make this dip ahead of time?

You can prepare it the same day, ideally 2 to 4 hours before serving, so it has time to chill and the flavors can come together. You can also make it the day before. Just keep it well covered in the refrigerator and decorate it right before serving.

How long does it last in the refrigerator?

You can keep it refrigerated in a well-covered container for about 2 to 3 days. If it releases a little liquid, simply stir it before serving.

Why did my dip turn out too runny?

This can happen if you add too much lime juice or if the sour cream you used is very light. To give it more body, you can add a little more corn or cheese.

🍽️ A Dip Everyone Will Love

This dip was born from wanting to make something special for someone I love very much, and it ended up becoming one of those recipes I always want to make again. It is easy, creamy, full of flavor, and perfect for sharing with family and friends.

And if you want to put together a delicious snack table, you can also serve it with:

Heart of palm
Tuna salad
Tilapia ceviche

Let me know in the comments if you also enjoy these esquites-inspired flavors, or if there is another recipe you would like to see on the channel.

Besitos!

Mara

A deep bowl filled with corn dip, decorated on top with paprika, chopped cilantro, and cheese. The photo is taken from above; toasted tortilla chips and a small bowl of paprika can be seen on the side.

Corn Dip

This creamy corn dip is made with sweet corn, queso fresco, sour cream, mayonnaise, jalapeño, and lime. It's an easy no-cook appetizer that's perfect for game day, parties, movie nights, or anytime you need a delicious dip to share.
Print Recipe Pin Recipe
Prep Time 20 minutes mins
Cooling Time 2 hours hrs
Total Time 2 hours hrs 20 minutes mins
Course Dip, Snacks
Cuisine latina
Servings 4 people

Equipment

  • Cutting board and knife
  • Mixing bowl and Spatula
  • Plastic wrap

Ingredients
  

Ingredients for the Corn Dip

  • ¼ cup finely diced red onion
  • ¼ cup finely chopped cilantro and culantro
  • ½ jalapeño seeded and finely diced (optional)
  • ⅛ cup fresh lime juice (2 tablespoons)
  • ½ cup mayonnaise
  • ½ cup sour cream
  • 1 tablespoon yellow mustard
  • 1 teaspoon paprika
  • ¼ teaspoon black pepper
  • 1 teaspoon granulated sugar optional
  • 1 can sweet corn drained (15 oz / 425 g)
  • 1 cup crumbled queso fresco
  • ½ teaspoon salt or to taste

For Garnish (optional)

  • Paprika
  • Crumbled queso fresco
  • Chopped cilantro or culantro

Instructions
 

  • Chop the red onion, culantro, cilantro, and jalapeño pepper finely. If you prefer a milder dip, remove the seeds from the jalapeño before chopping. Place all ingredients in a mixing bowl.
  • Add the freshly squeezed lemon juice, sugar, mayonnaise, sour cream, and mustard. Mix well until everything is creamy and evenly combined.
  • Add the drained sweet corn and crumbled queso fresco. Mix gently with a spatula until the corn and cheese are well distributed throughout the dip.
  • Season with salt, black pepper, and paprika. Mix again and taste. Adjust the salt, lemon juice, or paprika if needed.
  • Cover the bowl with plastic wrap and refrigerate for at least 30 minutes before serving. This helps the flavors come together and makes the dip taste fresher.
  • Before serving, transfer the dip to a serving bowl and decorate with extra paprika, chopped cilantro, and more crumbled queso fresco on top.
  • Serve chilled with tortilla chips, crackers, pita chips, or fresh vegetables.

Video

Notes

  • You can use canned yellow corn or cooked fresh corn. If using fresh corn, cook it and let it cool completely before mixing it into the dip.
  • The jalapeño is optional. For a milder flavor, remove the seeds and veins before chopping it.
  • Add the lemon juice little by little to prevent the dip from becoming too runny.
  • Add the salt at the end, because the cheese may already add some saltiness.
  • Refrigerate the dip for at least 2 hours before serving for the best flavor and texture.
 
📍 For more delicious recipes, visit the blog www.thelatinspoon. com and the The Latin Spoon YouTube channel.
Keyword Appetizer

Homemade Chicken Broth That Lasts for Months

Jul 1, 2026 · Leave a Comment

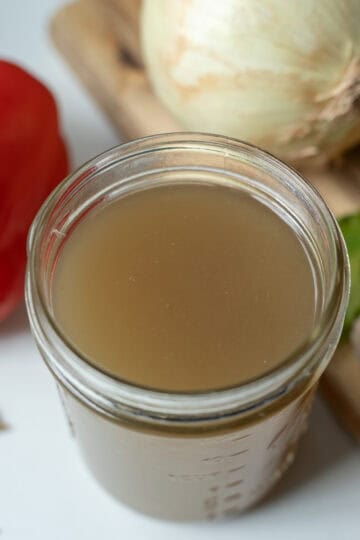
Jar of homemade chicken broth surrounded by carrots, celery, onions, garlic, bay leaves, and bell peppers.

Making a big batch of homemade chicken broth is one of my favorite ways to stock my freezer. I can control the amount of sodium that goes into my food, and I end up with a rich, flavorful broth that makes soups, stews, rice, sauces, and so many other recipes taste so much better. It does take a few hours to make, but the flavor and convenience are well worth the effort.

Jar of homemade chicken broth surrounded by carrots, celery, onions, garlic, bay leaves, and bell peppers.

Another good reason to make chicken broth, or at least the way I make it, is that buying whole chickens is almost always cheaper than buying boneless chicken. Whenever I find whole chickens on sale, I buy several and keep them in the freezer. Then, whenever I'm ready to make another batch of chicken broth, I simply thaw them and get cooking.

This also allows me to use every part of the chicken. The bones create a rich, flavorful broth, while the meat becomes the base for other meals like shredded chicken, arroz con pollo (Costa Rican-style chicken and rice), or chicken soup. Nothing goes to waste, and I end up with homemade broth plus several ready-to-use meals.

At the moment, I don't have any of those recipes available on the blog or YouTube channel. I do have my Chicken Stew recipe, which also uses homemade chicken broth. If you'd like to see recipes like shredded chicken, arroz con pollo, or chicken soup, let me know in the comments!

🎥Watch Video Here

Why I Make Chicken Broth in Bulk

Other than the reasons I mentioned above, why do I make such a big batch of chicken broth? Simply because, while the process is easy, it does take time. Instead of making a small batch every month, I make a double batch using 4 whole chickens, which lasts me for months.

In the video, you'll see me using 4 whole chickens. For the printable recipe below, I cut everything in half to make it more practical for everyday cooking. The process is exactly the same, just on a smaller scale.

If you're planning to can your chicken broth instead of freezing it, making a large batch makes even more sense. Since the process takes time from start to finish, it's more efficient to prepare, strain, and preserve a larger quantity all at once.

What You'll Need to Make a Big Batch of Chicken Broth

The ingredients below are the ones I used for this recipe, but whenever I'm making a big batch of chicken broth, I like to check my refrigerator first and see if I have vegetables that need to be used soon. This is a great way to reduce food waste while adding even more flavor to the broth.

You could also use vegetables like zucchini, cabbage, tomatoes, leeks, mushrooms, cauliflower, or even corn cobs.

🐔 Whole Chickens

I like using whole chickens because they're usually much cheaper than buying boneless chicken. Plus, I get both the meat and the bones. If you have the carcasses from rotisserie chickens, don't throw them away! Freeze them in a bag, and once you have 4 to 6 carcasses, use them to make homemade chicken broth. Those bones still have plenty of flavor left in them.

💧 Water

Water is one of the most important ingredients in this recipe. The less water you use, the more concentrated and flavorful your chicken broth will be. The more water you add, the larger the yield, but the flavor will be milder. I also recommend keeping the broth at a gentle simmer instead of a rolling boil. Boiling causes more evaporation, which reduces the amount of broth you'll end up with.

🥕 Vegetables

For the vegetables, I'm using carrots, celery, onions, bell peppers, cilantro, culantro, and garlic. Together they create a rich, well-balanced broth with lots of flavor. Feel free to adjust the vegetables based on what you have on hand, but I recommend keeping the carrots, celery, and onions since they are the foundation of a good chicken broth.

🌿 Herbs & Seasonings

For the herbs and seasonings, I'm using oregano, black pepper, bay leaves, cumin seeds, thyme, basil, and rosemary. Feel free to adjust them to your taste or use whatever herbs you have available. One thing you'll notice is that I don't add any salt. Since I don't know what recipes I'll be using this broth for later, I prefer to leave it unsalted and season each dish individually. That way, I have complete control over the final flavor.

💡Tips for the Best Homemade Chicken Broth

  • Keep the broth at a gentle simmer to extract plenty of flavor without causing excessive evaporation, since a rolling boil will reduce the amount of broth you end up with.
  • I purposely don't add salt to my chicken broth because I don't know what recipe I'll be using it for later, which gives me complete control over the seasoning of each dish.
  • During the first hour of cooking, skim off the foam and excess fat that rises to the surface, then check it again as the bones continue cooking since more fat may appear before straining the broth.
  • After removing the larger pieces of chicken, go back and clean the bones once they've cooled, you'll be surprised how much meat is still attached, and it's perfect for soups, chicken salad, shredded chicken, or arroz con pollo.
  • A regular strainer removes the vegetables and bones, while a second pass through cheesecloth removes the fine sediment, resulting in a much cleaner, clearer broth.
  • Don't pour the chicken fat down the drain; let it cool, pour it into a disposable container or bag, and throw it in the trash to help prevent clogged drains.
  • Making a big batch of chicken broth? Save yourself the headache of using a cheesecloth and use a fat separator instead. It's much faster and makes the whole process a lot easier.

How to Make Homemade Chicken Broth

The instructions below are for a batch made with 2 whole chickens. If you decide to double the recipe, the cooking times may need to be extended since a larger pot takes longer to come up to temperature and extract all the flavor from the chicken and bones.

Step 1: Prepare the Chicken.

Debone the chickens and remove the skin if you prefer a leaner broth. I also like to trim off any excess fat and remove the tail before adding the chicken to the pot. Don't throw away the bones—they are one of the main ingredients that give homemade chicken broth its rich flavor.

Step 2: Prepare the Vegetables.

Wash and roughly chop the carrots, celery, onions, bell peppers, cilantro, culantro, and garlic. Since everything will be simmering for a long time, the size of the vegetables isn't important. They'll release their flavor into the broth and will be discarded at the end of the cooking process.

Step 3: Add the Water and Seasonings.

Use enough water to completely cover the chicken. Stir everything together and bring it to a gentle simmer. If you're making a large batch like I did, it may take about 30 minutes for the pot to come up to temperature. Avoid a rolling boil, as too much evaporation will reduce the amount of broth you end up with.

Step 4: Remove the Foam and Fat.

After about an hour of cooking, let the broth sit for a minute so the foam and fat can rise to the surface. Using a spoon, carefully skim off as much of the foam and excess fat as possible. This helps produce a cleaner, clearer broth with a better flavor. Continue simmering the broth gently after skimming.

Step 5: Remove the Chicken and Separate the Meat.

After about 1 hour of cooking, remove the chicken from the broth and let it cool just enough to handle. Separate the meat from the bones using your hands, or use a fork if it's still too hot. Set the meat aside for other recipes.

Step 6: Return the Bones to the Broth.

Once you've removed as much meat as possible, return the bones to the pot. Stir everything well and continue simmering for about another hour to extract as much flavor as possible from the bones. As the broth continues to cook, more fat may rise to the surface. Skim it off as needed to keep the broth clean and clear.

Step 7: Add the Fresh Herbs.

Now it's time to add the cilantro and culantro. If you notice that some of the dried herbs were removed while skimming the foam and fat, feel free to adjust the seasonings by adding a little more oregano, thyme, or any of the herbs you used earlier. Continue cooking over a gentle simmer.

Step 8: Strain the Broth.

Remove all of the bones from the pot. Then, using a large strainer or colander, separate the broth from the vegetables. Once the vegetables are cool enough to handle, gently squeeze them to extract as much liquid as possible before discarding them. They've already released most of their flavor into the broth, but this extra step helps you get every last bit of it.

Step 9: Strain Through a Cheesecloth (Optional)

For an even cleaner broth, strain it one more time through a cheesecloth. This removes the fine sediment—tiny particles of cooked meat, vegetables, herbs, and proteins that naturally settle to the bottom of the broth during cooking. This step is completely optional, but it produces a clearer, cleaner-looking broth.

Step 10: Store the Chicken Broth.

Let the broth cool completely before storing it. I like to freeze mine in freezer bags because it's easy to stack and saves space, but this chicken broth is also perfect for pressure canning if you prefer to preserve it that way. Store it using your preferred preservation method so it's ready whenever you need it.

🫙 Your Questions About Chicken Broth

Can I pressure can this chicken broth?

Yes! This chicken broth is perfect for pressure canning. In my case, I prefer freezing it because it's what works best for my family, but pressure canning is an excellent option if you have the proper equipment and follow tested pressure canning guidelines for low-acid foods like chicken broth.

Can I make chicken broth with rotisserie chicken bones?

Absolutely! Rotisserie chicken carcasses still have plenty of flavor left in the bones. Instead of throwing them away, freeze them until you have several saved up, then use them to make a delicious batch of homemade chicken broth. You can even add fresh vegetables and herbs just like in this recipe to build even more flavor.

Can I reuse the chicken meat after making the broth?

Yes! That's one of my favorite parts of making homemade chicken broth. After removing the larger pieces of meat, I even go back and clean the bones because there's usually quite a bit of chicken left. I use it to make shredded chicken, chicken soup, arroz con pollo, or any recipe that calls for cooked chicken.

Can I add other vegetables to my chicken broth?

Definitely. Besides the vegetables in this recipe, you can also use ingredients like zucchini, cabbage, tomatoes, leeks, mushrooms, cauliflower, or even corn cobs. Making chicken broth is a great way to use vegetables that have been sitting in your refrigerator for a while and reduce food waste while adding extra flavor.

Why do I need to skim the foam and fat?

Skimming the foam helps produce a cleaner, better-tasting broth. During cooking, proteins and impurities rise to the surface and form the foam you see on top. Removing it prevents those impurities from staying in the broth. I also remove most of the excess fat, although that's simply a personal preference since some people prefer leaving more fat in their broth.

🍽️One Batch, Months of Flavor

Homemade chicken broth takes time to make, but the payoff is well worth the effort. Not only will you have a freezer full of flavorful broth ready for your favorite recipes, but you'll also have plenty of cooked chicken to prepare additional meals throughout the week.

Learn how to make Gallina achiotada o Chicken stew here.

If you make this recipe, I'd love to hear how you use your homemade chicken broth. Leave a comment below and let me know your favorite recipes, or share any vegetables and herbs you like adding to your broth.

Besitos (Kisses)
Mara

Jar of homemade chicken broth surrounded by carrots, celery, onions, garlic, bay leaves, and bell peppers.

Homemade Chicken Broth

Stop buying store-bought broth! This homemade chicken broth is packed with flavor, made with simple ingredients, freezes beautifully, and gives you plenty of cooked chicken to use in other meals.
Print Recipe Pin Recipe
Prep Time 30 minutes mins
Cook Time 2 hours hrs
Heating the pot 30 minutes mins
Total Time 3 hours hrs
Course Basic
Cuisine Latin American
Servings 8 pints

Equipment

  • Large Stockpot (12- to 16-quart)
  • Kitchen Scissors and knife
  • Large Colander or Strainer
  • Cheesecloth (optional)
  • Freezer Bags or Vacuum Sealer (for storage)

Ingredients
  

  • 2 whole chickens
  • 3 celery stalks
  • 2 medium carrots
  • 2 onions
  • 2 bell peppers
  • 5 garlic cloves
  • 14 cups water
  • 1 teaspoon oregano
  • 1 teaspoon black pepper
  • 5 bay leaves
  • 1 teaspoon cumin seeds
  • 1 teaspoon thyme
  • 1 teaspoon basil
  • 1 teaspoon rosemary
  • 1 bunch cilantro
  • 1 bunch culantro

Instructions
 

  • Debone the chickens, remove the skin if desired, trim any excess fat, and place the chicken and bones in a large stockpot.
  • Wash and roughly chop the carrots, celery, onions, bell peppers, cilantro, culantro, and garlic. Add them to the pot.
  • Add the water, oregano, black pepper, bay leaves, cumin seeds, thyme, basil, and rosemary. Stir, bring to a gentle simmer, and cook for about 1 hour.
  • Skim off the foam and excess fat that rises to the surface during cooking.
  • Remove the chicken from the broth and let it cool slightly. Separate the meat from the bones and set the meat aside for other recipes. Return the bones to the pot and continue simmering for about 1 more hour, skimming any additional fat as needed.
  • Add the cilantro and culantro. If desired, adjust the herbs that may have been removed while skimming the broth.
  • Remove the bones and strain the broth through a large colander. Once the vegetables are cool enough to handle, squeeze them to extract as much liquid as possible before discarding them.
  • For a clearer broth, strain it one more time through a cheesecloth (optional).
  • Let the broth cool completely, then freeze or pressure can using your preferred preservation method.

Video

Notes

  • I purposely don't add salt to my chicken broth because I don't know what recipe I'll be using it for later. This gives me complete control over the seasoning of each dish.
  • Keep the broth at a gentle simmer instead of a rolling boil. Boiling causes more evaporation, reducing the amount of broth you'll end up with.
  • If you double the recipe, the cooking time may need to be extended since a larger pot takes longer to come up to temperature and extract all the flavor from the chicken and bones.
  • Freeze the broth in portions that fit the way you cook, or preserve it using a pressure canner if you prefer shelf-stable storage.
  • Don't throw away the cooked chicken! Use it to make shredded chicken, chicken soup, arroz con pollo, or any recipe that calls for cooked chicken.
👩‍🍳For more delicious Latin recipes, visit www.thelatinspoon.com.
Keyword Broth Recipe

Homemade Lizano Sauce

Jun 20, 2026 · Leave a Comment

Una botella de vidrio con salsa Lizano casera sobre A wooden cutting board next to an onion, a carrot, and a bell pepper, with a plate of gallo pinto in the background.

Living in the United States and missing the flavors I grew up with, I had two choices: learn to live without them or learn how to recreate them at home. As you can probably guess, I chose the second option. This homemade Lizano-style sauce is one of those recipes that started as an experiment and ended up becoming a favorite.

A glass bottle filled with homemade Lizano-style sauce on a wooden board, next to an onion, a carrot, and a bell pepper, with a plate of gallo pinto in the background. A spoon is also shown displaying the sauce’s texture and consistency.

I can usually find Lizano Sauce at Latin American grocery stores, but it is not always available nearby. There were times when I had to drive quite a distance just to buy a bottle. Because I use it so often, I decided to start testing my own homemade version using ingredients that are easy to find in most U.S. grocery stores.

After several attempts, I found a combination that comes remarkably close to the flavor I remember. This homemade version is slightly less acidic than the store-bought sauce, and it gives you the option to adjust the salt, heat, acidity, and thickness to your preference.

The recipe takes some time to cook, but the process itself is simple. Most of the work is allowing the vegetables and seasonings to simmer slowly until the flavors become concentrated.

Watch Video Here

What Is Lizano Sauce?

Lizano Sauce is a Costa Rican vegetable-based condiment with a savory, slightly sweet, tangy, and gently spiced flavor. Its consistency is smooth and pourable, and although it is sometimes compared to Worcestershire sauce, it has its own distinctive taste.

The sauce was created in 1920 in Alajuela, Costa Rica, by Próspero Jiménez and Próspero Lizano. What began as a sauce prepared in a small local cantina eventually became one of the country’s most recognizable food products. More than a century later, its familiar green label can still be found in homes, restaurants, and grocery stores throughout Costa Rica.

For Costa Ricans, Lizano Sauce is much more than a table condiment. It is used while cooking and added to finished dishes, including gallo pinto, tamales, beans, rice, picadillos, eggs, meats, and soups. Its flavor has become so closely connected to Costa Rican food that a small amount can immediately make a dish taste familiar.

The exact commercial recipe is kept secret, but the sauce is known for its combination of vegetables, seasonings, sweetness, and acidity. That balance is what I tried to recreate in this homemade version.

The ingredients viewed from above: a cup of water, a small pitcher of vinegar, an onion, a bell pepper, cauliflower, a carrot, a cucumber, black pepper, molasses, oregano, mustard, garlic, salt, hot pepper, and cumin.

Ingredients for Homemade Lizano Sauce

You will need a combination of vegetables, spices, molasses, and vinegar. Each ingredient helps create the color, consistency, and distinctive flavor of the finished sauce.

🥦 Cauliflower, cucumber, and carrot

These vegetables form the base of the sauce and help give it body, a smooth consistency, and some natural sweetness.

I cut the carrot into smaller pieces because it takes longer to soften than the other vegetables.

You can leave the cucumber peel on or remove it, depending on the texture you prefer. The cauliflower helps thicken the sauce without leaving an overpowering flavor. These vegetables also provide fiber and create a good consistency without requiring an additional thickener.

🫑 Bell pepper, onion and garlic

The bell pepper and onion add flavor and depth to the vegetable base. You do not need to chop them finely because they will be cooked until tender and then blended.

You can use a red, green, or yellow bell pepper. Red bell peppers tend to be slightly sweeter, while green ones have a more pronounced flavor.

For the onion, I recommend using white or yellow. Red onion also works, although it may slightly affect the final color of the sauce.

I use fresh garlic because it provides a more noticeable flavor and cooks well with the vegetables.

🌶️ Chile powder

I use chipotle powder because it adds moderate heat and a light smoky flavor.

You can substitute jalapeño powder, cayenne pepper, or another ground dried chile. Begin with a small amount and adjust it according to your heat preference.

This sauce is meant to be gently spiced rather than extremely hot.

🌿 Celery seeds, cumin, and oregano

For this recipe, I use ground cumin and dried oregano. They help give the sauce a deeper and more developed flavor.

Celery seeds have a fairly concentrated taste, so use the amount indicated to prevent them from overpowering the other ingredients.

🟡 Mustard

I use prepared yellow mustard because it adds acidity and helps bring together the flavors of the spices, molasses, and vegetables.

Dijon mustard can also be used, but it has a stronger and sharper flavor that may slightly change the finished sauce.

🍯 Molasses

Molasses is one of the most important ingredients in this recipe. It gives the sauce its deep brown color and contributes some of its sweetness and richness.

I recommend using unsulphured molasses, which is the type commonly sold for cooking and baking in the United States.

I would not replace it entirely with white sugar because sugar does not provide the same color or depth of flavor. Dark brown sugar can work in a pinch, but the finished sauce will taste slightly different.

🍎 Apple cider vinegar

I like using apple cider vinegar because it adds enough acidity to balance the sweetness of the molasses and the flavor of the vegetables.

I prefer it because it tastes slightly milder than distilled white vinegar. You can use white vinegar instead, but add it gradually and taste the sauce before adding more.

A glass bottle of homemade Lizano sauce on a wooden board, next to an onion, a carrot, and a bell pepper, with a plate of gallo pinto in the background.

💡Tips for the Best Homemade Lizano Sauce

  • Wash all the vegetables carefully before cutting them, especially when leaving the peel on the cucumber.
  • Keep the first cooking stage at a gentle simmer. The bubbles should remain small so the vegetables soften without losing too much liquid through evaporation.
  • Allow the cooked vegetables to cool for a few minutes before blending. When blending a warm mixture, remove the center cap from the blender lid and cover the opening with a clean kitchen towel so steam can escape.
  • Begin blending at low speed and increase it gradually. This helps prevent pressure from building beneath the lid.
  • Use low heat during the second cooking stage. As the sauce becomes thicker, it can splatter if it boils too vigorously.
  • Check the pot every 5 to 10 minutes and stir along the bottom to keep the sauce from sticking.
  • Add the salt gradually. Allow the sauce to cook for a few minutes after each addition, and taste it again before adding more.
  • The sauce thickens as it cooks and may develop a little more body as it cools. Keep this in mind before reducing it too much.
  • For a smoother texture, blend the finished sauce for several minutes. You can also pass it through a fine-mesh strainer to remove any small pieces of vegetables.
  • Use clean bottles or jars and keep the finished sauce refrigerated.

How to Make Homemade Lizano Sauce

This recipe includes two cooking stages and two rounds of blending. The first cooking stage softens the vegetables, while the second concentrates the seasonings and brings the sauce to the desired consistency.

A pot with diced vegetables while a cup pours in water.

Step 1: Prepare the vegetables.

Wash the vegetables thoroughly, cut them into small pieces, and place them in a large pot. Add the water.

A pot with diced vegetables and water.

Step 2: Cook the vegetables.

Place the pot over medium heat. Once the water begins to simmer, reduce the heat.

Cook the vegetables for approximately 50-60 minutes, maintaining a gentle simmer.

A blender pitcher with the diced vegetables, next to a cauliflower and a pot.

Step 3: Blend the vegetables.

Remove the pot from the heat and let the mixture rest for 5 to 10 minutes.

Carefully transfer the vegetables and cooking liquid to a blender. Begin at low speed and blend for approximately 2 minutes.

A pot on the stovetop while the blender pitcher pours in the blended vegetable mixture.

Step 4: Return the mixture to the pot.

Carefully pour the blended vegetable mixture back into the pot.

A pot with the blended vegetable mixture and the seasonings on top, while a spatula adds molasses from a small cup.

Step 5: Add the seasonings.

Add the chile powder, celery seeds, cumin, oregano, mustard, molasses, and apple cider vinegar. Stir until everything is evenly combined.

Add the salt gradually, tasting between each addition until the seasoning is to your liking.

A pot on the stovetop with the liquid mixture inside and a cauliflower in the background.

Step 6: Cook over low heat.

Cook the sauce over low heat for approximately 1 hour.

Check it every 5 to 10 minutes and prevent it from boiling with large bubbles.

A pot pours the mixture into the blender jar; outside, a cauliflower, a bell pepper, and an onion can be seen.

Step 7: Blend the sauce again.

Remove the sauce from the heat and let it rest for approximately 10 minutes.

Blend it again for about 3 minutes or until it reaches a smooth and even consistency.

One hand holds a container with a funnel on top, while the other pours the sauce using a spoon. In the background, there is a blender pitcher, a cauliflower, and an empty container beside it.

Step 8: Bottle the sauce.

Using a funnel, carefully transfer the sauce to clean bottles or jars.

Allow it to cool, close the containers tightly, and store the sauce in the refrigerator.

🫙 Frequently Asked Questions About Homemade Lizano Sauce

Does homemade Lizano Sauce taste exactly like the original?

The flavor is very similar, especially because of the combination of vegetables, molasses, vinegar, and spices.
However, commercially produced Lizano Sauce has a more pronounced acidity and is made using a standardized commercial process. This homemade version tastes slightly milder, but you can add more vinegar according to your preference.

Is Lizano Sauce the same as Worcestershire sauce?

No. They are both savory brown condiments, and they can sometimes be used in similar ways, but their flavors and ingredient profiles are different.
Lizano Sauce has a noticeable vegetable base and a mild combination of sweetness, acidity, and spices. It is also generally less sharp than Worcestershire sauce.

Is Lizano Sauce spicy?

Lizano Sauce is flavorful and lightly spiced, but it is not normally considered a hot sauce.
The chipotle powder in this recipe adds a small amount of heat. You can reduce it, omit it, or add a little more depending on your preference.

Can I make half of the recipe?

Yes. Divide all the ingredients in half to prepare a smaller amount.
You can also double the recipe and use a whole cauliflower when making several bottles. Make sure your pot and blender are large enough to handle the additional volume safely.

How long does homemade Lizano Sauce last in the refrigerator?

In my experience, I have kept it refrigerated for more than a month and it has remained in good condition. However, the exact storage time can vary depending on the cleanliness of the containers, the refrigerator temperature, and how the sauce is handled.
Store it in very clean, tightly closed bottles or jars, and always use clean utensils. Discard it if you notice mold, bubbling, an unusual odor, or any other sign of spoilage.
For longer storage, divide the sauce into smaller portions and freeze the amount you will not be using soon.

🍽️ A Costa Rican Sauce to Use in More Than One Recipe

What I enjoyed most about developing this recipe was discovering that simple vegetables, seasonings, and a little patience can create something remarkably close to a sauce I have used since childhood.

You can adjust the finished sauce to suit the way you cook. Leave it a little thicker, add more vinegar for a tangier flavor, or increase the chile powder for a little more heat.

Use it to season Gallo pinto, Costa Rica’s traditional rice-and-beans dish, or add it to a Shimp and Rice. It also works well in Costa Rican tamales and adds flavor to beans, rice, soups, eggs, roasted vegetables, and meats.

I hope you give this Homemade Lizano Sauce a try. Let me know in the comments how you used it, whether you made any adjustments, and how it turned out.

Besitos (Kisses)
Mara

Una botella de vidrio con salsa Lizano casera sobre A wooden cutting board next to an onion, a carrot, and a bell pepper, with a plate of gallo pinto in the background.

Homemade Lizano Sauce

A homemade version of Costa Rica’s classic Lizano Sauce, made with vegetables, spices, molasses, and vinegar. It is savory, slightly sweet, tangy, and perfect for gallo pinto, shrimp rice, beans, meats, and other Costa Rican recipes.
Print Recipe Pin Recipe
Prep Time 10 minutes mins
Cook Time 1 hour hr 50 minutes mins
Cooling Time 30 minutes mins
Total Time 2 hours hrs 30 minutes mins
Course Seasoning
Cuisine Costa Rican
Servings 2 Liters

Equipment

  • 1 large pot
  • 1 Cutting board and knife
  • 1 Blender
  • 1 Funnel
  • measuring cups

Ingredients
  

  • ½ medium head cauliflower
  • ½ red bell pepper
  • ½ medium onion
  • 1 medium cucumber
  • ½ medium carrot
  • 4 garlic cloves
  • 5 cups of water
  • ½ teaspoon chile powder
  • 1 teaspoon celery seeds
  • 1 teaspoon ground cumin
  • 1 teaspoon dried oregano
  • 2 teaspoon mustard
  • 5 tablespoon Molasses
  • 1 cup vinegar
  • 4 teaspoon salt

Instructions
 

  • Wash all the vegetables thoroughly, cut them into small pieces, and place them in a large pot. Add the water.
  • Place the pot over medium heat. Once the water begins to simmer, reduce the heat and cook for about 50 minutes, keeping it at a gentle simmer.
  • Remove the pot from the heat and let the mixture cool for 5 to 10 minutes. Carefully transfer it to a blender and blend for about 1 minute, starting at low speed.
  • Carefully pour the blended vegetable mixture back into the pot.
  • Add the chile powder, celery seeds, cumin, oregano, mustard, molasses, and apple cider vinegar. Stir until well combined.
  • Add the salt gradually, tasting between each addition, and continue cooking until the sauce reaches your preferred flavor and consistency.
  • Cook the sauce over low heat for about 1 hour. Check it every 5 to 10 minutes and avoid letting it boil with large bubbles.
  • Remove the sauce from the heat and let it cool for about 10 minutes. Blend again for approximately 3 minutes or until smooth.
  • Using a funnel, transfer the sauce to clean bottles or jars. Let it cool completely, cover tightly, and store in the refrigerator.

Video

Notes

  • Keep both cooking stages at a gentle simmer to prevent too much liquid from evaporating and to reduce splattering.
  • Add the salt gradually because the flavor becomes more concentrated as the sauce cooks.
  • The sauce will thicken as it reduces and may become slightly thicker once it cools.
  • Store the sauce in very clean bottles or jars with tight-fitting lids and keep it refrigerated.
  • For longer storage, divide the sauce into smaller portions and freeze what you will not use soon.
🔗 For more recipes like this one, visit thelatinspoon.com or join me on my YouTube channel .
Keyword Homemade

Tres Leches Cake

Jun 13, 2026 · Leave a Comment

A plate with a slice of tres leches cake, showing the fluffy sponge inside, topped with whipped cream and sliced strawberries.

I have never met anyone who tried tres leches cake for the first time and didn't fall in love with it. Just be warned, if you bring it to a party, people will probably ask you to make it every time you get together.

A top-down view of a plate with a slice of tres leches cake topped with whipped cream and three strawberry slices. Some of the milk mixture is visible at the bottom of the plate. In the background, there is another plate served the same way, with a whole strawberry placed beside it.

In all the years I have been making tres leches cake, I have learned one thing: it tastes even better the next day. That is one of the reasons it has become one of my favorite desserts to share with family and friends.

The secret is starting with a light sponge cake. In this recipe, I separate the eggs and gently fold the whipped egg whites into the batter. This creates an airy cake that can absorb the tres leches mixture without becoming too dense.

There is a reason tres leches cake has become a favorite dessert in so many Latin American homes. It is easy to make, perfect for feeding a crowd, and even better when prepared a day ahead, which is why it is often served at celebrations and family gatherings.

This is what we are going to need:

All the ingredients needed for the recipe: a small jar of water, a small bowl of evaporated milk, a small bowl of sweetened condensed milk, a small bowl of flour, a small bowl of sugar, a small pitcher of regular milk, a small bowl of heavy cream, a plate with six eggs, strawberries, salt, baking powder, and vanilla extract served in small bowls.

Ingredients

For this recipe, we will prepare three simple parts: the sponge cake, the tres leches mixture, and the whipped cream topping.

🌾 Flour

All-purpose flour works perfectly for this sponge cake. Since this cake needs to absorb the milk mixture later, we want a simple and light base that holds its shape without becoming too dense.

🥄 Baking powder and salt

Baking powder helps the sponge rise and gives it a lighter texture. Mix it well with the flour and salt before adding the dry ingredients to the yolk mixture. A small amount of salt helps balance the sweetness and bring out the other flavors. It will not make the cake taste salty.

🥚 Eggs

Use large eggs at room temperature. They are easier to separate, and the whites will whip with better volume than cold eggs.

🍚 White sugar

For this recipe, I use regular white sugar, the same kind used for coffee or everyday baking. You do not need powdered sugar for the cake batter. Coconut sugar can also be used, but it will give the cake a darker color and a slightly different flavor.

🥛 Sweetened condensed milk

Sweetened condensed milk gives the tres leches mixture most of its sweetness and a thicker consistency. You can use a homemade version or sweetened condensed coconut milk, although the coconut flavor will be noticeable.

🥛 Evaporated milk

Evaporated milk adds a more concentrated dairy flavor and helps give the tres leches mixture a richer consistency.

🥛 Regular milk

Regular milk helps lighten the mixture and determines how soaked the cake will be. Whole milk gives the best texture, but 2% milk, lactose-free milk, or an unsweetened plant-based milk can also be used.

🍶 Heavy cream

Use cold heavy cream or heavy whipping cream. Keeping it refrigerated until you are ready to whip it will help it thicken and hold its shape more easily. If you don't want to mix it and buy the whipped cream instead, you can do that too.

A plate with a slice of tres leches cake, showing the fluffy sponge inside, topped with whipped cream and sliced strawberries.

💡 Tips for the Best Tres Leches Cake

  • Preheat the oven before the batter is ready. Once the mixture is done, it should go into the oven right away so the cake can rise properly.
  • Do not rush the egg whites. Beat them until they reach firm peaks, because this is what helps the sponge cake stay light and airy.
  • Fold the egg whites gently into the batter. Use slow, folding movements instead of mixing too fast, so the cake does not lose the air you already incorporated.
  • Let the cake cool completely before adding the milk mixture. This is very important. If the cake is still warm, it can become too soft or heavy once you pour the milk over it.
  • Poke the cake with a fork before adding the tres leches mixture. This helps the milk go into the cake instead of staying only on the surface.
  • Add the milk mixture slowly. Pour a little, let the cake absorb it, and then continue adding more. This helps the cake soak evenly.
  • Adjust the amount of milk to your preference. If you like a more soaked tres leches cake, you can add 1 or 2 extra cups of regular milk.
  • Chill the cake before serving. Tres leches cake tastes better cold, and resting in the fridge gives the cake time to absorb the milk mixture completely.

How to Make Tres Leches Cake

Let’s make this tres leches cake together, starting with a light sponge and finishing it with whipped cream and fresh fruit.

A bowl with flour while a hand holds a small bowl pouring salt into it. In the background, a cup of sugar can be seen.

Step 1: Prepare the dry ingredients.

Before starting, preheat the oven to 355°F.

In a large bowl, whisk together the flour, salt, and baking powder. Set the bowl aside.

A bowl containing the egg yolks, with the right hand holding a whisk. The left hand holds a small bowl of flour while pouring it into the mixture. Beside it, there is a small bowl with the egg whites, and another bowl of flour can be seen in the background.

Step 2: Separate the eggs

Separate the egg whites from the yolks, placing them in two different bowls.

Whisk the yolks with the vanilla. Gradually add the sugar.

A bowl containing the egg yolk and sugar mixture. The left hand holds a whisk, while the right hand pours water from a small pitcher into the bowl. A bowl of flour can be seen in the background.

Step 3: Add the water.

Add the water to the yolk mixture, stir until combined, and set the bowl aside.

A bowl containing the egg whites, with an electric hand mixer placed inside.

Step 4: Start beating the egg whites.

Beat the egg whites on low speed for 1 minute, then increase to medium speed.

A bowl filled with whipped egg whites that look light and fluffy.

Step 5: Check the consistency.

Continue beating until the egg whites form firm peaks and hold their shape. Stop before they become dry, then set them aside.

A bowl with the egg yolk, sugar, and water mixture, with some of the flour mixture being added on top.

Step 6: Add the dry ingredients.

Add the dry ingredients to the yolk mixture a little at a time, stirring gently between each addition until combined.

A bowl containing the flour and egg mixture, while a spatula adds fluffy whipped egg whites on top.

Step 7: Add half of the egg whites.

Add about half of the whipped egg whites to the batter. Using a spatula, gently fold them in by cutting through the center of the bowl, scraping along the sides, and folding the batter over itself.

A spatula gently folds the whipped egg whites into the batter using slow, circular movements.

Step 8: Fold in the remaining egg whites.

Add the remaining egg whites and repeat the same folding motion, turning the bowl as you go. Stop once combined and avoid overmixing.

A baking dish filled with the uncooked cake batter.

Step 9: Transfer and bake

Pour the batter into the baking dish and spread it gently toward the corners. Bake for about 30 minutes, or until lightly golden and a wooden skewer comes out clean.

Let the cake cool completely.

The baking dish with the baked cake, while a pitcher pours the milk mixture over the top.

Step 10: Prepare the milk mixture

Combine the condensed milk with the evaporated milk, stirring until smooth. Add the regular milk, then pour the mixture slowly and evenly over the completely cooled cake, allowing it to absorb between each addition.

A baking dish with the cake inside, while a hand uses a spatula to spread whipped cream on top.

Step 11: Refrigerate and add the topping.

Cover the cake with plastic wrap and refrigerate for at least 8 hours, or preferably overnight. Beat the cold heavy cream with sugar until soft peaks form, then spread it evenly over the cake.

A baking dish containing the cake decorated with whipped cream, while a hand places strawberry slices on top.

Step 12: Decorate and serve.

Decorate the cake with strawberries or any fresh fruit you like, such as blueberries, kiwi slices, or even a few mint leaves. Try to use fruit that is similar in size for a more even and beautiful presentation. Slice the cake and serve it cold.

❓Frequently Asked Questions

Can I prepare tres leches cake the day before?

Yes. It is actually better when prepared the day before because the cake has enough time to absorb the milk mixture and chill completely.

What if I still see small pieces of egg white in the batter?

That is okay. Do not keep mixing just to remove every small piece, because overmixing can make the cake lose its airy texture.

How do I know if I added enough milk?

The cake should absorb the milk gradually without leaving a large pool on top. Add it in rounds and wait between each one before deciding if it needs more.

Can I decorate it before refrigerating overnight?

It is better to refrigerate the soaked cake first and add the whipped cream and fruit the next day. This keeps the topping fresher and easier to spread.

How long does tres leches cake last in the refrigerator?

Keep the cake covered in the refrigerator and enjoy it within 3 to 4 days. If it is decorated with fresh fruit, it is best to add the fruit shortly before serving or replace it if it begins to release too much liquid.

🍰 A Sweet Taste of Latin America

Making tres leches cake is mostly about patience: keeping the sponge light, adding the milk gradually, and giving it enough time to rest. Once you see how well the cake absorbs the mixture while still holding each slice, you will understand why this recipe is worth making again.

If you enjoyed this tres leches cake and want to try more Costa Rican desserts:
Mango mousse and rice pudding are two great options.
Also Fig Cake with Condensed Milk Glaze. These desserts are simple, familiar, and full of the flavors that make Latin American cooking so special.

If you make any of these recipes, I would love to know how they turned out. Leave a comment, tell me which one was your favorite, or send me a photo so I can see what you made at home.

Kisses! (Besitos)
Mara

A plate with a slice of tres leches cake, showing the fluffy sponge inside, topped with whipped cream and sliced strawberries.

Tres Leches Cake

This Costa Rican tres leches cake is made with a light sponge soaked in a mixture of three milks, then topped with homemade whipped cream and fresh fruit. It is a practical make-ahead dessert that serves several people and is especially popular for birthdays, family gatherings, and celebrations.
Print Recipe Pin Recipe
Prep Time 15 minutes mins
Cook Time 30 minutes mins
Cooling Time 3 hours hrs
Total Time 3 hours hrs 45 minutes mins
Course Dessert
Cuisine Latin American
Servings 12 people

Equipment

  • 1 Baking dish
  • 3 Mixing bowls
  • 1 Hand whisk
  • 1 Electric hand mixer
  • 1 spatula
  • Measuring cups and spoons

Ingredients
  

Ingredients for the cake

  • 225 grams all-purpose flour 1 ½ cups
  • 5 grams baking powder 1 ½ teaspoons
  • 315 grams white sugar 1 ½ cups
  • 4 grams salt ½ teaspoon
  • 6 eggs yolks separated from whites
  • 150 ml water ⅔ cup
  • 1 teaspoon vanilla

Ingredients for the milks

  • 1 can condensed milk 397 ml
  • 1 can evaporated milk 354 ml
  • 500 ml regular milk 2 cups

Ingredients for the topping

  • 2 tablespoons sugar
  • 500 ml heavy cream 2 cups
  • Strawberries or fresh fruit to decorate

Instructions
 

  • Preheat the oven to 355°F. In a bowl, whisk together the flour, baking powder, and salt. Set aside.
  • Separate the egg whites from the yolks. Whisk the yolks with the vanilla, gradually add the sugar, then mix in the water.
  • Beat the egg whites on low speed for 1 minute to break them up. Gradually increase the speed and continue beating until they become light and fluffy and form firm peaks that hold their shape. Be careful not to overbeat them, as dry egg whites can affect the texture of the cake.
  • Add the dry ingredients to the yolk mixture a little at a time, stirring gently between each addition.
  • Fold half of the whipped egg whites into the batter using a spatula. Cut through the center of the bowl, scrape along the sides, and gently fold the batter over the egg whites. Add the remaining egg whites and continue folding until just combined. A few small streaks or lumps of egg white are fine. Do not overmix, or the cake can lose its light and airy texture.
  • Pour the batter into a clean and dry baking dish and spread it toward the corners. Bake for about 30 minutes, or until the top is lightly golden and a wooden skewer inserted into the center comes out clean. Let the cake cool completely.
  • Combine the sweetened condensed milk and evaporated milk, stirring until the condensed milk is completely dissolved and the mixture is smooth. Add the regular milk and stir again until fully combined. Refrigerate the milk mixture while the cake finishes baking and cooling.
  • Pour the milk mixture slowly and evenly over the completely cooled cake, adding it a little at a time and allowing it to absorb between each addition. After the first few rounds, if needed, use a skewer or fork to gently poke holes in the cake so the remaining milk mixture can soak through evenly. Cover with plastic wrap and refrigerate for at least 8 hours, or overnight.
  • Beat the cold heavy cream with the sugar until soft peaks form, then spread it evenly over the cake. Decorate with strawberries or your favorite fresh fruit. Slice and serve cold.

Video

Notes

  • Preheat the oven before you start mixing the batter.
  • Let the cake cool completely before adding the milk mixture. The bottom of the baking dish should no longer feel warm.
  • Pour the milk mixture slowly in several additions, allowing the cake to absorb each one before adding more.
  • If you prefer a wetter Tres Leches, add 1 or 2 extra cups of milk.
  • For the best texture, cover and refrigerate the soaked cake overnight.
  • Add the whipped cream and fresh fruit the following day for a fresher topping.
 
🔎For more Costa Rican recipes, visit thelatinspoon.com and follow the  Youtube channel for new videos.
Keyword Latin Desserts

Shimp and Rice (Arroz con Camarones)

Apr 2, 2026 · Leave a Comment

Blue pot filled with arroz con camarones, viewed from above.

With the right steps and a few simple ingredients, you can create a flavorful, comforting shrimp and rice that will have everyone asking for seconds.

Blue pot filled with arroz con camarones, viewed from above.

Arroz con camarones is a dish that is especially popular in many coastal areas of Latin America, where seafood and rice are both common parts of everyday cooking. Different countries and regions prepare their own versions, but the idea is very similar: combining shrimp, rice, vegetables, and seasonings into a dish that is practical, flavorful, and well suited for sharing.

Because this dish can be prepared in so many different ways, here I am sharing my own version. Like many traditional recipes, it can also serve as a base, allowing each person to adjust the ingredients and make it in the way that best suits their taste and what they have on hand.

Watch Video Here

Since it is very easy to obtain shrimp in Costa Rica, mostly from the Pacific side, arroz con camarones is, or at least was when I was growing up, a fancy yet affordable dish to serve a big crowd of guests whenever you had a party or a celebration. Not as popular as its cousin arroz con pollo (rice with chicken), but I would say still popular.

By the way, let me know if you want me to show you how to make arroz con pollo.

Now that I live in the United States and it’s easy for me to find frozen shrimp almost everywhere, this is a recipe I like to make often since it’s easy, very affordable, and full of flavor. And if you have a good rice to shrimp ratio, it can also be a very balanced dish with carbs and protein, since shrimp is high in protein.

This is what we are going to need.

Ingredients for arroz con camarones including shrimp, rice, vegetables, spices, achiote, and shrimp stock laid out on a table.

Ingredients to make Arroz con Camarones

These are the ingredients I used in this recipe. For more options or substitutions, check the FAQs section.

🍤 Shrimp

Any type of shrimp will work here, no matter the color, size, or whether it’s fresh or frozen. I do want to mention that a high percentage, if not most, of the shrimp found in the United States is sold frozen, so I recommend buying it that way and thawing it at home. You can leave it in the fridge overnight or thaw it under cold running water.

When you buy “fresh” shrimp at the store, it has usually been previously frozen and thawed, and you don’t always know how long it has been sitting there. By buying frozen shrimp, you’re more likely getting a fresher option.

🦐 Shrimp stock

I made my own Shrimp Stock for this recipe, and I’m sharing it here in case you’d like to make it too. If you don’t have shrimp shells or are not in the mood to make it, you can buy it at your regular grocery store under the name seafood stock or shrimp bouillon. Both options work.

🍚 Rice

For this recipe, I am using parboiled rice, which is a type of rice that is soaked, steamed, and dried while still in its husk, partially cooking it before milling. The process, not the grain itself, is what makes this rice different from regular rice.

It is less sticky, takes longer to cook, and has a slightly different flavor, not better or worse, just different. It also offers some health benefits, like a lower glycemic index, which can help with blood sugar management.

🧡 Achiote

Also known as annatto, it is what gives the rice its warm color. It has a mild, earthy flavor with slightly peppery notes, and it’s mainly used to add color and depth to dishes without overpowering them. It can be found as achiote paste, achiote powder, or achiote-infused oil, and any of these can work depending on what is available where you live. Find it here.

🥫 Lizano Sauce

It’s a traditional Costa Rican condiment with a slightly tangy, mildly sweet, and spiced flavor that adds a very distinctive touch to many dishes. Learn how to make Lizano Sauce from scratch here. And if want to skip the process and get it delivered at your door, get Lizano Sauce here.

💡 Helpful Tips For Delicious Arroz Con Camarones

  • Try to chop the vegetables into similar-sized pieces so they cook more evenly and blend better into the rice.
  • Let the achiote cook briefly in the oil before adding the vegetables so it can release its color more evenly.
  • If possible, use shrimp stock instead of water, since it gives the rice a much deeper seafood flavor.
  • Once you cover the pot, avoid removing the lid too early, because the trapped heat helps the rice cook properly.
  • Taste the rice before adding the shrimp so you still have time to adjust the seasoning if needed.
  • Add the shrimp near the end so they stay tender and do not overcook.
  • If you use a different type of rice, keep in mind that you may need to adjust the amount of liquid.

How to Make It Step by Step

Don’t forget the video is also available for this recipe, but if you prefer pictures, let’s get started.

Step 1: Sauté all of the veggies.

Add oil and achiote to a large pot and cook over medium heat for 2 to 3 minutes. Then add the onion, bell peppers, celery, carrots, and finely chopped garlic, and cook for 3 to 5 minutes.

Step 2: Add the rice

Parboiled rice does not need to be rinsed before cooking, but if you are using a different type of rice and would like to rinse it first, this is the time to do it.

Step 3: Add your seasoning and stock

Add paprika, black pepper, salt, and Salsa Lizano, then pour in the shrimp stock. You can substitute with water, but the flavor won’t be the same.

Step 4: Cover and cook

Put the lid on and cook the rice for 25 minutes. Do not remove the lid during this time, let the rice cook and absorb all those flavors.

Step 5: Add peas and shrimp

Once the time has passed, remove the lid and add the peas and shrimp. Season the shrimp with salt and pepper, put the lid back on, and cook for about 5 more minutes.

Step 6: Finish cooking

Remove the lid. Mix the shrimp into the rice and cook for 3 to 5 more minutes, depending on the size of the shrimp.

💡FAQs About Shrimp And Rice

Can I use a different type of rice if I don’t have parboiled rice?

Yes, you can use any type of rice you have available. Just keep in mind that cooking time and liquid ratios may vary depending on the type of rice, so you may need to adjust accordingly.

Do I have to make shrimp stock or can I use water instead?

You can use water, but shrimp stock adds much more flavor to the dish. It doesn’t have to be shrimp stock specifically, you can also use seafood stock or shrimp bouillon, which are usually easy to find at most grocery stores.

When should I add the shrimp so they don’t turn rubbery?

Add the shrimp during the last few minutes of cooking. Ideally, around the last 3 to 5 minutes, but even a little earlier can still work. The key is not to add them at the beginning while the rice is still raw, otherwise they can become overcooked and rubbery.

What if I don’t have Achiote or Salsa Lizano?

Do not worry if you cannot find these two. They do add a lot of flavor, but you can make up for it by adjusting your seasonings. Just make sure not to skip the shrimp stock, since it adds a lot of flavor to the dish.

Can I prepare this recipe ahead of time?

Yes, you can make arroz con camarones ahead of time and store it in the refrigerator. Reheat it gently on the stove or in the microwave, adding a small splash of water if needed to bring back moisture.

👉A Dish Worth Making Again and Again

Whether you decide to make shrimp stock or not, and even if you use a store-bought option, this is a delicious recipe you can make even if you are not Costa Rican or have never visited the country. It’s easy to make, full of flavor, and a balanced meal for you and your family.

Here are some recipes you can pair it with:

First, the link for the Shrimp Stock.
Then add a Heart of Palm Salad on the side. I will also be working on a refried beans recipe, so stay tuned for that.
Finish your meal with a delicious dessert like Fig Cake with Condensed Milk Glaze.

Let me know in the comments if there’s another Costa Rican recipe you would like to see next here on the blog.

Besitos (Kisses),
Mara

Blue pot filled with arroz con camarones, viewed from above.

Shrimp and Rice (Arroz con camarones)

This arroz con camarones is a flavorful and comforting one-pot dish made with rice, shrimp, vegetables, and a rich shrimp stock. It’s easy to prepare, comes together with simple ingredients, and results in a balanced meal full of color and bold flavor, perfect to share with family and friends.
Print Recipe Pin Recipe
Prep Time 15 minutes mins
Cook Time 50 minutes mins
Total Time 1 hour hr 5 minutes mins
Course Main Course
Cuisine Costa Rican
Servings 8 servings

Equipment

  • Cutting board and knife
  • Measuring cups and spoons
  • Large Pot or Dutch Oven
  • Wooden Spoon or spatula

Ingredients
  

  • 3 tablespoons oil
  • 2 teaspoons achiote
  • ½ yellow or sweet onion
  • ½ bell pepper
  • 2 sticks celery
  • 2 medium carrots
  • 2 teaspoons finely minced garlic
  • 2 cups rice
  • 2 teaspoons paprika
  • 1 teaspoon black pepper
  • 2 teaspoons salt
  • 1 tablespoon Lizano Sauce
  • 4 cups shrimp stock
  • ½ cup peas
  • 1 lb around 40 shrimp
  • 1 small batch cilantro

Instructions
 

  • Heat oil in a large pot over medium heat. Add achiote and let it melt for about 1 minute.
  • Add onion, bell pepper, celery, and carrots. Cook for 2 to 3 minutes, then add the garlic and continue cooking for about 1 more minute, stirring frequently so nothing burns.
  • Add the rice and stir to coat it with the oil and achiote. Add paprika, black pepper, salt, and Salsa Lizano. Stir everything well so the rice is evenly seasoned and coated with all the flavors.
  • Pour in the shrimp stock, (Recipe available on the blog) mix well, and taste. This is the moment to adjust the seasoning if needed before the rice finishes cooking.
  • Cover with a lid and cook for 25 minutes without opening the pot.
  • After 25 minutes, remove the lid and stir. The rice should be about 90% cooked and still have a little liquid.
  • Add peas and shrimp. Lightly season the shrimp with salt and black pepper. Cover again and cook for 5 minutes.
  • Remove the lid, stir, and cook for an additional 3 to 5 minutes, depending on the size of the shrimp, until fully cooked.
  • Turn off the heat, add fresh cilantro, and stir. Serve with a side of salad, refried beans, and enjoy with family and friends.

Video

Notes

  • Chop vegetables evenly for better cooking.
  • If your rice looks too wet, cook uncovered for a few extra minutes to let the excess liquid evaporate.
  • Add shrimp at the end to avoid overcooking.
  • Adjust liquid if using a different rice.
  • Large shrimp work best for this recipe since they are less likely to overcook.
  • You can swap peas for edamame or soybeans for a different texture and added protein.
  • Adjust salt carefully if using store-bought stock or bouillon, since they can already contain sodium.
 
For more recipes go to 📌 www.thelatinspoon.com
Keyword Seafood

Easy Homemade Shrimp Stock

Mar 21, 2026 · Leave a Comment

A pot containing shrimp shells and vegetables.

Shrimp shells are one of the most underrated ingredients in the kitchen. Instead of throwing them away, you can turn them into a rich, flavorful broth that adds depth to so many dishes with very little effort.

A pot containing shrimp shells and vegetables. In the background, an onion, a celery stalk, and a bell pepper.

It is light, flavorful, and incredibly versatile in the kitchen. But beyond that, it is also part of a nose-to-tail way of cooking, where we use every part of the ingredient and honor the whole animal instead of letting it go to waste.

It is also a practical way to cook, especially with the cost of groceries today. Turning shrimp shells into a rich homemade broth is an easy way to add flavor to your meals without relying on expensive ingredients.

Watch Video Here

Ingredients

This shrimp stock is also a great way to make use of leftover vegetables and seasonings you may already have in the refrigerator. The combination I am sharing here is just one simple idea, so do not worry if you do not have every single ingredient. You can work with what you have on hand and still make a flavorful homemade stock.

🦐 Shrimp shells

These are the base of the stock and where most of the flavor comes from. You can use small or large shrimp, and if they still have the heads on, even better, since they add even more depth to the broth. You could also add fish heads and any other seafood scraps you have on hand to build even more flavor in your shrimp stock.

🥕🧅Vegetables

Onion, carrot, celery, bell pepper, and garlic help build flavor and give the broth a richer, more balanced taste.

🌿 Fresh herbs

Cilantro or parsley add freshness and aroma. You can use either one depending on the flavor you prefer.

🍃🧂 Seasonings

Bay leaves, black pepper, cumin, oregano, and any other aromatics you like. Avoid adding salt at this stage, since the seasoning will be adjusted later in the final dish where the stock is used.

An overhead photo of the ingredients: an onion, a bell pepper, a carrot, culantro coyote, cilantro, celery, garlic, cumin, oregano, and bay leaves.

💡 Helpful tips for a Flavorful Shrimp Stock

  • If your shrimp have heads, add them too, they bring even more flavor and depth to the broth.
  • Do not worry about using exact vegetables. This recipe is very flexible, and the broth can still turn out delicious with different combinations.
  • Let the stock simmer gently rather than boil strongly, as this helps develop flavor without turning it cloudy.
  • If you see foam or impurities rising to the surface, you can remove them with a spoon for a cleaner stock.
  • Strain it well before using, this helps remove the shells, vegetables, and seasonings so the broth is smooth and ready for your recipes.
  • Do not be afraid of garlic here. Shrimp and garlic are a perfect match, and it adds a lot of depth to the broth.
  • This is not a strict recipe. Think of it as a method. Use what you have, adjust as needed, and make it work for your kitchen.

How to Make this Homemade Shrimp Stock

A step-by-step guide with pictures to help you make a delicious shrimp stock.

There is a pot with vegetables and some shrimp shells, a bowl with peeled shrimp, and a bowl with unpeeled shrimp in the front. Above the bowl, two hands are removing the shell from a shrimp.

Step 1: Peel the shrimp.

Remove the shells from the shrimp and set them aside. Then prep your ingredients, peel and chop the vegetables, keeping them similar in size so they cook evenly

A pot with shrimp shells and vegetables while water is being added.

Step 2: Add everything to a pot.

Place the shrimp shells, vegetables, herbs, seasonings, and water into a large pot.

A pot with vegetables, spices, and shrimp shells gently simmering.

Step 3: Simmer the broth.

Set the pot over medium heat and let the broth simmer gently, not at a strong boil, for about an hour, or until it becomes aromatic and flavorful.

A bowl with a strainer on top, while the vegetables and shrimp shells are being poured through it to strain the broth

Step 4: Strain and use.

Strain the broth well to remove the shells, vegetables, and herbs. Use it right away or let it cool before storing.

💡A few questions you may have about this recipe

Can I make this broth ahead of time?

Yes. This broth is perfect for making in advance. You can store it in the refrigerator for up to one week, or freeze it for longer storage.
If you plan to freeze it, let it cool completely first, then transfer it into airtight containers or freezer-safe bags. This makes it easy to portion and use whenever you need it.

Can I use frozen shrimp shells?

Yes. You can use them straight from frozen, no need to thaw. Just add them directly to the pot and let them cook with the rest of the ingredients.

Can I add salt to shrimp stock?

It is best to avoid adding salt at this stage. Seasoning is easier to control later when you use the stock in your final dish.

How long should I cook shrimp stock?

About one hour is enough to extract flavor without overcooking the shells or vegetables.

Can I save shrimp shells and seafood scraps for later?

Yes. This is actually one of the best ways to make shrimp stock. You can keep shrimp shells, fish heads, and other seafood scraps in a bag in your freezer. Once you have enough, you can use them all at once to make a rich and flavorful stock.
No need to thaw everything in advance, you can cook them straight from frozen.

A Simple Stock That Brings So Much Flavor to Your Cooking

This homemade shrimp broth is one of those simple recipes that can make a big difference in your cooking. It is easy to prepare, full of flavor, and a wonderful way to get more out of ingredients you already have in your kitchen.

You can use it in seafood soups and stews like chowders, bisques and gumbo. It also works beautifully in rice dishes like arroz con camarones, paella, or risotto, and even in seafood pasta or curries where you want to build real depth of flavor.

I hope you give this recipe a try and enjoy having it ready for future meals. If you make it, I would love for you to share your recipe with me and let me know how you used it in your cooking.

Kisses!
Mara

A pot containing shrimp shells and vegetables.

Easy Homemade Shrimp Stock

This shrimp broth is an easy and practical recipe made with shrimp shells, vegetables, herbs, and simple seasonings. It is a great way to build flavor at home and use it later in rice dishes, sauces, soups, and other seafood recipes.
Print Recipe Pin Recipe
Prep Time 15 minutes mins
Cook Time 1 hour hr
Total Time 1 hour hr 15 minutes mins
Course Broth, Stock
Cuisine Basis
Servings 6 cups

Equipment

  • 1 large pot
  • 1 Cutting board and knife
  • 1 strainer
  • 1 large bowl

Ingredients
  

  • Shells of 2 lbs shrimp
  • 1 onion
  • 1 medium carrot
  • 1 bell pepper
  • 2 celery sticks
  • 5 garlic cloves
  • 1 bunch of cilantro
  • 1 bunch of culantro coyote
  • 4 bay leaves
  • ½ teaspoon cumin seeds
  • ½ teaspoon oregano
  • 6 cups of water

Instructions
 

  • Peel the shrimp and set them aside.
  • Place the shrimp shells, water, onion, bell pepper, carrot, celery, garlic, culantro coyote, cilantro, cumin, oregano, bay leaves, salt, and black pepper in a large pot.
  • Bring the pot to a gentle simmer over medium heat. This might take from 10-20 mins.
  • Let the broth simmer for about an hour, without bringing it to a strong boil.
  • Strain the broth to remove the shells, vegetables, and herbs.
  • Use immediately or let it cool before storing.

Video

Notes

  • Let the broth simmer gently, not at a strong boil, so it stays clearer and develops flavor gradually.
  • This recipe is very flexible, so you can use the vegetables and herbs you already have on hand.
  • You can also freeze it in portions for later use
🦐 For more recipes like this, visit www.thelatinspoon.com
Keyword Seafood

Tropical Mango Mousse with Coconut Milk

Mar 13, 2026 · Leave a Comment

This dessert is light, creamy, and full of tropical flavor. It looks elegant enough to serve to guests, yet it is surprisingly simple to make at home. No oven, no complicated techniques, just fresh mango, coconut milk, and a few simple ingredients.

A serving platter with small glass cups filled with mango mousse, topped with mango pieces and coconut flakes, with a decorative flower placed on the platter.

The other day I stopped by the Asian store near my house and the mangoes immediately caught my attention. They were beautiful, perfectly ripe, and imported from Thailand. I knew right away they had to come home with me.

Of course I ate a few slices fresh, because mangoes are already delicious on their own. But I also wanted to turn them into something special, and that is how this mango mousse came to life.
But those mangoes also reminded me of something else… my childhood.

Watch Video Here

When I was growing up, we lived on a coffee plantation. My grandfather ran the place, and while we were allowed to play in the big playground, we were also expected to help in the fields. From a very young age, I learned the value of work. We helped my grandfather pick coffee cherries (yes, they are called coffee cherries, not coffee beans), pick tomatoes 🍅, plant onions 🧅, and many other chores around the farm.

But when mango season arrived, everything felt different. That was our favorite time of the year 🥭.

After a long day of work, my cousins and I would climb the mango trees and pick the fruit straight from the branches. We would even make competitions to see who would be the first to lick their elbows when the mango juice started dripping down our arms.

Of course, nobody ever won.

Just telling you this story brings a smile to my face 😊. Mangoes from Costa Rica are incredibly sweet and juicy. Unfortunately, I cannot get those here in the United States, but these mangoes from Thailand are just as sweet and delicious as the ones I remember from my childhood.

A cup of coconut milk, heavy cream, several mangoes, a small bowl of coconut pieces, another with vanilla extract, powdered gelatin, sugar, and salt.

Ingredients for Mango Mousse

Before we begin, let’s take a look at the simple ingredients that bring this mango mousse together. Most of them are easy to find, and you may already have several waiting in your kitchen.

🥭 Mango

Ripe mango is the star of this recipe. The sweeter and softer your mangoes are, the better the flavor will be. Fresh mango works best, but frozen mango (fully thawed) can also be used.

🥥 Coconut Milk

Use canned full-fat coconut milk for a creamier and richer mousse. Light coconut milk also works, but the texture will be slightly less creamy. Avoid coconut beverages meant for drinking, as they contain too much water and may affect the consistency.

🥛 Heavy Cream

Heavy whipping cream is ideal for this recipe, but whipped cream will work as well.

🍮 Unflavored Gelatin

This helps the mousse hold its shape while staying soft and creamy. If you prefer a vegetarian option, agar-agar can be used instead following the package directions.

🌼 Vanilla

A little vanilla rounds out all the flavors. I usually use vanilla extract, but honestly, if you don’t have it on hand, the mousse will still taste wonderful without it.

🍬 Sugar

The amount of sugar really depends on your mango. If your fruit is very sweet, you may want to reduce it slightly. Regular sugar works perfectly, but powdered sugar blends just as nicely.

Top view of a decorative platter holding small glass cups filled with mango mousse, topped with mango pieces and coconut flakes, with an edible flower placed on the side for decoration.

💡 Extra Tips for Making Mango Mousse

  • Use ripe mangoes for the best flavor and natural sweetness. If the mango smells fragrant and feels slightly soft, it’s ready to use.
  • Make sure the heavy cream is very cold before whipping. Cold cream holds air better and creates a lighter mousse texture.
  • When blooming the gelatin, always use cold water. Hot water prevents proper hydration and may create lumps later.
  • Fold the mango mixture gently into the whipped cream instead of stirring aggressively. This keeps the mousse airy and smooth.
  • For cleaner layers when serving, pour the mousse using a pitcher or measuring cup instead of a spoon.

Let’s Make Mango Mousse Together

Take your time, prepare your ingredients ahead, and enjoy the process — this is one of those recipes that feels as good to make as it does to eat.

One hand holding a mango while the other uses a knife to peel it, with a cutting board visible in the background.

Step 1: Prepare the mango.

Peel the mangoes and cut the flesh into chunks, removing the pit. Set aside a few small cubes for decoration later.

A blender cup containing mango pieces, milk, and vanilla extract, with a hand holding a cup of sugar above it.

Step 2: Add the ingredients to the blender.

Place the mango pieces, coconut milk, vanilla extract, sugar, and a small pinch of salt into the blender jar.

Step 3: Blend until smooth.

Blend everything until you obtain a smooth and creamy mango mixture with no visible lumps

Step 4: Bloom the gelatin.

In a small bowl, sprinkle the powdered gelatin over water and let it sit for a few minutes until hydrated. Warm gently until fully dissolved, making sure it does not boil.

Step 5: Whip the heavy cream.

In a separate glass bowl, whip the heavy cream using a hand mixer until soft peaks form. The texture should be light and fluffy, not overly stiff.

Step 6: Add the mango mixture to the whipped cream.

Pour the mango mixture into the bowl containing the whipped cream.

Step 7: Fold gently with a spatula.

Using slow, circular motions, fold the whipped cream into the mango blend. Avoid stirring or mixing too aggressively, as this would deflate the whipped cream.

Step 8: Add the gelatin.

Pour the dissolved gelatin slowly in a thin stream while continuing to mix gently to distribute it evenly.

Step 9: Fill the serving cups.

Transfer the mousse into small glasses or dessert cups using a pitcher or spoon. Refrigerate for at least 8 hours, or until the mousse is fully set.

Step 10: Decorate and serve.

Top with fresh mango cubes and coconut flakes just before serving.

💡 Frequently Asked Questions

Can I use frozen mango instead of fresh?

Yes, you can. Just make sure the mango is completely thawed and drain any excess liquid before blending to avoid altering the texture of the mousse.

How long does mango mousse last in the refrigerator?

Stored in a covered container, it keeps well for up to 4 days in the refrigerator. The texture stays creamy and delicious when kept properly chilled.

Can I make this dessert ahead of time?

Absolutely. This mousse is perfect for preparing a day in advance, making it ideal for gatherings or special occasions.

What can I use instead of coconut milk?

You can substitute it with evaporated milk, whole milk, or even additional heavy cream depending on how rich you want the dessert to be.

Why didn’t my mousse set properly?

This usually happens if the gelatin wasn’t fully dissolved or if the mousse didn’t chill long enough. Make sure the gelatin is smooth before adding it and allow enough refrigeration time.

🥭 A Light and Creamy Mango Dessert You’ll Love

Every time I make this mango mousse, it takes me back to those days when my cousins and I would climb mango trees and eat the fruit straight from the branches. Mangoes have always been one of my favorite fruits, and turning them into a simple dessert like this one makes them feel even more special.

If you have ripe mangoes at home, I truly hope you give this recipe a try. It is creamy, refreshing, and a beautiful way to enjoy the natural sweetness of this tropical fruit.

Here are a few other dessert recipes you can make at home:
Costa Rican Style Rice Pudding
Fig Preserves
Fig Cake with Condensed Milk Glaze

And if you make it, let me know in the comments how it turned out for you. I always love hearing from you.💛

Besitos (Kisses),
Mara

Tropical Mango Mousse with Coconut Milk

A light and creamy mango mousse made with fresh mango, coconut milk, and whipped cream. This easy no-bake dessert is smooth, refreshing, and perfect for warm days, celebrations, or whenever you want a tropical treat prepared with simple ingredients.
Print Recipe Pin Recipe
Prep Time 30 minutes mins
Refrigeration 8 hours hrs
Total Time 8 hours hrs 30 minutes mins
Course Dessert
Cuisine Costa Rican
Servings 8 portions

Equipment

  • 1 Blender
  • 1 Hand mixer
  • Bowls and spatulas
  • 1 microwave-safe bowl
  • Measuring cups and spoons

Ingredients
  

  • 4 mangoes
  • 1 can coconut milk 400 ml
  • 1 teaspoon vanilla extract
  • ½ teaspoon salt
  • ½ cup sugar
  • 4 teaspoons gelatin
  • 4 tablespoons water
  • 1 cup heavy cream
  • Reserved mango for decoration
  • Shredded coconut for decoration

Instructions
 

  • Peel the mangoes and cut the flesh into medium pieces. Set aside.
  • Place the mango pieces, coconut milk, vanilla extract, salt, and sugar into the blender.
  • Blend until completely smooth and creamy. Set aside.
  • In a small bowl, sprinkle gelatin over cold water. Let it sit for 10 minutes until hydrated, then gently warm until fully dissolved.
  • In a large bowl, whip the cold heavy cream using a hand mixer. Beat for about 1 minute at medium speed, then increase to high speed and continue mixing for 3 to 5 minutes, or until soft peaks form.
  • Pour the blended mango mixture into the whipped cream. Using a spatula, gently fold the mixture together until everything is fully combined and smooth. Work slowly as you fold, making sure to keep as much air as possible in the whipped cream so the mousse stays light and airy.
  • Slowly pour the dissolved gelatin into the mousse mixture while folding continuously to distribute evenly. Transfer the mousse into a pitcher or measuring cup and pour into serving glasses.
  • Refrigerate for at least 8 hours, or until the mousse is fully set. Top with fresh mango cubes and coconut flakes before serving.

Video

Notes

  • Make sure the heavy cream is very cold before whipping to achieve a light and airy texture.
  • Always bloom gelatin using cold water, then warm gently until dissolved before adding it to the mixture.
  • Allow the mango mixture to cool slightly before combining with whipped cream to prevent deflating the mousse.
  • Refrigerate for at least 8 hours or until fully set. Overnight chilling provides the best texture.
  • While refrigerating, cover with plastic wrap to help reduce “fridge taste.”
 
✨ For more delicious recipes, visit thelatinspoon.com

Tuna Salad Recipe (Ready in Under 10 Minutes)

Mar 6, 2026 · Leave a Comment

A round blue bowl showing the finished tuna salad with pieces of tomato and cilantro visible in the background.

Tuna salad is one of those recipes that proves simple ingredients can still deliver big flavor. In this version, canned tuna is combined with fresh vegetables, lime juice, and herbs to create a light, refreshing salad that comes together in under 10 minutes.

A bowl of tuna salad with red onion and tomato pieces, with tomatoes and cilantro visible in the background.

The citrus helps soften the onions while bringing brightness to the salad, and the fresh vegetables add color and texture in every bite. The tuna stays in hearty chunks, giving the salad a satisfying bite instead of a mushy texture. If you like a little heat, you can also add a small amount of minced jalapeño for an extra kick. I often use my homemade pickled jalapeños, and you can find that recipe here.

Watch Video Here

Which Tuna Makes the Best Tuna Salad?

When choosing tuna for tuna salad, there are a few things people usually consider. The first is the type of tuna. The most common varieties you will find in stores are albacore (often labeled as white tuna) and chunk light tuna, which is usually skipjack. Both can work well in tuna salad, but many people prefer tuna that holds its shape and creates visible pieces in the salad and for that reason, I would choose albacore.

Another factor is how the tuna is packed. Tuna packed in water tends to have a cleaner flavor and is lighter, which makes it a popular choice for tuna salads that include fresh vegetables and citrus. Tuna packed in oil is richer and more flavorful, but it can also make the salad heavier depending on the other ingredients you are using. I personally love tuna in oil, but for this recipe I stayed with tuna packed in water.

In this recipe, I am using a tuna brand from Costa Rica called Tonnino. This is not a paid promotion. I simply like including products from Costa Rica whenever I can, since the channel focuses on Costa Rican cooking and it reminds me of flavors from my childhood. Tonnino can be found at Whole Foods, it’s also available on Amazon, and I’ve included the link here if you would like to try it.

A photo taken from above showing all the ingredients used to make the tuna salad.

Ingredients for Tuna Salad

Remember, this ingredient list is based on what I had available at the time. I encourage you to do the same and work with what you have in your kitchen. Small adjustments like these are what make home cooking flexible and enjoyable.

🐟 Tuna

For this salad you can use either fresh tuna or canned tuna. If you prefer fresh tuna, simply cook it first, let it cool completely, and then break it into chunks before adding it to the salad. If you want to keep things quick and simple, canned tuna works perfectly. I recommend using tuna packed in water, which keeps the salad lighter and allows the fresh ingredients to shine.

🧅 Red Onion

Red onion is my favorite for fresh salads because it has a slightly milder flavor and beautiful color. It adds a nice bite without overpowering the rest of the ingredients. If red onion is not available, you can substitute it with white onion, yellow onion, or even green onions.

🍋 Lemon or Lime

Both lemon and lime juice work well in this recipe. They have slightly different flavors, but each one adds brightness and helps soften the onions while bringing everything together.

🌿 Celery Tops

Celery tops add a fresh, slightly herbal flavor and a bit of texture to the salad. They are tender enough to eat raw and work beautifully in dishes like this. If you don’t have celery tops, you can also use finely chopped celery stalks.

🧂 Salt and Black Pepper

Salt and black pepper help bring all the flavors together. Start with a small amount and adjust to your taste after mixing the salad.

A round blue bowl showing the finished tuna salad with pieces of tomato and cilantro visible in the background.

💡 Extra Tips for Making Tuna Salad

  • Feel free to add other vegetables you enjoy such as chickpeas, spinach, zucchini, or shredded carrots to make the salad more filling and nutritious.
  • If you don’t have jalapeños on hand, a few drops of hot sauce can add a nice spicy touch.
  • If you prefer your tuna salad a little less juicy, remove the seeds from the tomatoes before slicing them.
  • A few cubes of ripe avocado can make the salad slightly creamy without needing mayonnaise.
  • Finely chopped cucumber adds a refreshing crunch and works very well with the citrus in the salad.
  • If you have leftover grilled or pan-seared tuna, you can break it into chunks and use it instead of canned tuna.

From Pantry to Plate: Step-by-Step Tuna Salad Photos

The full video for this recipe is on my YouTube channel if you’d like a clearer, more detailed walkthrough.

A wooden cutting board with red onion being sliced into long strips, with a bowl of tuna chunks in the background.

Step 1: Slice the onions lengthwise

Start by slicing the red onion lengthwise into thin strips. Thin slices blend better with the rest of the ingredients and give the salad flavor without overpowering it.

A glass bowl with red onion strips inside, a strainer on top, and a right hand squeezing lemon juice over the onions.

Step 2: Add citrus to the onions

Place the sliced onions in a bowl and squeeze fresh lemon or lime juice over them. Let them sit for about 5 minutes. The citrus helps soften the onion and slightly mellow its sharp flavor.

A wooden cutting board with two hands finely chopping cilantro.

Step 3: Chop the fresh greens

Finely chop the cilantro, green onions, celery tops, or any other leafy green ingredients you would like to add. Smaller pieces distribute the flavor more evenly throughout the salad.

A wooden cutting board with two hands slicing tomatoes into long strips lengthwise.

Step 4: Prepare the tomatoes

Slice the tomatoes in half and then cut them lengthwise into strips. If you prefer a slightly drier salad, you can remove the seeds before slicing.

A glass bowl with all the chopped ingredients, with a fork approaching the bowl to begin mixing.

Step 5: Mix the vegetables

Add all the chopped ingredients to the bowl with the onions and gently stir them together. At this point, you can adjust the quantities depending on your preference, adding more tomatoes, cilantro, or celery if you like.

A glass bowl in the background with two hands separating tuna chunks into smaller pieces.

Step 6: Break the tuna into chunks.

Separate the tuna fillets into chunks. If you want medium or large chunks, gently separate them with your hands. If you prefer smaller pieces, you can use a fork.

A glass bowl holding the mixed tuna salad with freshly added black pepper on top.

Step 7: Add the seasonings

Season the salad with salt, black pepper, and any additional seasoning you enjoy.

A glass bowl holding the tuna salad while a small cup above it adds minced jalapeño to the salad.

Step 8: Add some heat if you like

If you enjoy a little spice, add minced pickled jalapeños or a few drops of hot sauce to the salad. Mix gently and adjust the heat to your taste.

💡 All Of Your Tuna Salad Questions, Answered

What type of tuna works best for tuna salad?

Many people prefer tuna packed in water because it keeps the salad lighter and allows the fresh ingredients to stand out. For this recipe, I am using a tuna brand imported from Costa Rica called Tonnino. It’s a brand I enjoy using because it reminds me of flavors from home. You can find it here.

Can I make tuna salad ahead of time?

It’s best served shortly after mixing, since the vegetables can release moisture once salt is added.

Can I use fresh tuna instead of canned tuna?

Yes. You can cook fresh tuna, let it cool completely, and then break it into chunks before adding it to the salad.

What can I serve with tuna salad?

You can enjoy it with tortilla chips, crackers, bread, or serve it the Costa Rican way over freshly cooked rice.

🐟 Why I Keep Coming Back to This Tuna Salad

I love making this tuna salad not only because it reminds me of Costa Rica, but also because it is so quick to prepare. In less than 10 minutes you can have lunch, dinner, or even a light snack ready. You can enjoy it with white rice, crackers, or even wrap it in a crisp lettuce leaf for a fresh and simple meal.

If you would like to enjoy it the Costa Rican way, try pairing it with some of these recipes:

White Rice
Black Beans
Pickled Jalapeños
Homemade Corn Tortillas

Please let me know in the comments if there are any Costa Rican recipes you would like to see next. I would love to make them for you.

Besitos (kisses),
Mara

A bowl of tuna salad, showing tomatoes, onions and tuna mixed in

Tuna Salad Recipe (Ready in Under 10 Minutes)

Fresh, bright, and ready in under 10 minutes, this Costa Rican-style tuna salad combines canned tuna, crisp vegetables, and citrus for a light and flavorful meal. Perfect for lunch, dinner, or a quick snack.
Print Recipe Pin Recipe
Prep Time 5 minutes mins
Mixing Time 5 minutes mins
Total Time 10 minutes mins
Course Dinner, Lunch, Salad
Cuisine Costa Rican
Servings 6

Ingredients
  

  • ¼ red onion
  • Juice of 3 limes
  • 3 roma tomatoes
  • 2 celery tops
  • Small batch of cilantro
  • 2 cans of tuna 6.7 oz each
  • 1 teaspoon of salt
  • ½ teaspoon of black pepper
  • 1 teaspoon minced pickled jalapeños optional

Instructions
 

  • Thinly slice the red onion and place it in a bowl. Separate the layers with your fingers.
  • Add the lime juice and let the onions sit for about 5 minutes.
  • Slice the Roma tomatoes lengthwise and finely chop the celery tops and cilantro.
  • Add the vegetables to the bowl and stir to combine.
  • Break the tuna into chunks and add it to the salad.
  • Season with salt and black pepper and gently mix.
  • Add minced pickled jalapeños if you like a little heat and serve immediately.

Video

Notes

  • Let the onions sit in the citrus juice for a few minutes to soften their flavor and make them more pleasant to eat in raw salads.
  • Remove the seeds from the tomatoes if you prefer a less juicy tuna salad.
  • Break the tuna with your hands instead of a fork if you want to keep larger chunks in the salad.
  • Serve the tuna salad on its own, with tortilla chips, crackers, or over freshly cooked white rice.
  • For the best flavor and freshness, serve the tuna salad shortly after mixing it.
📌 For more recipes visit www.thelatinspoon.com
Keyword Quick Meals

Costa Rican Tortillas Aliñadas

Feb 27, 2026 · Leave a Comment

Three cooked Tortillas Aliñadas stacked on a round white plate, placed over a blue cloth, with a bowl of sour cream in the background.

These are not your typical corn tortillas. Tortillas Aliñadas are traditional Costa Rican tortillas made with cheese, sour cream, butter, and milk mixed directly into the masa. Soft, rich, and full of flavor in every bite, they take homemade tortillas to a completely different level.

Corn is especially celebrated in Nicoya, one of the world’s Blue Zones known for longevity, where it plays a key role in the daily diet. But the love for corn goes far beyond that region. Throughout Costa Rica, it’s eaten every day and cherished in homes across the country, making recipes like Tortillas Aliñadas deeply rooted in our culture.

Watch Video Here

What is Tortilla Aliñada?

A Tortilla Aliñada is not a stuffed tortilla. The cheese, sour cream, butter, and milk are mixed directly into the dough before cooking, so the flavor is built into the masa itself. The result is a softer, richer tortilla with cheese in every bite, not just in the center.
This is what we are going to need:

Ingredients for Tortillas Aliñadas

Remember, this ingredient list is based on what I was able to find. I encourage you to do the same and work with what you have available to you.

🌽 Corn Flour

Costa Rica is known for using nixtamalized corn flour, which means the corn has been soaked and cooked in an alkaline solution before being ground. This process improves flavor, texture, and nutrition.
It’s not difficult to find this type of corn flour, but you may not always see it at a regular grocery store. Check your local Latin or international markets, where it’s more commonly available. Look for a brand that is labeled specifically for making tortillas for the best results.

🧀 Cheese

In Costa Rica, Tortillas Aliñadas traditionally use one or two types of cheese, usually one that melts well and one that holds its shape. Over time, I’ve made this recipe so many times that I started adding a smoked cheese because it brings such a beautiful depth of flavor. Check the FAQs section below to see what types of cheeses you can use.

🥣 Sour Cream

Sour cream adds that slight tangy flavor to the tortillas that, combined with the salt and the touch of sugar, creates a very balanced result. For this recipe, I used regular sour cream from the grocery store, which is a bit thicker than Costa Rican natilla and also different from Mexican crema.

If you want to make these as close as possible to authentic Costa Rican Tortillas Aliñadas, visit your local Latin market and look for Central American crema. That’s exactly what we’re looking for.

🥛 Milk and Butter

Adding milk and butter increases the fat content in the dough, which helps prevent the tortillas from drying out once cooked. They also add richness and enhance the overall flavor.

🧂 Salt and Sugar

Both are added to enhance the flavors of the tortillas. Feel free to adjust the amounts to your liking or dietary needs.

💡 Extra Tips for Making Tortillas Aliñadas

  • Always preheat your comal before placing the tortillas to ensure even cooking and proper browning.
  • Let the dough rest for at least 10 minutes to allow the corn flour to fully hydrate. This improves texture and prevents cracking.
  • You can prepare the dough up to 1 day in advance. Store it tightly covered in the refrigerator and bring it back to room temperature before shaping.
  • Make half the recipe if you prefer, or prepare the full batch and freeze half for later use.
  • Tortillas can be made in your preferred size and thickness. Adjust the cooking time accordingly if you make them thicker or thinner.
  • Keep uncooked dough balls covered with a towel while shaping to prevent drying.

From Masa to Comal: Step-by-Step Photos

The full video for this recipe is on my YouTube channel if you’d like a clearer, more detailed walkthrough.

Step 1: Mix the dry ingredients

In a large bowl, combine the corn flour, salt, and sugar. Stir for a few seconds until evenly distributed.

Step 2: Add the liquid ingredients.

Add the milk, water, and melted butter. Make sure the butter is melted but not hot before adding it to the bowl.

Step 3: Mix and rest the dough.

Using your hands, mix everything together until a soft dough forms. Let the dough rest for 10 minutes to fully hydrate. If needed, add a small amount of liquid to adjust the texture.

Step 4: Add the cheese and sour cream.

Add in the shredded or crumbled cheeses, depending on the type you are using. Also add the sour cream and incorporate evenly into the dough.

Step 5: Mix and adjust flavor.

Continue mixing until everything is fully combined. Cook a small piece of dough to taste and adjust salt or sugar as needed.

Step 6: Shape the tortillas.

Divide the dough into equal portions and form balls. Shape them into flat rounds using your hands or a tortilla press, keeping them as even in size as possible.

Step 7: Cook on a hot comal.

Place the tortillas on a preheated comal or cast iron skillet. Cook for 1 to 2 minutes before flipping.

Step 8: Flip and finish cooking.

Flip the tortillas and cook for about 5 minutes total, or until golden brown on both sides. Serve with the fingerprint side facing up.

💡 Tortillas Aliñadas FAQs

Can I make Tortillas Aliñadas without cheese?

Technically, you can, but they would not be Tortillas Aliñadas. The term “aliñada” refers to something that has been enhanced or seasoned with additional ingredients. You would still get a delicious corn tortilla, but it would not be aliñada. Are you trying to make them vegan? If so, see the next question.

Can I make this version vegan or dairy-free?

Yes, you can! I love that you asked because I enjoy testing variations. I’ve made this recipe using vegan cheese and vegan butter with very good results. You can skip the milk and substitute it with water or any plant-based milk of your choice.

What type of cheeses can I use?

You can use many different types of cheese in this recipe. I recommend avoiding frying cheeses and sweet cheeses. Here are some good options:
Cheeses that melt well: mozzarella, provolone, Oaxaca, quesadilla cheese, Monterey Jack.
Cheeses that hold their shape: queso fresco, Cotija, farmer’s cheese.
Cheeses that add flavor: smoked gouda, smoked cheddar, Havarti with herbs, pepper jack, or any lightly smoked cheese.
Combining one melty cheese with one that holds its shape creates the best texture.

Can I freeze Tortillas Aliñadas?

Yes. I recommend freezing the dough before cooking. When you’re ready to use it, thaw it in the refrigerator or at room temperature. Once thawed, knead it gently with your hands, shape into tortillas, and cook as usual.

Why are my tortillas dry immediately after cooking?

If they feel dry right after cooking, your dough was likely too dry to begin with. Add a small amount of water and mix again until the dough feels smooth and soft. Always cook a small test piece first so you can adjust the texture before shaping all the tortillas.

Why are my tortillas dry the next day?

You did nothing wrong. That’s simply how cooked corn behaves over time when exposed to air. To refresh them, lightly dampen the tortillas with a bit of water, cover with a damp towel, and microwave in 30-second intervals until soft and warm again.

🌽Why these Tortillas are worth making

Tortillas Aliñadas are not meant to replace regular corn tortillas. They are thicker, slightly firm on the outside, and not as flexible, which means they’re not ideal for folding into gallos (AKA tacos). For that, you’ll want the classic Corn Tortilla Recipe.

Tortillas Aliñadas are meant to be enjoyed differently, served alongside Gallo Pinto for breakfast, paired with coffee or aguadulce in the afternoon, or simply eaten on their own with a little natilla on top. Knowing how to make both styles gives you versatility in your kitchen and keeps this tradition alive in the way it was meant to be enjoyed.

Find the recipe for Gallo Pinto here.

And if you’re planning to serve Tortillas Aliñadas for coffee time, don’t forget to bring a slice of Fig Cake as well.

This channel is all about Costa Rican food. Let me know in the comments if there’s another recipe you’d like to see next on the channel.

Besitos (kisses),
Mara

Three cooked Tortillas Aliñadas stacked on a round white plate, placed over a blue cloth, with a bowl of sour cream in the background.

Authentic Tortillas Aliñadas from Costa Rica

Tortillas Aliñadas are traditional Costa Rican corn tortillas enriched with cheese, sour cream, butter, and milk mixed directly into the masa. Unlike stuffed tortillas, the flavor is built into the dough, creating rich, slightly creamy tortillas full of cheese in every bite. Perfect for breakfast with Gallo Pinto or enjoyed warm with a cup of coffee.
Print Recipe Pin Recipe
Prep Time 15 minutes mins
Cook Time 20 minutes mins
Total Time 35 minutes mins
Course Breakfast, Side Dish
Cuisine Costa Rican
Servings 12 Tortillas

Equipment

  • Large Mixing Bowls
  • Measuring cups and spoons
  • Comal or cast iron skillet

Ingredients
  

  • 2 cups corn flour
  • 2 teaspoons salt
  • 2 teaspoons sugar
  • 1 cup milk
  • 1 cup water
  • ½ cup sour cream
  • 1 cup shredded mozzarella cheese
  • 1 cup crumbled queso fresco
  • 1 cup shredded smoked cheese

Instructions
 

  • Add the corn flour to a large bowl. Stir in the salt and sugar until combined.
  • Add the water and milk to the corn flour. Using clean hands, begin mixing until the dough comes together. Continue mixing for about 2 minutes as the flour hydrates. The dough will go through stages: lumpy, wet, then slightly dry. It should no longer stick to your hands.
  • Add melted butter to the dough and mix for 2 more minutes, or until fully incorporated. If you feel small lumps, break them apart with your fingers.
  • Let the dough rest for 10 minutes to fully hydrate.
  • Add the shredded and crumbled cheeses to the dough, along with the sour cream. Mix for 2 to 3 minutes until everything is evenly incorporated.
  • Taste the dough and adjust with additional salt or sugar if needed, depending on the cheeses and sour cream used.
  • Divide the dough into 12 medium-sized portions and form into balls. If desired, freeze half of the dough for up to 3 months.
  • Flatten each dough ball by hand or between plastic sheets until evenly shaped. Try to keep all tortillas the same size for even cooking.
  • Preheat a comal or skillet over medium heat. Carefully transfer each tortilla onto the hot surface. Cook for about 1 minute on the first side, then flip and cook another minute. Flip once more if needed and continue cooking until golden brown on both sides, about 5 minutes total.
  • Place cooked tortillas inside a clean kitchen towel to keep warm while you finish cooking the rest. Serve warm on their own, with sour cream, or alongside your favorite Costa Rican dishes.

Video

Notes

  • For the best flavor and texture, use a combination of three cheeses: one flavorful cheese (like smoked gouda or smoked cheddar), one melty cheese (like mozzarella or provolone), and one that holds its shape (like queso fresco).
  • Shredding your own cheese from a block will give you better melting results than using pre-shredded cheese, which often contains anti-caking agents.
  • Queso fresco does not need to be grated. Simply crumble it with your hands before mixing it into the dough.
  • You can use regular sour cream, Costa Rican natilla, or Central American crema. Each will slightly change the flavor and richness of the tortillas.
  • The fingerprint marks left when shaping by hand are traditional and a sign of handmade tortillas. Serve them fingerprint side up for a beautiful presentation.
  •  
📌For more Costa Rican Recipes visit www.thelatinspoon.com
Keyword Cheese Tortillas, Corn Tortillas

Costa Rican Style Rice Pudding

Feb 20, 2026 · Leave a Comment

three glass jars filled with rice pudding, each topped with half a strawberry. Two of the jars have a spoon inserted inside. On the countertop around the jars, there are whole cloves scattered, along with a few whole strawberries placed next to them.

Rice pudding is a staple in Costa Rican cuisine and one of the first desserts I had to share on this channel. In this version, we build flavor step by step using cloves, cinnamon sticks, lemon peel, and different types of milk to control texture and creaminess.

Three glass jars filled with rice pudding, each topped with half a strawberry. Two of the jars have a spoon inserted inside. On the countertop around the jars, there are whole cloves scattered, along with a whole strawberries and cinnamon sticks placed next to them.

In Costa Rica, rice plays a central role in our everyday cooking, it’s part of nearly every meal and a familiar companion in the kitchen. From a simple pot of White Rice to our iconic Gallo Pinto, rice is woven into daily life. So it’s no surprise that a dessert made from rice feels just as meaningful and ever-present in our homes.

Creamy Rice Pudding

What makes rice pudding special is how every family prepares it differently. Some add raisins, others love using coconut milk for extra richness, while some brighten it with a little lemon zest, or deepen the flavor with more cinnamon and cloves. These variations tell a story of family traditions, weekend gatherings, and the familiar smells of kitchens we grew up in.

Whether you enjoy it warm with a sprinkle of cinnamon or chilled straight from the fridge, this rice pudding captures the soul of Costa Rican home cooking: simple, heartfelt, and made to be shared.

A top-down shot of the ingredients: cup of milk, cup of condensed milk, cup of rice, a small cup of sugar, a small cup of powdered milk, some cinnamon sticks, a small cup of cloves, one lemon, salt, and vanilla extract.

What You’ll Need for This Recipe

Rice pudding can be made in many different ways. Here are the ingredients I chose for this version.

🍚 Rice

Use regular white rice. I’m using long grain white rice, which is the most common type used in Costa Rica for arroz con leche. I’ve tried it with others too, jasmine, arborio, you name it, and they all work with slightly different textures. Just avoid pre cooked or instant rice, since it doesn’t absorb flavor the same way.

🥛 Milk

The traditional version uses regular cow’s milk but you can use any type of milk for this recipe. Almond, soy, whole, or lactose-free milk are all suitable options.

🥫 Condensed milk

This gives most of the sweetness and creaminess. You can adjust the amount depending on how sweet you like your pudding. Also use vegan condensed milk if you desire.

🥄 Powdered milk

Powdered milk boosts the creaminess and gives the pudding a richer flavor. You can use any brand and adjust the amount depending on how thick you want it. I’m using Leche Pinito, a staple in many households in Costa Rica. I usually bring a bag when I visit, but it's pretty easy to find it online. Find Leche Pinito here. If you don’t have it, you can skip it. The recipe will still work just fine.

🍬 Sugar

White sugar is the standard option and gives the most neutral flavor. You can also use brown sugar, coconut sugar, or raw sugar, but keep in mind that these alternatives may slightly change the color and taste of the rice pudding.

🍋Lemon

Use the peel to add aroma and flavor. Make sure not to include too much of the bitter white part. Lime and orange peel can work if you don’t have lemon.

⭐ Cloves and Cinnamon sticks

I’m using whole cloves and whole cinnamon sticks. If you prefer the ground versions, you can use them, just keep in mind they will slightly change the color of your pudding. It will still taste delicious, but it won’t be as white as you might expect.

🍦 Vanilla extract

Adds aroma and ties all the flavors together. Use real vanilla extract if possible, I am using imitation vanilla because I want to keep my rice pudding as whiter as possible.

🧂 Salt

Always add a small pinch of salt, even in desserts. It doesn’t make the pudding salty, instead, it enhances the sweetness and balances the flavors. Just a little goes a long way.

A small cup filled with rice pudding sits in the front. Next to it, there are a few cloves, some strawberries, and a stick of cinnamon. In the background, there are additional cups of rice pudding, each topped with a half strawberry and with spoons placed inside.

💡Pro Tips for Creamy Rice Pudding

  • Stir often. Gentle, frequent stirring prevents sticking and helps release the rice’s natural starch for a creamier texture.
  • Low and slow. Keep the heat at a gentle simmer so the rice absorbs the milk gradually and evenly.
  • Adjust thickness. If the pudding becomes too thick, add a splash of warm milk and stir until it reaches your desired consistency.
  • Remove whole spices. Take out cinnamon sticks, cloves, and lemon peel once the flavor has infused to avoid bitterness.
  • Customize it. Add raisins, shredded coconut, chopped nuts, or a swirl of dulce de leche for extra flavor.
  • Better next day. Rice pudding tastes even better after resting, as the flavors deepen overnight.

Step-by-step photos

Follow along with these step-by-step photos to see just how easy it is to make this creamy, comforting rice pudding.

A hand holds a bowl of rice and pours it into a pot on the stove.

Step 1: Rinse the rice

Rinse the rice under water until it runs mostly clear. This helps remove excess starch and keeps the pudding from turning gummy.

A pot with rice, water, cloves, and cinnamon sticks is visible in the back. One hand holds a lemon, and the other hand cuts the peel with a knife

Step 2: Start the simmer.

Add the water, sugar, cinnamon sticks, cloves, and lemon peel to the pot. Stir until the sugar dissolves, then place over medium heat.

A pot with rice, whole cloves, cinnamon sticks, and small pieces of lemon peel.

Step 3: First simmer.

Cover and cook for about 10 minutes, remove the lid and stir.

A pitcher of milk being poured into a pot containing rice, cinnamon sticks, cloves, and small pieces of lemon peel.

Step 4: Add first milk.

Add add 1 cup of milk. Cover again and cook for 5 minutes, or until the milk is mostly absorbed.

A pitcher of milk being poured into a pot containing rice, cinnamon sticks, cloves, and small pieces of lemon peel.

Step 5: Repeat the process

Repeat the process of adding milk, covering, and cooking two more times, stirring between each round.

Cooked rice pudding in a pot while pink tongs remove a cinnamon stick from the mixture, illustrating the step where the cinnamon sticks, cloves, and lemon peel are taken out of the recipe.

Step 6: Remove whole spices.

Once the rice is tender and has doubled in size, remove the cinnamon sticks, cloves, and lemon peel.

A pot of rice pudding cooking on the stove, the mixture looks creamy and the rice grains have noticeably doubled in size after absorbing the liquid.

Step 7: Boost the creaminess.

Add two more cups of milk and the powdered milk, little by little, stirring well after each addition to avoid lumps. Cover with the lid and cook for 5 to 10 more minutes.

A cup of condensed milk being poured with a spatula into a pot of rice pudding

Step 8: Sweeten and finish.

Stir in the condensed milk, vanilla extract, and salt. If using raisins, add them at this stage.

A hand holds a spatula inside the pot of rice pudding, lifting a small portion of the mixture. In the background, slightly out of focus, there is a small cup filled with cloves.

Step 9: Cook to desired consistency.

Continue cooking for 7–10 minutes, stirring often, until the rice pudding reaches your desired consistency.

A metal bowl placed inside another metal bowl is held with one hand, while the other hand uses a spatula to mix the rice pudding. In the background, there is a glass of milk.

Step 10: Cool quickly.

To prevent the rice pudding from drying out or forming a thick skin, place the bowl over another bowl filled with ice and gently stir until it cools down.

💡Rice Pudding Questions, Answered

Can I make this rice pudding dairy-free?

Yes. You can use coconut milk, oat milk, almond milk, or any plant-based milk you prefer. Keep in mind that coconut milk will give a richer, more tropical flavor. Also substitute the condensed milk for vegan condensed milk.

Can I use Arborio or Jazmine rice?

Yes! Arborio rice is excellent for rice pudding because of its high starch content. However, this is a Costa Rican-style version, and traditionally we use long-grain rice since that’s what we grow and cook with most often.

Can I freeze rice pudding?

I don’t recommend freezing it. Milk-based desserts tend to separate once thawed. Stored in the refrigerator, rice pudding will keep well for up to 5 days.

Can I make half the recipe?

Absolutely. Simply divide all ingredients in half. That said, in my experience, rice pudding disappears very quickly once shared with family and friends.

💛 From My Kitchen to Yours

There’s something about arroz con leche that always takes me back to simple moments in the kitchen, a pot gently simmering on the stove, the smell of cinnamon in the air, and the quiet joy of making something from scratch for the people I love.

Here are some other Costa Rican desserts you might enjoy.
Fig Preserves
Fig Cake with condensed milk glaze
Tropical Fruit Salad

If you try this recipe, I would love to hear how you enjoyed it. Share your photos and stories with me, seeing your creations truly makes my day.

Besitos,
Mara 💛🍚

three glass jars filled with rice pudding, each topped with half a strawberry. Two of the jars have a spoon inserted inside. On the countertop around the jars, there are whole cloves scattered, along with a few whole strawberries placed next to them.

Costa Rican Style Rice Pudding

A creamy Costa Rican arroz con leche made with cinnamon, cloves, and lemon peel, slow-cooked and layered with different types of milk for the perfect texture. Simple, comforting, and easy to customize to your taste.
Print Recipe Pin Recipe
Prep Time 15 minutes mins
Cook Time 50 minutes mins
Total Time 1 hour hr 5 minutes mins
Course Dessert
Cuisine Costa Rican
Servings 10 servings

Equipment

  • 1 large pot
  • 1 spatula
  • measuring cups
  • 1 strainer
  • 1 large bowl

Ingredients
  

  • 2 cups rice
  • 3 cups water
  • 1 cup sugar
  • 6 cups milk
  • 10 units cloves
  • 1 cup powdered milk
  • ½ rind lemon
  • 4 sticks cinnamon
  • 1 can condensed milk
  • 1 teaspoon vanilla extract

Instructions
 

  • Rinse the rice under cold water. In a large pot, add the water and the rinsed rice, along with the sugar, cloves, cinnamon sticks, and lemon peel. Stir until the sugar dissolves, then cover and cook over medium heat for 10 minutes.
  • Remove the lid and stir. Add 1 cup of milk, cover, and cook for 5 minutes.
  • Remove the lid, stir, and add another cup of milk. Cover and cook for 5 minutes. Repeat one more time: stir, add 1 cup of milk, cover, and cook for 5 minutes.
  • Once the rice has been cooking for about 30 minutes, remove the cinnamon sticks, cloves, and lemon peel. This prevents the rice pudding from developing an overpowering or slightly bitter taste.
  • Add 2 more cups of milk and stir. Cover and cook for 5–10 minutes, or until rice is fully cooked.
  • Gradually add the powdered milk, stirring well after each addition to avoid lumps. You can also dissolve the powdered milk in a cup of water, not listed in the ingredients, before adding it to the rice pudding if you prefer a smoother incorporation.
  • Add the condensed milk, 2 more cups of milk, vanilla extract, and salt. If using raisins, add them at this stage. Stir constantly, this step is important to achieve a creamy rice pudding, prevent lumps, and avoid scorching the milk and sugar at the bottom of the pot.
  • Stir and continue cooking for 7 to 10 minutes, or until the rice pudding reaches your desired consistency. Once you’re happy with the texture, transfer it to a bowl and let it cool naturally, or place the bowl over an ice bath if you’d like to speed up the cooling process.

Video

Notes

  • Use ground cinnamon if that’s what you have, just expect a slightly darker pudding. The flavor stays the same, only the color changes.
  • Stir gently and avoid scraping the bottom of the pot to prevent mixing in the “costra.”
  • Cook a few extra minutes for a thicker texture. Add a splash of milk and cook briefly if you prefer it thinner. Adjust it to your taste.
  • Remember that rice pudding thickens as it cools. Check the consistency before it sets and adjust if needed.
  • Powdered milk boosts creaminess, but the recipe will still work without it.
 
📌 For more recipes, visit www.thelatinspoon.com
Keyword Costa Rican Basics

Ground Beef Picadillo

Jan 30, 2026 · Leave a Comment

A bowl of ground beef picadillo with small pieces of potato and carrot, served with a few cilantro leaves on the side.

Ground beef picadillo is a classic in Latin cuisine. Every country has its own version and there are thousands of possible ingredient combinations, but without a doubt, every version is delicious. This is the Costa Rican version. Watch the video here.
I make this Ground Beef Picadillo on those days when I want something cozy and comforting. It’s packed with tender potatoes, carrots, and a rich, savory sauce that slowly simmers, allowing all the flavors to develop and concentrate. It somehow tastes even better the next day, if there’s any left.

A bowl on a kitchen towel filled with ground beef picadillo with potatoes and carrots.
In the background, there’s a bowl of white rice, two lemon slices, a small cup of pico de gallo, and a few cilantro leaves on the side.

What is picadillo?

To start, the word itself gives us clues about what picadillo is. It comes from the verb “to chop” or “to mince” and refers to a mixture of finely chopped ingredients stirred together to create a dish made of small, chopped components. Picadillos in Costa Rica are usually served with White Rice and Black Beans for a complete meal.

Picadillos can be:

Vegan: The main ingredients are vegetables. We can make combinations like potatoes with carrots, potatoes with broccoli, squash with corn, and many more.

Vegetarian: Vegetables are still the main ingredient, but they are paired with animal byproducts such as eggs and dairy. One delicious example is chayote with sweet corn and heavy cream.

Picadillos with meat: In this type of picadillo, we include everything. Vegetables, animal protein, and sometimes dairy products like milk or heavy cream.

A plate served with a bed of white rice topped with ground beef picadillo with potatoes and carrots.
In the background, a few lemon pieces

Why We Love Picadillos 🍲

They are easy to make. You simply chop the vegetables, cook the meat, season everything, and let it simmer. They require very little hands on time and you only need a cutting board, a knife, one pot, and a spoon. That also means less time spent cleaning.

They are budget friendly 💲. Picadillos are mostly made with vegetables, which are more affordable than many other ingredients. They are also a great way to use up leftover vegetables sitting in the fridge, like half an onion, a bell pepper, a couple of carrots, or a few potatoes.

They are nutritious. Since vegetables are the base, picadillos provide a balanced and nourishing meal.

They are great for meal prep. You can make a big batch, portion it out for the week, and enjoy a recipe that includes all the macros needed for a balanced diet.

Ingredients I am using

🥩Ground beef

The one I’m using is 93–7. This means that 93 percent of its content is meat and the remaining 7 percent is fat. There are many different types of ground beef available on the market and they are all delicious, but it’s important to know that the higher the fat content, the more the meat will shrink once it’s cooked.

On the other hand, the higher the percentage of meat, the higher the price. That’s why I recommend using the ground beef that best fits your budget, your taste, and what’s available where you live.
You could also substitute for 80-20% ground beef, ground turkey or chorizo.

🥔Potatoes

Use yellow potatoes because they hold their shape while cooking. Other varieties may soften more, but they still work. You can also use green beans, chayote, or zucchini as substitutes.

🥬Sofrito

Sofrito is a flavorful base that gives this recipe its soul. Check out my Sofrito here. It’s something you can prepare ahead of time and keep in your fridge to elevate soups, stews, beans, sauces, and so many everyday meals.

🌶️Achiote

This gives the picadillo its beautiful warm color and a slightly earthy note. Fin your achiote at a Latino store near by or by following the link here.

🍲Chicken or beef stock

Beef stock is ideal for this picadillo since we’re cooking with beef, but chicken stock works perfectly if that’s what you have on hand, like me. Vegetable stock can also be used, adding a slightly different but still rich flavor.

💡 Kitchen Notes & Helpful Tips

  • Cut evenly. Try cutting both the potatoes and carrots into uniform pieces. This helps them cook evenly and gives your picadillo that clean, polished look that feels restaurant-worthy.
  • Drain if needed. If the beef releases too much liquid (common with fattier cuts), drain the excess before adding the achiote.
  • Adjust the spices. Swap all herbs and spices for taco seasoning if you need a shortcut.
  • Add greens. Stir in spinach or kale at the end for extra color and nutrition.
  • Make it ahead. Picadillo tastes even better the next day once the flavors settle.
  • Control the texture. Add a splash of stock for a saucier picadillo, or cook uncovered longer for a thicker consistency.

Step-by-Step: Costa Rican Ground Beef Picadillo

Here’s how to make it so the beef stays juicy, the potatoes tender, and the sauce rich and full of warmth.

A Dutch oven with raw ground beef inside, a spatula held by a hand stirring it, and small bowls of onion and celery in the background.

Step 1: Start with the Beef.

Place a large pot or Dutch oven over medium heat. Add the ground beef and start breaking it apart with a stiff spatula while it cooks.

A Dutch oven with cook ground beef inside, a spatula held by a hand stirring it, and small bowls of onion and celery in the background.

Step 2: Brown the Meat.

Keep stirring until the meat is fully browned and no pink spots remain. This process usually takes about 7 to 10 minutes.

A ladle draining cooked ground beef from the Dutch oven, with more beef remaining at the bottom.
In the background, there are small bowls of onion and celery.

Step 3: Drain the Excess Liquid.

If the beef releases liquid or fat, you can drain it for a leaner dish or keep it if you prefer a richer flavor.
Once done, remove the beef from the pot and set it aside in a separate bowl.

Step 4: Add Achiote.

In the same pot, add the achiote paste and oil. Stir until the achiote dissolves and releases its color. Then add the potatoes and cook for 2 more minutes.

Step 5: Add the vegetables.

Add the carrots, bell pepper and garlic, stir, and cook for about 2 minutes, be careful to not burn the garlic.

Step 6: Add the Liquids.

Add the marinara or pasta sauce, the beef, chicken or vegetable stock.

A Dutch oven with the picadillo and ground beef on top with few bay leaves, a hand holding a spoon of salt above as if sprinkling it in.

Step 7: Add the Seasonings.

Add the bay leaves, dried oregano, black pepper, cumin seeds, salt, and chili powder (optional).
Stir gently to combine all the flavors.

A Dutch oven with ground beef picadillo containing potatoes and carrots, with a hand stirring it using a spatula.

Step 8: Simmer.

Place the lid on the pot and cook for about 20-25 minutes.

A Dutch oven with ground beef picadillo containing potatoes and carrots, and a kitchen towel in the background.

Step 9: Adjust Seasoning and Reduce.

Remove the lid and check the seasoning.
Add more salt, chili powder, or cumin to taste. Keep cooking uncovered over low heat for 20 to 30 minutes, stirring occasionally, until the liquid reduces.

A Dutch oven with ground beef picadillo containing potatoes and carrots, while a small cup of chopped cilantro is being poured in and a kitchen towel in the background.

Step 10: Finish with Cilantro.

Remove the bay leaves.
Add the chopped cilantro and stir gently before serving.

🥄 Frequently Asked Questions

Can I make this recipe in the Instant Pot?

Yes, you can. Cook the ground beef first using the Sauté function to break it apart. Then, add the rest of the ingredients raw and cook under high pressure for 10 minutes. Release the pressure naturally and stir before serving.

Can I make this recipe in a slow cooker?

Yes. Brown the ground beef in a skillet before transferring it to the slow cooker. Add all other ingredients and cook on low for 6 to 8 hours or on high for 3 to 4 hours.

Can I freeze Picadillo?

Absolutely. Let it cool completely, then transfer it to an airtight container.
Freeze for up to 3 months. To serve, thaw it in the fridge overnight and reheat on the stove over low heat.

🍽️Why this picadillo deserves a spot on your table

Picadillo is one of those dishes that brings comfort, tradition, and practicality together in one pot. In Costa Rica, picadillos are usually made with vegetables, and meat is added to complement the dish, making it more nutritious and higher in protein. It’s made with simple, affordable ingredients and slowly simmered to develop deep, rich flavors. It’s perfect for feeding a family or for meal prep. Every country has its own version, which makes it a dish that connects cultures, kitchens, and generations. Once you make it, you’ll understand why picadillos are a staple in Latin homes.

Please serve this picadillo with warm white rice, freshly made black beans, a slice of avocado, and a delicious pitaya lemonade. You can find all of these recipes right here on the blog.

See you next week!
Besitos (kisses),
Mara

A bowl of ground beef picadillo with small pieces of potato and carrot, served with a few cilantro leaves on the side.

Ground Beef picadillo

This Ground Beef Picadillo is a quick, flavorful, and comforting dish that combines tender potatoes, carrots, and savory ground beef in a rich sauce.
Print Recipe Pin Recipe
Prep Time 10 minutes mins
Cook Time 1 hour hr 20 minutes mins
Course Picadillo
Cuisine Costa Rican
Servings 8 people

Equipment

  • Dutch oven or big pan
  • 1 spatula
  • 1 Cutting board and knife

Ingredients
  

  • 1 lb ground beef
  • 1 teaspoon achiote paste
  • 1 tablespoon oil
  • 5-6 medium size potatoes
  • 2-3 carrots
  • ½ onion
  • 1-2 celery sticks
  • ¼ bell pepper
  • 3-5 cloves garlic
  • 1 cup marinara sauce
  • 2 cup chicken or beef stock
  • 3-5 unit bay leaves
  • 1 teaspoon dried oregano
  • 1 teaspoon black pepper
  • 1 teaspoon cumin seeds
  • 2½ teaspoon salt
  • ¼ teaspoon chili powder
  • 1 small bunch cilantro

Instructions
 

  • Place a large pot or Dutch oven over medium heat. Add the ground beef and break it apart with a stiff spatula. Cook until fully browned, about 7–10 minutes, and drain excess liquid if desired. Remove the beef and set aside.
  • In the same pot, add achiote paste and oil. Stir until melted and colored with red. Add potatoes, carrots, garlic, onion, celery, and bell pepper. Cook for about 3–4 minutes, stirring occasionally, until the vegetables start to soften.
  • Pour in the marinara sauce and chicken or beef stock. Stir to combine and cook for 2 minutes.
  • Return the cooked ground beef to the pot. Add bay leaves, dried oregano, black pepper, cumin seeds, salt, and chili powder (optional). Stir gently to mix all the flavors.
  • Cover the pot and cook for about 10 minutes. Remove the lid, stir, cover again, and continue cooking. Repeat this until the picadillo has cooked for approximately 35 minutes, adjusting heat to maintain a gentle simmer. Remove the lid, taste, and adjust seasoning if needed. Continue cooking uncovered for 20–30 minutes until the sauce reduces and thickens.
  • Remove the bay leaves. Add chopped cilantro and stir gently before serving. Serve with warm white rice and freshly made black beans.

Video

Notes

  • You can use ground beef, turkey, chicken, or chorizo.
  • Dice the vegetables into evenly sized small cubes so they cook at the same rate.
  • Keep a gentle simmer; high heat can break down the potatoes and carrots.
  • Adjust chili powder or add chipotle if you like more heat.
📍 For even more delicious recipes visit www.thelatinspoon.com
Keyword Costa Rican Basics

Pico de gallo

Dec 5, 2025 · Leave a Comment

A ceramic bowl containing pico de gallo made with tomato, onion, and green chili. In the background, there are tomatoes, a small cup with sliced jalapeños, a small cup with chips, some limes, and cilantro.

Fresh, colorful, and full of flavor, this Pico de Gallo is one of those simple recipes that instantly makes any meal brighter. Every bite has that perfect mix of tomato, onion, cilantro, and lime — refreshing and tangy all at once.

A ceramic bowl containing pico de gallo. A right hand holds a tortilla chip being dipped into the pico de gallo. On the sides, out of focus, there are tomatoes, tortilla chips, cilantro leaves, and limes.

I’ve always believed that Pico de Gallo is one of those recipes that truly belongs to everyone. Across Latin America, you’ll find it in different forms — sometimes spicier, sometimes milder, but always fresh, colorful, and full of life. In Costa Rica, this simple mix of chopped veggies has a special place on the table. It’s that easy side dish that makes everything taste a little better — from rice and beans to grilled meats or gallos wrapped in a warm tortilla.

Costa Rican Pico de Gallo

Now here’s something interesting — in Costa Rica, many people, especially older generations, call this dish “Chimichurri.” I know, it’s not the same green sauce from Argentina that’s poured over meat, but what can I say? In Costa Rica, that’s what we call it, and I kind of love that. So yes, this is my version of Costa Rican Chimichurri — Mara-style.

I also like to add jalapeños, sometimes fresh, sometimes from my own Pickled batch, because I enjoy a little heat in my food. And while not everyone in Costa Rica eats spicy, that’s okay — the beauty of cooking is that you make it your own.

Even the way we chop the vegetables changes from home to home. Some like them chunky, others prefer them finely chopped, like I do. It’s not about being fancy — it just helps the flavors mix better and makes the dish look cleaner and more vibrant.

And then there’s the lime juice, that’s where all the magic happens. In Costa Rica, we don’t usually use lemons; we use limón mandarina or limón criollo, which have a softer acidity and a slightly floral taste that’s hard to replicate abroad. Here in Missouri, I work with what I have — limes or lemons, whichever I can find — and while the flavor is a little different, the acidity still does its job beautifully. It balances the onion, brightens the tomatoes, and ties everything together in that perfect, tangy bite that makes Pico de Gallo so addictive.

If you’d like to see exactly how this recipe is made, click here to follow along with the video.

From a top view, the ingredients: tomatoes, onion, limes, bell pepper, jalapeños, cilantro, sugar, salt, and blackpepper.

What Goes Into Pico de Gallo

🧅 Onion

I prefer using yellow or sweet onion for balance; soak it in lime juice to mellow that sharp-raw flavor.

🍅 Tomatoes

I like to use Roma tomatoes because they’re firm, full of flavor, and easy to work with. I remove the seeds and the juicy center, keeping only the meaty part — that’s what keeps the Pico de Gallo fresh and not watery..

🌶️Bell pepper

For this recipe I recommend green bell pepper for color and crunch, but any color works.

🌿 Cilantro

Just a little bit add lots of flavor.

🌶️ Jalapeños

I love adding a bit of heat with jalapeños. These can be fresh or pickled — use whichever you have on hand. Removing the seeds will make them milder, but if you like spicy food, keep them in. I often use Homemade Pickled Jalapeños made by myself.

🍋Lemon Juice

Adds acidity and freshness that bring the whole pico together. It balances the onion and keeps the flavor bright. If limes aren’t available, lemons work too, though the taste will be slightly sharper.

🧁 Sugar

Just a small teaspoon to balance the acidity. It won’t make your Pico de Gallo sweet, but it will enhance the flavor and make everything taste more rounded.

Salt and black pepper

I always add a pinch of salt and pepper at the end — just enough to balance things out. Salt brightens the tomatoes and lime, while pepper brings a cozy warmth that ties it all together.

A ceramic bowl containing pico de gallo made with tomato, onion, and green chili. In the background, there are tomatoes, a small cup with sliced jalapeños, a small cup with chips, some limes, and cilantro.

🥄 Helpful Tips Before You Start

  • Don’t add the salt too early. If you’re not serving the pico right away, wait until the last minute to season it — salt makes the tomatoes release water and turns the mix too soupy.
  • Make it fresh. Pico de Gallo is best eaten the same day; it starts losing freshness after a few hours.
  • Control the texture. Leave the tomato seeds in, if you like it juicier and for a drier version, remove them and the inner liquid.
  • Chill before serving. Let it rest in the fridge for 15–20 minutes so the flavors combine and cool down nicely.
  • Play with add-ins. You can mix in chopped garlic, celery, or even radishes for more crunch and color.
  • Storage. Keep it refrigerated in an airtight container and eat it within 24 hours — after that, it starts getting watery and soft.

🍅 Step by Step for Pico de Gallo

Just follow these steps and you’ll have fresh Pico de Gallo in minutes.

On a cutting board, an onion is being finely chopped with a knife held in the right hand, while the left hand assists with the cutting motion. In the background, there are tomatoes.

Step 1: Chop the onion.

Cut the onion into small cubes. Add them to a medium size bowl.

A hand squeezes a lime over a strainer placed on top of a bowl containing chopped onion. In the background, there are tomatoes.

Step 2: Add the lime juice

Squeeze the limes and pour the juice over the chopped onion. Stir and let it sit while you prepare the rest of the ingredients.

A cutting board with several halved tomatoes. The left hand holds one tomato half while the right hand uses a spoon to remove its seeds. Whole tomatoes are placed off the board.

Step 3: Prep the tomatoes.

Cut the Roma tomatoes in half, remove the seeds and the juicy center.

On a cutting board, small cubes of tomato are visible, and a tomato is being cut into thin strips. The knife is held in the right hand, while the left hand holds the tomato steady.

Step 4: Slice the tomatoes.

Cut the meaty part into long thin strips — this makes it easier to get even pieces.

On a cutting board, the left hand holds the tomato while the right hand uses a knife to cut it into small pieces. Whole tomatoes are visible in the background.

Step 5: Dice the tomatoes.

Turn those strips and cut them in the opposite direction to form small cubes. Add them to the onion and lime mixture.

A bowl containing tomato, bell pepper, and onion. A spoon is inside the bowl, and tomatoes are visible in the background.

Step 6: Add the bell pepper.

Dice the bell pepper into small, even pieces and add it to the bowl. Mix it with the tomato, onion and lime juice.

n a bowl, the pico de gallo mixture is visible, while a cutting board above it is pouring chopped cilantro into the mix. Next to the bowl, there are tomatoes.

Step 5: Add the cilantro and jalapeño.

Chop the cilantro finely. Then chop the jalapeño and add it to the bowl. Combine it all with the tomato mix.

A left hand holds a small bowl containing sugar, while the right hand holds a measuring spoon scooping the sugar to add it to the pico de gallo mixture below. In the background, there are tomatoes for decoration and a small cup of salt.

Step 6: Add sugar and black pepper

Sprinkle a little white sugar and black pepper over the mixture. Mix everything gently until well combined. Add salt right before serving.

🥄 Frequently Asked Questions

How long does pico de gallo stay fresh?

Pico de gallo tastes best within the first 1–2 hours after making it. Refrigerate it for up to one day, but the vegetables will start losing their crunch and freshness.

Can I freeze pico de gallo?

No, it’s not a good idea to freeze pico de gallo. Once it thaws, the tomatoes release too much water and the texture turns soft and mushy. This is a fresh salsa that’s meant to be enjoyed right after making it.

🌶️ Why Pico de Gallo never fails

Tomatoes are one of those ingredients we all have at home, and it’s amazing how with just a few extra touches, you can turn them into something so vibrant and flavorful.

It’s perfect over nachos, or spooned next to rice and beans for a quick, homemade meal. Try it over my Costa Rican Hot Dogs. Some people even eat pico de gallo as a light salad, and honestly, I can’t blame them.

Whenever you make this recipe, send me a photo or video! I love seeing your versions, every bowl of pico de gallo has its own personality. Don’t forget to like, comment, and share if you enjoyed it; that’s how this little community keeps growing, one bite at a time.

Because at the end of the day, that’s what I love most about food — how something so bright, simple, and familiar can bring us together across tables, stories, and countries. ❤️
Kisses and hugs,
Mara

A ceramic bowl containing pico de gallo made with tomato, onion, and green chili. In the background, there are tomatoes, a small cup with sliced jalapeños, a small cup with chips, some limes, and cilantro.

Pico de gallo

This Costa Rican-style pico de gallo is fresh, colorful, and full of flavor. Made with tomatoes, onions, bell pepper, cilantro, lime, and just a hint of sugar, it’s the perfect side to brighten any meal.
Print Recipe Pin Recipe
Prep Time 10 minutes mins
Total Time 10 minutes mins
Course Healthy, Salad
Cuisine Latin
Servings 8 people

Equipment

  • Cutting board and knife
  • Medium size bowl
  • strainer
  • measuring spoons

Ingredients
  

  • ½ yellow or sweet onion
  • 3 limes
  • 6-7 tomatoes
  • ¼ green pepper
  • 1 small bunch cilantro
  • jalapeños to taste
  • ½ teaspoon black pepper
  • 1 teaspoon salt
  • ½ teaspoon sugar

Instructions
 

  • Cut the onion into small cubes. Place the chopped onion in a medium bowl.
  • Cut the limes in half and squeeze them. Pour the juice over the onion, stir gently, and let it sit while you prepare the rest of the ingredients. This helps soften the raw flavor of the onion.
  • Cut the roma tomatoes in half, remove the seeds and juicy center to avoid excess liquid.
  • Cut the firm part of the tomatoes into long, thin strips. This makes it easier to get even pieces later. Turn the strips and cut them in the opposite direction to form small cubes. Add them to the bowl with the onion and lime juice.
  • Dice the bell pepper into small, even pieces and mix it with the tomatoes, onion, and lime juice.
  • Finely chop the cilantro, then the jalapeño. Add both to the bowl and stir to combine all the colors and flavors.
  • Sprinkle a small amount of white sugar and black pepper over the mixture. Mix everything gently until well combined. Taste and adjust salt, pepper, or jalapeño to your liking.

Video

Notes

  • Add salt at the end: If you’re not serving it right away, season just before eating.
  • Best fresh: Pico de Gallo tastes best the same day you make it.
  • Chill before serving: Rest in the fridge for 15–20 minutes so the flavors blend.
  • About the jalapeño: For a milder flavor, remove the seeds and white veins before chopping.
  • Storage: Keep refrigerated and eat within 24 hours for the best taste and texture.
 
🌎 You can find more fresh and easy Latin recipes at thelatinspoon.com
Keyword Salsas

Chicken Stew (Gallina Achiotada)

Nov 29, 2025 · Leave a Comment

A plate with a piece of chicken and carrots, served with white rice and decorated with little pieces of fresh cilantro

There are dishes that taste like home — and this one, with its deep orange color and slow-cooked tenderness, is exactly that. Gallina Achiotada translates to Achiote-Braised Hen, a humble yet hearty stew full of vegetables, warmth, and soul.

A plate with a piece of chicken and carrots, served with white rice and decorated with little pieces of fresh cilantro.

It was almost impossible to find a hen where I live — and if you’ve ever cooked one, you know exactly why I was craving it. In Costa Rica, this dish is always made with gallina, not chicken; the meat is firmer, the flavor richer, and the stew thicker and more comforting.

But when hens are nowhere to be found, I buy a whole young chicken instead. I actually love doing that. Not only because it’s cheaper, but because it feels like cooking the way my grandmother used to — with intention and patience. I debone it myself, piece by piece: Jerry gets the white meat, I keep the dark. The bones go straight to the freezer; when I’ve saved enough, I turn them into homemade chicken broth for another day.

When making this stew, it helps to have all your ingredients ready before you start. That way, cooking feels smoother and more enjoyable, and you can focus on letting the flavors develop slowly — the way this dish deserves. I try to cut everything the same size, not just for looks but because even cooking means better flavor.

And about that pot — yes, it’s called a Dutch oven. Fancy name, right? But really, it’s just a ceramic-coated cast iron pot that holds heat beautifully. Any pot will do. The real magic, as always, is in the patience.

If you really want to enjoy this dish the Costa Rican way, serve it with a side of white rice, homemade black beans and a simple cabbage and tomato salad. That combination is pure comfort food — the kind that makes you want to go back for seconds.

An overhead shot of the ingredients: a whole chicken in a bowl, a small cup of chicken broth, carrots, cilantro, potatoes, garlic, celery, onion, bell pepper, oil, black pepper, bay leaves, salt, cumin, achiote, oregano, and a bit of cornstarch

🍗 Everything You’ll Need for This Stew

Prefer a video? Go watch it now. Prefer to read? Here are the ingredients.

🐔Chicken

Traditionally, this recipe is made with hen. I couldn’t find one this time, so I’m using a whole young chicken. You can use any part of the chicken you like — thighs, drumsticks, or breasts — even boneless pieces if that’s what you have. But I’ll say this: a bit of bone makes the broth richer and more authentic, just the way this dish is meant to be.

🥄 Oil

Use any light cooking oil you like; it helps the achiote release its color and flavor evenly. You don’t need much — just enough to coat the bottom of the pot and let everything cook gently without sticking.

🌺Achiote (Annatto)

A natural seed used across Latin America to add color and mild flavor to food. Click here to get it from Amazon.

🌿Spices

Oregano, cumin, salt, black pepper, and bay leaves — these are the spices I love to use, and they almost always find their way into my cooking. But this is just my way of showing you how I make it — feel free to add your own favorite spices and make it your own.

🥔Potatoes and Carrots

These two are the classic pair for this stew, the ones you’ll find in most kitchens when making it. But honestly, you can use any vegetables you prefer — chayote, zucchini, green beans, or whatever’s in your fridge will work beautifully.

🧅 Onion, Bell pepper, Celery, and Garlic

These are the natural seasonings that no Costa Rican kitchen could ever live without. They’re the base of countless dishes, and together they create our version of a Sofrito. You can find it here if you’d like to make it ahead and keep it ready for your next dish.

🍗Chicken broth

I usually make my own at home, using chicken bones that I buy and simmer slowly, because homemade broth always has a deeper, richer flavor. But if you don’t have any or prefer something quicker, you can use store-bought broth — any kind will work just fine.

💧Cornstarch

I like to use it to give the sauce a slightly thick and silky consistency. It should always be dissolved in a bit of cold water first to make sure there are no lumps, because if you add it directly to the hot stew, it will clump right away.
You can use all-purpose flour as substitutes.

🌿 Cilantro

Add it at the end, when you turn off the stove or right before serving, so it stays fresh and keeps its flavor.

A serving plate with chicken, carrots, and potatoes, and in the background, slightly blurred, a bowl of salad.

🥄 A Few Secrets from My Kitchen

  • The chicken doesn’t need to be fully cooked yet when you take it out of the pot — it will finish cooking later in the broth.
  • Don’t rinse the pot! Those little browned bits at the bottom hold so much flavor. Use them to build your stew’s rich base.
  • Add the cilantro at the very end, after turning off the heat. This keeps its color bright and its flavor fresh.
  • Cut your vegetables evenly so they cook at the same time and look beautiful in your bowl.
  • If you like a touch of heat, add jalapeño, chipotle, or chili flakes to make it your own.

🔪How to Make It

Now that everything’s ready, it’s time to bring it all together! ✨

A Dutch oven with the whole chicken cut into pieces

Step 1: Cook the chicken

Place a Dutch oven or large pot over medium heat.
Add the achiote and oil, then add the chicken pieces. Quickly season with salt and black pepper.

A Dutch oven with the chicken pieces cooking starting to turn golden

Step 2: Flip and Season

Immediately flip your chicken and season the other side as well, and let it cook for about 10 minutes per side. Remove it and set aside.

In the dutch oven small cubes of potato

Step 3: Cook the potatoes.

In the same pot, add a little oil and achiote. Add the potatoes and cook for 5 minutes, stirring often, until slightly golden.

Inside the Dutch oven, you can see potato cubes, carrot slices, and chopped onion, while a hand pours a small cup of celery into the pot. In the background, there’s a container of oil slightly out of focus.

Step 4: Add the vegetables.

Add the carrots, onion, celery, and bell pepper. Stir for 2–3 minutes.

nside the Dutch oven, there are potato cubes, carrot slices, chopped garlic, and oregano, with a spatula resting inside. In the background, a small cup of chopped cilantro, a glass with oil, and a few bay leaves

Step 5: Add the spices.

Add garlic, oregano, cumin, salt, black pepper, and bay leaves.
Mix well and cook for 1 more minute.

In the pot, there are chunks of carrot and potato mixed with the seasonings, while a container of chicken broth is being poured into the mixture.

Step 6: Add the broth

Add the chicken broth, you could also substitute with water.

A pot with the mixture of potatoes, carrots, and chicken pieces is shown. In the background, there’s a small cup of cilantro, a container of oil, and a small cup with bay leaves.

Step 5: Add the chicken.

Return the chicken to the pot with any juices. Cover and cook for 30 minutes over medium heat.

Inside the pot, you can see the mixture of chicken and vegetables, while the left hand holds a small cup of cornstarch, ready to pour it in, and the right hand stirs with a spatula

Step 6: Thicken the sauce

In a small bowl, mix the cornstarch with cold water until fully dissolved. Slowly pour the mixture into the stew while stirring constantly. Cook for 5 more minutes.

Your Frequently Asked Questions, Answered

What if I can’t find achiote?

No worries! Achiote gives the stew its color and earthy flavor, but you can replace it with paprika or turmeric — both work beautifully. Find your Achiote here.

Can I make this in a slow cooker?

Yes! Just add all the ingredients — chicken, veggies, and spices — and cook on low for 6–8 hours.
When you get home, dinner will be ready and delicious.

How do I know when the chicken is fully cooked?

The chicken is ready when it’s tender and easy to pull apart with a fork.
If you want to be sure, check the thickest part — it should be white all the way through, with no pink inside.
You can also use a kitchen thermometer: it should read 165°F (74°C) at the center.

🥭 Why You Need to Make Gallina Achiotada

Costa Rican food may not be as famous or bold as other Latin cuisines, but it’s full of warmth, color, and simplicity — the kind that brings people together around the table. My goal with recipes like this one is to show how easy it can be to make and how much comfort it carries in every bite.

If you enjoyed this Achiote-Braised Chicken, try pairing it with a Fresh Tamarind Juice a hearts of palm salad, or even serve it “en gallo,” tucked into a warm handmade tortilla and if you want to keep exploring Costa Rican flavors, don’t miss the Yucca Flower Picadillo, another one of our traditional favorites.

I hope these little pieces of our kitchen inspire you to cook, share, and fall in love with the taste of Costa Rica. And if you make this recipe, send me a photo or leave a comment — I’d love to see how it turned out in your kitchen!

Besitos (kisses),
Mara

A plate with a piece of chicken and carrots, served with white rice and decorated with little pieces of fresh cilantro

Chicken Stew (Gallina Achiotada)

This Achiote-Braised Chicken is a classic Costa Rican comfort dish — tender chicken simmered in a colorful broth with achiote, fresh vegetables, and simple spices. It’s the kind of meal that fills your kitchen with warmth and brings everyone to the table.
Print Recipe Pin Recipe
Prep Time 25 minutes mins
Cook Time 1 hour hr 20 minutes mins
Course Hearty meal
Cuisine Costa Rican
Servings 6 people

Equipment

  • 1 Big pot or Dutch Oven
  • 1 Cutting board and knife
  • measuring spoons

Ingredients
  

To cook the chicken:

  • 1 whole young chicken
  • ¼ cup oil
  • 1 teaspoon achiote
  • salt and black pepper

To cook the stew:

  • 5-6 potatoes
  • 1 teaspoons achiote
  • 2 carrots
  • ½ onion
  • ½ bellpepper
  • 2 sticks celery
  • 2 garlic cloves
  • 1 teaspoon oregano
  • 1 teaspoon cumin
  • ½ teaspoon black pepper
  • 1 teaspoon salt
  • 3-4 bay leaves
  • 3 cups chicken broth
  • 2 tablespoon cornstarch
  • 4 tablespoon water
  • 1 bunch cilantro

Instructions
 

  • Heat a Dutch oven or large pot over medium heat. Add the achiote and oil, then place the chicken pieces inside. Season with salt and black pepper, then immediately flip each piece and season the other side as well.
  • Leave the chicken to cook on that second side for about 10 minutes, until it starts to turn golden. Flip the pieces again and cook the other side for another 10 minutes, or until both sides are nicely browned. Remove from the pot and set aside.
  • In the same pot, add a little more oil and achiote if needed. Add the potatoes, carrots, onion, celery, and bell pepper all at the same time. Stir well and cook for about 5 minutes, or until the vegetables begin to soften and the potatoes start to turn slightly golden.
  • Add the garlic, oregano, cumin, salt, black pepper, and bay leaves. Mix well and cook for 1 more minute to release the flavors.
  • Pour in the chicken broth and bring it to a boil.
  • Return the chicken and any juices to the pot. Cover and cook for about 30 minutes over medium heat until the chicken is fully cooked and tender. When time has past, remove the lid and cook for 20-25 more minutes.
  • In a small bowl, mix the cornstarch with cold water until fully dissolved. Slowly pour it into the stew while stirring constantly. Cook for 5 more minutes, or until the sauce thickens slightly.

Video

Notes

  • The chicken doesn’t need to be fully cooked when you remove it in the first step, it will finish cooking later in the broth.
  • Don’t rinse the pot after cooking the chicken; the browned bits at the bottom add amazing flavor to the stew.
  • Always dissolve the cornstarch in cold water before adding it to the stew to avoid lumps.
  • If you can’t find achiote (annatto), you can substitute it with paprika or turmeric.
  • Add the fresh cilantro at the end, after turning off the heat, to preserve its bright color and fresh taste.
📍 For more recipes like this one, visit TheLatinSpoon.com 
Keyword Costa Rican Basics

Pickled Jalapeños Recipe

Nov 21, 2025 · Leave a Comment

A small container holding slices of jalapeño chili.

Few things bring more flavor to a meal than a spoonful of pickled jalapeños. They add that perfect balance of heat, tang, and crunch — turning even the simplest dish into something special.

This Costa Rican-style version keeps things bright and crisp, with just the right amount of spice. Perfect on tacos, nachos, or anything that needs a little kick. Watch the video here.

Sealed jar of homemade pickled jalapeños in brine, held by both hands, with bay leaves and garlic bulbs in the background.

I love gardening during summer — it keeps me grounded, even when my plants don’t always cooperate. Peppers and jalapeños are some of my favorite things to grow because they’re so easy to maintain (unlike my Brussels sprouts, but that’s a story for another day).

Every year, when the jalapeños start coming in, I make a fresh batch of homemade pickled jalapeños. It’s one of those simple recipes that remind me how small things can bring the most joy. These are straight from my garden — some green, some red, all perfectly imperfect.

And if I’ve learned anything after more than forty years on this planet, it’s that I have nothing to prove — especially not to jalapeños. So yes, I wear gloves when I cut them. I’m brave, but I also like keeping my hands intact. 😉

I like mine a little crunchy, so I don’t boil them. I just pour the hot brine on top and let it work its magic. You can cook yours if you prefer them softer — either way, they’ll turn out flavorful, tangy, and just the right amount of spicy.

A small container holding slices of pickled jalapeños.

Ingredients for Pickled Jalapeños

Jalapeños 🌶️

They’re not just about heat, Jalapeños are packed with vitamin C, antioxidants, and capsaicin, which may help boost metabolism and reduce inflammation. If you prefer something milder, you can use banana peppers or poblanos instead. Want to go hotter? Try serranos. A mix of red and green jalapeños gives your jar a beautiful color contrast and a nice balance between sweet and spicy.

Water 💦

Balancing vinegar with water keeps the brine from being too harsh. If you want a bolder flavor, reduce the water a bit. Always use filtered water if possible to avoid altering the taste or the color of your brine.

White Vinegar 💧

I used white vinegar in this recipe because it’s strong, neutral, and keeps the jalapeños bright and crisp. It’s also the best natural preservative — it prevents bacteria growth and gives that sharp, tangy kick that makes pickled foods so addictive. You can also experiment with apple cider vinegar for a fruity twist or rice vinegar for a gentler acidity, though they’ll slightly change the flavor and color.

Garlic 🧄

Garlic does more than just add flavor — it has natural antibacterial properties and a touch of sweetness once it infuses. It’s also rich in compounds like allicin, which are known to support heart health. You can replace it with shallots for a milder, slightly sweeter result.

Bay Leaves 🍃

I love them because they add a subtle herbal aroma and help round out the acidity of the vinegar. If you don’t have bay leaves, you can use oregano sprigs or a pinch of thyme — both bring that same earthy balance.

Black Peppercorns ⚫

I love how they look floating in the jar, like tiny pearls. They add freshness and a sharp, earthy touch that balances the spice. If you only have ground pepper, don’t worry — but if you can, go for the whole ones.

Salt 🧂

Salt isn’t just about flavor — it also helps the jalapeños stay crisp and safe to store by drawing out excess moisture. I used mineral salt from Redmond Real Salt (not sponsored) but I really loved the flavor and properties it adds to my food. Avoid regular table salt, since the iodine can make your brine cloudy and alter the taste.

💡 Extra Tips

  • Crunch control: If you like your jalapeños with a little crunch (like I do), do not cook your jalapeños. Cooking them will make them soft.
  • Sweet twist: Add a teaspoon of honey, sugar, or maple syrup to the brine for a sweet-and-spicy version.
  • Kitchen safety: Always use gloves and avoid touching your face while slicing jalapeños. Trust me, it’s not a memory you want to keep.
  • This is an awesome product to can. Make lots of pickled jalapeños at the same time to save time and resources.

Let's Pickle Jalapeños with Pictures

Now that we’ve got everything ready, let’s make some magic. This recipe is quick, simple, and full of flavor — just a few easy steps and you’ll have your own homemade pickled jalapeños ready to go. 🌶️

On a cutting board, the right hand holds a knife slicing jalapeños while the left hand steadies them. In the background, there’s a jar filled with sliced jalapeños and a small cup of whole peppercorns.

Step 1: Slice the jalapeños.

Slice your jalapeños into even rings so they pickle evenly. You can remove the seeds if you want less heat.

Two hands peel a garlic clove over a cutting board with three garlic cloves and a knife resting on it.

Step 2: Mash the garlic.

Peel and lightly crush the cloves with the flat side of your knife. You don’t need to chop them — just smash to release flavor.

A small pot on the stove filled with vinegar as a measuring cup pours water into it, with a jar of jalapeños in the background.

Step 3: Start the brine.

In a small pot, add the white vinegar and water. Bring it to medium heat and let it warm up slowly — you don’t want it boiling yet.

A small pot on the stove containing garlic, black peppercorns, bay leaves, vinegar, and water. Next to it, there’s a jar of jalapeños and a small cup with salt and pepper.

Step 4: Add the seasonings.

Once the liquid is warm, add the bay leaves, smashed garlic, black peppercorns, and salt. Stir gently so everything starts to release its aroma.

A small pot on the stove containing garlic, black peppercorns, bay leaves, vinegar, and water. Next to it, there’s a jar of jalapeños and a small cup with salt and pepper.

Step 5: Cook the brine.

Keep the pot over medium heat until you see small bubbles forming around the edges — that’s the sweet spot. Don’t let it boil hard; we want it hot and infused, not reduced. Then, remove it from the heat.

A jar filled with sliced jalapeños as a pot with hot brine and seasonings is poured over them.

Step 6: Pack and pour.

Place your sliced jalapeños into a clean glass jar. If you need to press them down a little, that’s okay — they’ll soften once the brine is added. Carefully pour the hot liquid over the jalapeños until they’re fully covered.

A hand placing the lid on a jar filled with jalapeños, with a small cup of salt and another of pepper in the background.

Step 7: Let them rest.

Leave the jar uncovered for about 10–15 minutes to release the steam, then close the lid and let it sit at room temperature for 3–4 hours before refrigerating.

Sealed jar of homemade pickled jalapeños in brine, held by both hands, with bay leaves and garlic bulbs in the background.

Step 8: Refrigerate overnight.

By the next day, the jalapeños will have changed color and are perfectly pickled — bright, crisp, and flavorful.

💡 Your Questions, Answered

How long do pickled jalapeños last?

If you store them in the fridge, they’ll last up to 3 months. For long-term storage, use sterilized jars and seal them using the canning method — that way, they can last up to a year.

Can I skip the vinegar?

Not really. Vinegar is what keeps the jalapeños safe to eat and gives them that signature tangy flavor. Without it, you’d have to eat them within a few days, and they wouldn’t technically be “pickled.”

🔥 Why I love Having Pickled Jalapeños All Year Long?

I grew up eating jalapeños at home with pretty much any meal possible. Sometimes you add them to white rice and black beans, sometimes to nachos or empanadas. Even when I make tamales for Christmas, I add black beans and jalapeños. Black bean tamales are very common in Costa Rica (we call them “mudos”), but I love giving them that extra kick with jalapeños.

So having a garden that produces jalapeños is honestly a dream come true. I make a big jar of pickled jalapeños and they last a good three months. And having homemade pickled jalapeños, with the right amount of salt, garlic, bay leaves, and all those flavors we added, is so much better than anything canned.

Try adding pickled jalapeños to your Costa Rican:

Tilapia Ceviche
Fluffy White Rice
Black Beans

Besitos (kisses),
Mara

A small container holding slices of jalapeño chili.

Pickled Jalapeños

These homemade pickled jalapeños are crunchy, tangy, and packed with flavor. Made with fresh peppers, garlic, and bay leaves. Perfect for topping tacos, sandwiches, or anything that needs a little kick of heat.
Print Recipe Pin Recipe
Prep Time 15 minutes mins
Cook Time 10 minutes mins
Resting Time 8 hours hrs
Total Time 8 hours hrs 25 minutes mins
Course Seasoning
Cuisine Costa Rican
Servings 25 oz container

Equipment

  • 1 Cutting board and knife
  • 2 kitchen gloves
  • 1 small pot
  • 1 Measuring cups and spoons
  • 1 Canning jars with lid

Ingredients
  

  • 15-20 jalapeños
  • 1 ½ cups water
  • ¼ cup white vinegar
  • 5-6 garlic cloves
  • 5-6 bay leaves
  • 1 teaspoon cracked black peppercorns
  • 1 tablespoon salt

Instructions
 

  • Put on gloves. Slice your jalapeños into rounds of the same thickness so they pickle evenly. You can remove the seeds if you want less heat.
  • Peel and lightly crush the cloves with the flat side of your knife. No need to chop them — just mash to release the flavor.
  • In a small pot, add the white vinegar and water. Bring it to medium heat and let it warm up slowly — don’t let it boil yet.
  • Once the liquid is warm, add the bay leaves, smashed garlic, black peppercorns, and salt. Stir gently so everything starts to release its aroma and flavor.
  • Keep the pot over medium heat until you see small bubbles forming around the edges — that’s the sweet spot. Don’t let it boil hard; we want it hot and infused, not reduced. Then, remove it from the heat.
  • Place your sliced jalapeños into a clean glass jar. If you need to press them down a little, that’s okay — they’ll soften once the brine is added. Carefully pour the hot liquid over the jalapeños until they’re fully covered.
  • Leave the jar uncovered for about 10–15 minutes to release the steam, then close the lid and let it sit at room temperature for 3–4 hours before refrigerating.
  • Refrigerate overnight. By the next day, the jalapeños will have changed color and be perfectly pickled and ready to consume.

Video

Notes

  • Remove the seeds for milder jalapeños or keep them for extra spice.
  • The less you heat the brine, the crunchier the jalapeños stay.
  • For a sweeter touch, add a teaspoon of honey, sugar, or maple syrup to the brine.
  • Always use a clean, dry glass jar with a tight lid. Sterilize if you plan to keep them for more than a few weeks.
 
✨ For more delicious homemade recipes, visit: www.thelatinspoon.com
Keyword Pickled, Preserves, Spicy

Salchipapas Recipe - Fries + Hot Dogs

Nov 14, 2025 · Leave a Comment

A plate of French fries and sliced sausages topped with pink sauce.

Few things feel more comforting than a plate of crispy fries and golden hot dogs slices covered in creamy pink sauce. Salchipapas are the kind of dish that brings everyone to the table — simple, salty, satisfying, and full of flavor.

In Costa Rica, they’ve become a favorite street food, loved for their no-fuss attitude and comforting taste. Traditionally, salchipapas are deep-fried and served piping hot, drizzled with that unmistakable pink sauce we all know and love.

A plate of French fries and sliced sausages topped with pink sauce.

I like giving this classic a lighter twist — baking or air-frying the potatoes instead of deep-frying them. It takes a little longer, but it’s worth it. The fries turn out perfectly golden, the hot dogs caramelize just enough, and everything feels a bit fresher while keeping that comforting flavor intact.

When I make them at home, I season the potatoes generously before baking — something you can’t really do when frying. The result is a crispy, flavorful bite that still tastes like the salchipapas I grew up loving, only with less oil and a little more personality. And of course, no salchipapas would be complete without Salsa Rosada — that creamy Costa Rican pink sauce that ties it all together. Click here if you would like to watch the video instead.

A small cup of olive oil, a plate with sausages and potatoes, and seasonings including salt, pink sauce, black pepper, paprika, and all-purpose seasoning.

Gather Your Ingredients for Salchipapas Recipe

🥔 Potatoes

I use Russet potatoes because they make long, crispy fries — perfect for baking. But any kind will do! If you prefer, you can even use frozen fries to save time.

🧴 Oil

A bit of vegetable oil (or avocado oil) helps the potatoes crisp up beautifully. Don’t skip this — it’s what gives them that perfect golden color in the oven.

🌿 Badia Complete Seasoning

This blend gives everything that extra kick. If you don’t have it, you can mix garlic powder, onion powder, oregano, and a little cumin — it’ll do the trick. Get the Seasoning here.

🌶️ Paprika

I love how it makes the fries look even more golden and appetizing. If you don’t have paprika, you can use a mix of chili powder (for a little heat) or sweet red pepper flakes (for color without spice).

⚫ Black Pepper

A classic — freshly ground is best. If you don’t have black pepper, try white pepper for a milder flavor or crushed red pepper if you like a little heat. You can also skip it altogether for a kid-friendly version.

🧂 Salt

Don’t be shy with salt! It brings the flavor of everything else to life. Taste and adjust after baking if needed.

🌭 Hot Dogs

I use beef hot dogs, but chicken, turkey, or even vegan work beautifully too. Slice them into rounds before baking so they get lightly caramelized and golden — that’s what gives the Salchipapas their signature flavor.

A plate of salchipapas with two wooden sticks on top, a tomato-shaped salt shaker, and a bottle of pink sauce in the background.

💡 Helpful Tips for Perfect Salchipapas

  • Keep the skin on if you like a rustic look — it adds a bit of texture and a natural golden color to your fries.
  • Cut evenly. Try to keep the potato strips the same size so they cook evenly and crisp up beautifully.
  • Rinse well. Washing the potatoes removes excess starch and helps them get extra crispy once baked.
  • Dry completely. If they’re still wet, the oil won’t stick, and the potatoes will steam instead of crisping.
  • Air fryer option. You can make these in the air fryer too — just reduce the cooking time by half and shake the basket halfway through.
  • Fry them if you prefer. The traditional version is fried in oil. If you go that route, season the fries after frying so they stay crispy.
  • Make them your own. Add toppings like cheese, chives, sour cream, or even hot sauce for a fun twist.

Step-by-step for Making Salchipapas

No tricks, no shortcuts — just the way I’ve been making them at home for years. Here’s the simple, oven-baked version I love: golden fries, perfectly browned hot dogs, and a drizzle of creamy pink sauce to finish it off.

A cutting board with potato peels falling as the left hand holds a potato and the right hand peels it, with a peeled potato in the background.

Step 1: Preheat & peel.

Place a baking sheet inside the oven, set it to 425°F (220°C), and let it preheat while you peel the potatoes.

The right hand cuts a potato into strips with a knife while the left hand holds it steady on a cutting board.

Step 2: Cut the potatoes.

Slice the peeled potatoes lengthwise, then cut them into thin strips.

Cut potato strips in a large bowl set on a cutting board, rinsed with tap water while the right hand stirs them.

Step 3: Rinse and soak.

Place the potatoes in a bowl, cover with water, and rinse until the water runs clear.

The left hand holds the sausages while the right hand cuts them into small pieces on a cutting board, with a bowl of cut potatoes in the background.

Step 4: Slice the Hog Dogs.

Cut your hot dogs into even rounds and set aside.

Hands hold a kitchen towel filled with potato strips, drying them completely. A bowl with more potatoes strips sits in the background.

Step 5: Dry the potatoes.

Drain the water and pat the fries completely dry with a clean kitchen towel.

Cut potato strips spread on a tray while the right hand pours oil from a container over them.

Step 6: Add the oil.

Place the fries on a cool baking sheet (not the one that’s heating in the oven). Drizzle oil over them and mix well with your hands or a spatula until each fry is lightly coated.

Potato strips on a tray sprinkled with paprika.

Step 7: Add the seasoning.

Sprinkle Badia Complete Seasoning, paprika, black pepper, and salt evenly over the potatoes. Massage gently to coat every piece.

Seasoned potato strips on an aluminum tray

Step 8: Transfer and bake.

Carefully remove the preheated baking sheet from the oven and transfer the seasoned fries onto it. Spread them evenly in a single layer and bake for 20 minutes.

Lightly cooked potato strips on one side of the tray and sliced sausages on the other.

Step 9: Add the Hot Dogs.

After 20 minutes, add the hot dogs slices to one side of the tray and bake for another 15–20 minutes

A plate of French fries and sliced sausage topped with pink sauce, with a tomato-shaped salt shaker in the background.

Step 10: Mix & serve.

Mix the fries and hot dogs together. Serve on a round plate and drizzle Salsa Rosada generously on top.

💬 Your Salchipapas Questions, Answered

My fries came out soft — what went wrong?

They probably had a bit too much moisture. Make sure to dry the potatoes really well before adding the oil and seasoning — any leftover water will make them steam instead of crisp.

How do I reheat leftovers?

Place them back in the oven or air fryer for a few minutes to bring back the crisp. Avoid the microwave — it makes them soggy.

Can I use sweet potatoes instead of regular ones?

Yes! Sweet potatoes work beautifully — they’ll add a slightly caramelized flavor and a hint of natural sweetness. Just reduce the cooking time a bit; they tend to brown faster.

Do I need to flip the fries while baking?

Yes, halfway through! Gently turn them so they cook evenly and get crispy on all sides.

Can I make them ahead of time?

You can prep the potatoes and hot dogs a few hours in advance and keep them refrigerated. Just bake right before serving so they stay crispy and fresh.

🌞 Everyone Deserves Salchipapas

The last time I visited my grandkids — who aren’t exactly babies anymore but still small enough to make a mess at the table — I made this recipe for them. It’s easy to eat, fun to grab with tiny hands, and full of flavor they loved right away. Watching them enjoy it, reminded me why I love simple, homemade food like this.

And for all the busy moms out there — this one’s a lifesaver. It’s quick, satisfying, and gives you those few extra minutes to breathe while still putting something homemade and comforting on the table.

If you try this recipe, share your photos and stories with me — I love seeing your versions and hearing how your little ones (or big ones!) enjoy it.

Besitos,
Mara

A plate of French fries and sliced sausages topped with pink sauce.

Salchipapas Recipe

Crispy oven-baked fries mixed with golden hot dogs slices and topped with creamy pink sauce — this Costa Rican classic is comfort food at its best.
Print Recipe Pin Recipe
Prep Time 10 minutes mins
Cook Time 40 minutes mins
Total Time 50 minutes mins
Course fast food, Snack
Cuisine Costa Rican fast food
Servings 4 people

Equipment

  • 1 baking sheet
  • 1 kitchen towel or paper towels
  • 1 Cutting board and knife
  • 1 measuring spoons and cups

Ingredients
  

  • 3 potatoes
  • ¼ cup oil
  • 1 tablespoon complete seasoning
  • 1 teaspoon paprika
  • 1 teaspoon black pepper
  • 2 teaspoons salt
  • 8 hot dogs

Instructions
 

  • Place a baking sheet inside the oven and set it to 425°F (220°C). Let it preheat while you peel the potatoes.
  • Slice the peeled potatoes lengthwise, then cut them into thin strips, keeping them as even as possible so they cook and crisp up evenly.
  • Place the potatoes in a bowl, cover with water, and rinse until the water runs clear. This removes the starch and helps them get extra crispy. Let them soak while you prepare the hot dogs.
  • Cut the hot dogs into even rounds and set aside. You can use beef, chicken, turkey, or vegan — whatever you prefer.
  • Drain the water and pat the fries completely dry with a clean kitchen towel. If they’re still wet, the oil won’t stick and they’ll steam instead of crisping.
  • Place the fries on a cool baking sheet (not the one heating in the oven). Drizzle with oil and mix well with your hands or a spatula until every fry is lightly coated.
  • Sprinkle Badia Complete Seasoning, paprika, black pepper, and salt evenly over the potatoes. Massage gently to coat every piece.
  • Carefully remove the preheated baking sheet from the oven and transfer the seasoned fries onto it. Spread them in a single layer and bake for 20 minutes.
  • After 20 minutes, add the hot dogs to one side of the tray and bake for another 15–20 minutes, until everything is crispy and golden.
  • Once done, mix the fries and hot dogs together. Serve on a round plate and drizzle Salsa Rosada generously on top.

Video

Notes

  • Cut evenly: This helps the fries bake and crisp up perfectly.
  • Flip halfway: Turn the fries halfway through baking so they brown evenly on all sides.
  • Air fryer option: 15–18 minutes at 400°F (200°C), shaking the basket halfway.
  • Storage: Keep leftovers refrigerated in a sealed container and reheat in the oven or air fryer to bring back the crisp.
  • Serve immediately: Salchipapas taste best right out of the oven, with plenty of Salsa Rosada on top.
 
🌎For more recipes visit: thelatinspoon.com
Keyword Costa Rican Basics, Fast food

Salsa Rosada Recipe (Pink Sauce)

Nov 10, 2025 · Leave a Comment

A small bowl of pink sauce on a decorative cloth, with a spoon and cherry tomatoes in the background.

Salsa Rosada or Pink Sauce is very common in Latin America. It started as something simple like mixing mayo with ketchup, but then evolved into what it is today, a staple in Latin American cuisine. Each country has its own version and even its own name. Besides Salsa Rosada, other common names are Salsa Golf, fry sauce, mayochup and more.

What makes it truly Costa Rican are two things: we add Salsa Lizano and we add a little sugar, because ketchup in Costa Rica is naturally sweeter than the one in the USA. In Costa Rica, we don’t just eat French fries with ketchup. We mix mayo and ketchup to create salsa rosada, and we use it on empanadas, hot dogs, fried yuca and so much more.

A small cup of creamy pink sauce sits on a decorative cloth, with a spoon nearby and tomato-shaped salt and pepper shakers behind it.

This sauce is used on salchipapas (wait for the recipe — it’s coming soon), Costa Rican hot dogs, tacos, empanadas, and so many other dishes. Yum yum, I’m getting hungry just thinking about it! It’s the kind of condiment that instantly brings back memories of home — family gatherings, late-night snacks, and the irresistible smell of fried food.

My recipe is a little different from others because I like to season my food well. I’ve been working on this recipe for many years, adding some ingredients, removing others, until I came up with the version I’m presenting to you now. And I’m not going to lie — I love Raising Cane’s here in the USA, and this sauce reminds me so much of theirs!

The best part is how easy it is to make. Just mix everything in a bowl — the order doesn’t matter — and stir until smooth. Make it ahead of time and refrigerate it; it’s even better when it’s cold.

If you like a little heat, add some hot sauce. Or place it in a Ziploc bag, cut a tiny corner, and drizzle it over your food like a pro. Watch the Step-by-step video instead.

The tomato sauce mixture is carefully poured into a small jar.

Ingredients for Salsa Rosada or Pink Sauce

🥚 Mayonnaise

You can use regular, light, or even vegan mayo — any kind that gives a creamy base works. Homemade mayo is also a great choice if you prefer something fresher and less processed, and you can even replace part of it with Greek yogurt for a lighter, tangier flavor.

🍅 Ketchup

Classic tomato ketchup works perfectly for this recipe — it adds sweetness, color, and that familiar tangy flavor. You can also try spicy or no-sugar versions depending on your taste, or even use homemade ketchup if you prefer a more natural option.

🌿 Mustard

You can use yellow mustard for a mild flavor, Dijon for something sharper, or whole-grain mustard if you want a bit more texture and depth.

🍯 Sugar

The sugar helps balance the acidity from the ketchup and mustard. You can skip it if you prefer a tangier sauce or if your ketchup is already sweet.

🥄 Lizano Sauce

Lizano sauce adds a unique Costa Rican touch — it’s slightly sweet, tangy, and savory all at once. Learn how to make Lizano Sauce from scratch here. And if want to skip the process and get it delivered at your door, get Lizano Sauce here.

🧂 Salt and Black Pepper

Make sure to taste your Salsa Rosada and adjust the salt and black pepper to your liking. If you want to add spicy peppers like jalapeño or chipotle, you can do that as well.

💡 Tips I’ve Learned While Making Salsa Rosada

  • Make it ahead of time. This sauce tastes even better after it chills in the fridge for a few hours — the flavors come together and it gets creamier. I usually prepare it the day before and keep it ready for quick meals or snacks.
  • Add a little heat. If you like a bit of spice, add a few drops of your favorite hot sauce or a pinch of cayenne pepper. It turns into a whole new experience.
  • Store it right. Keep it in a sealed glass jar or container in the fridge.
  • Add your twist. A splash of lemon juice can make it brighter, a touch of garlic adds depth, and a drop of Worcestershire gives it that smoky Costa Rican edge.

Here’s how I make it

Pictures speak louder than words, so here’s a step-by-step with photos (and just a few words) to show you how to prepare the best Salsa Rosada.

A left hand pouring tomato sauce from a small cup into a bowl of mayonnaise, with a small cup of sugar and a decorative tomato in the background.

Step 1: Add the base.

In a large bowl, add the mayonnaise and ketchup. Do not mix yet.

A left hand holding a small cup of mustard and a right hand holding a measuring spoon filled with mustard over a bowl containing mayonnaise, tomato sauce, Lizano sauce, and sugar.

Step 2: Add the flavor.

Add the sugar, Lizano sauce, and mustard on top of the base. Do not mix yet.

A bowl with mayonnaise, tomato sauce, Lizano sauce, mustard, and sugar, while the left hand holds a small cup of pepper and the right hand sprinkles it over the mixture.

Step 3: Add the seasoning.

Add the salt and black pepper.

A bowl with all the ingredients mixed together, held by the left hand while the right hand stirs the mixture with a spatula.

Step 4: Combine everything.

Mix all the ingredients until the sauce looks smooth and has an even pink color.

💡 Questions You Might Have

How long does it last?

Keep it refrigerated in a sealed container for up to 2–3 weeks.

Can I freeze it?

No. Freezing will change the texture and separate the ingredients.

What if I can’t find Lizano sauce?

Skip it, or replace it with a mix of Worcestershire sauce and a few drops of lime juice.

Where can I buy Lizano sauce?

Learn how to make Lizano Sauce from scratch here. And if want to skip the process and get it delivered at your door, get Lizano Sauce here.

🍽️Hope You Love It as Much as I Do

This sauce is so easy to make that it quickly becomes a kitchen essential. It’s perfect for dipping, spreading, and even drizzling. Try it on fries, tacos, burgers, or as a dressing for your favorite salad — it works with everything.

I keep mine in a squeeze bottle or Ziploc bag with a small corner cut off; it makes serving clean and fun. Once you have it ready in the fridge, you’ll start discovering new ways to use it. That’s the magic of this pink sauce: it’s simple, versatile, and always delicious.

If you try this sauce in one of your recipes, share your videos or photos with me! I love seeing your creations and how you make each recipe your own — tag @thelatinspoon so I can see them and share your versions too.

Besitos (kisses),
Mara

A small bowl of pink sauce on a decorative cloth, with a spoon and cherry tomatoes in the background.

Salsa Rosada

A quick and creamy pink sauce made with mayo, ketchup, and a few pantry staples. Perfect for burgers, fries, or seafood — ready in minutes!
Print Recipe Pin Recipe
Prep Time 15 minutes mins
Course Seasoning
Cuisine Costa Rican
Servings 6 oz container

Equipment

  • Bowl and Spatula
  • Measuring cups and spoons

Ingredients
  

  • 1 cup mayonnaise
  • ½ cup ketchup
  • 1 teaspoon mustard
  • 1 teaspoons sugar
  • 1 tablespoon lizano sauce
  • ½ teaspoon blackpepper
  • 1 teaspoon salt

Instructions
 

  • In a large bowl, add the mayonnaise and ketchup.
  • Add the sugar, Lizano sauce, and mustard on top of the base, but don’t mix yet.
  • Add the salt and black pepper.
  • Mix all the ingredients until the sauce looks smooth and evenly pink. Taste and adjust the seasoning if needed.

Video

Notes

  • Keep refrigerated in a sealed container for up to 2–3 weeks.
  • Do not freeze — it changes the texture and separates the ingredients.
  • If you can’t find Lizano sauce, replace it with Worcestershire sauce + a few drops of lime juice.
  • Lizano sauce is available online or in Latin grocery stores — it’s a Costa Rican staple.
  • The sauce tastes even better after a few hours in the fridge — the flavors blend and the texture turns creamier.
  • For a spicy touch, add a few drops of hot sauce or a pinch of cayenne pepper.
  • Store it in a sealed glass jar or airtight container to keep it fresh.
 
For more recipe visit 👉 thelatinspoon.com
Keyword No Cook

Tamarind Juice — Costa Rican Fresco de Tamarindo

Nov 5, 2025 · Leave a Comment

A glass of tamarind drink with yellow lemon slices on the rim and inside the glass. Decorative tamarind pods are placed at the base. In the background, there are a few lemons and two more glasses of the same drink.

Few things are as comforting as a glass of Fresco de Tamarindo on a warm afternoon. Its perfect mix of sweetness and tang brings a little burst of joy to any meal. Made with real tamarind pods and a touch of sugar, it’s a simple, honest drink that feels like home — refreshing, natural, and full of flavor.

A glass filled with fresco de tamarindo, decorated with lemon slices on the rim and floating inside the drink. At the base, a few tamarind pods are arranged decoratively, their rustic brown shells adding texture. In the background, a couple of fresh lemons and two more glasses of the drink

Tamarind may have come from far away — originally from tropical Africa — but it has found a home in Costa Rica like it’s always belonged here. You’ll find it in marinades for chicken and pork, in tangy sauces, and, of course, in this refreshing fresco de tamarindo that we all know from childhood lunches and sunny afternoons.

I like to prepare it the traditional way — no cooking, just letting the pulp release its flavor slowly. Cooking tamarind makes it lose that bright, fresh taste. When it’s for meat, sure, I’ll boil it; but for a drink, I prefer to keep it fresh and vibrant.

You can leave the tamarind soaking overnight if you want the process to be easier — or cook it if you’re in a hurry. Either way, the sweetness and acidity will always be there, balancing just right.

If you want to see exactly how I make it, you can watch the full step-by-step video on my YouTube channel, where you’ll see the process up close, from cracking the pods to serving that first glass of cold tamarind juice.

Top view of small bowls containing tamarind pods, ice cubes, and sugar, with two lemons placed next to them.

Ingredients for the Best Fresco de Tamarindo Ever!

🍂 Tamarind pods

I used fresh tamarind for this recipe — the kind that comes in long, brown shells you have to crack open and peel. Look for pods that are slightly dry on the outside but still soft when pressed. Inside, the sticky pulp hides that sweet-and-sour flavor.

You’ll also need to remove the veins, and yes, it gets sticky. Some people find this part relaxing, others find it annoying — and that’s okay. If you’re not into peeling and cleaning tamarind, just buy tamarind paste at your local Asian or Latino store and skip this step. It works perfectly and saves you the mess.


💧 Water

I usually use tap water, but I always filter it first — just to make sure it’s clean and fresh. You can also use bottled water if you prefer. And if you like a little twist, try using sparkling water — it gives the fresco de tamarindo a fun, bubbly touch that’s actually really refreshing.


🍬 Sugar

I recommend using white sugar for this recipe because it has a neutral flavor that lets the tamarind shine. But if at home you usually use unrefined sugar or tapa de dulce (raw cane sugar), go ahead — it works too. Just know it’ll give the drink a slightly deeper color and a more caramel-like flavor.


🧊 Ice

For me, ice is non-negotiable — fresco de tamarindo has to be cold. You can use regular cubes, crushed ice, or even big round ones if you want to make it look fancy. Just make sure to add plenty, because the colder it is, the better it tastes.


🍋 Lemon slices

I use lemon slices mostly for decoration, but I like how they slowly release their flavor into the glass. If you want a stronger, tangier taste, you can squeeze a few drops of lemon juice right into the drink — it really brightens up the tamarind.

Top view of two glasses of tamarind drink decorated with lemon slices. Behind them, there is a pitcher with the tamarind mix, a few lemons, and some natural tamarind pods.

💡 Mara’s Extra Tips for Fresco de Tamarindo

  • If you want to make things easier, leave the tamarind soaking overnight — the pulp will separate almost on its own.
  • You can also cook the tamarind if you prefer, but I don’t usually do that for drinks; it changes the flavor and takes away that fresh, natural taste.
  • Keep the concentrate refrigerated and tightly covered — it’ll stay fresh for up to two weeks.
  • For a more natural sweetness, use honey instead of sugar.
  • Adjust the sweetness after chilling. Cold drinks taste less sweet, so taste it again once it’s cold and add a bit more sugar if needed.

How I Make My Tamarind Juice

No tricks, no rush — just the way I’ve been making tamarind juice since I was a kid.

A hand holds two tamarind pods over a glass bowl filled with discarded shells, while another bowl with whole tamarinds sits in the background.

Step 1: Crack & clean.

Crack the tamarind pods, peel off the shells, and remove the veins. (Yes, it’s sticky — that’s normal.)

A left hand holds a glass bowl with peeled tamarind, while the right hand tilts a pitcher to pour water into the bowl.

Step 2: First soak.

Place the peeled tamarind in a large bowl. Add 2 cups of water

A bowl showing the tamarind pulp mixture after adding water anda massage.

Step 3: Massage the tamarind.

Use your hands (or a potato masher / blender pulse) to massage the pulp for about 3–4 minutes. Let it rest for 10–15 minutes.

A left hand holds a strainer with tamarind seeds and pulp remains, draining over a bowl.

Step 4: Strain.

Pour through a fine strainer or cheesecloth into a bowl, pressing well to extract the liquid. You’ll see the seeds.

A pitcher tilted, pouring water into a bowl containing tamarind pulp and seeds left after straining.

Step 5: Second round.

Add 1 cup of water to the remaining pulp and seeds, massage again, and rest for another 10 minutes. This time the liquid will look clearer, which means most of the flavor is out — but you can repeat the process as many times as needed until no more pulp or flavor comes out.

A left hand holds a measuring cup with sugar over a bowl containing tamarind pulp. A spatula rests inside the bowl.

Step 6: Sweeten & adjust.

Combine all the strained liquid (your concentrate) and add sugar to taste

A pitcher filled with tamarind pulp mixture, while another pitcher pours water into it. In the background, two lemons are visible.

Step 5: Add more water.

Depending on how much water you used to soak it, you might want to add a little more water to adjust the consistency. Just be careful not to overdo it — too much water can make it lose the tamarind flavor.

Two glasses: one filled with tamarind drink and ice, the other with ice and lemon slices while a pitcher pours in the tamarind drink. In the background, a wooden board holds lemon slices and half a cut lemon.

Step 6: Chill and enjoy.

Refrigerate until very cold.

Fill a glass with ice, tuck in a few lemon slices, and pour over your fresco de tamarindo.

💡 Your Fresco de Tamarindo Questions, Answered

Can I freeze it?

Yes! The best way to do it is to freeze the tamarind concentrate in ice cube trays. Once frozen, store the cubes in a sealed bag. They’ll stay fresh for up to 3 months, and you can easily make a quick drink anytime.

How long does it last in the fridge?

Keep your tamarind concentrate refrigerated and tightly covered. It stays good for up to two weeks. Always stir before serving — the pulp tends to settle.

Why does mine look darker or lighter than yours?

That depends on the type of tamarind you used and how concentrated your pulp is. There’s no wrong color — just flavor.

Everyone Deserves to Taste Fresco de Tamarindo at Least Once!

There’s something so special about recipes like this one — simple, refreshing, and full of real flavor. Fresco de tamarindo is the kind of drink that never goes out of season and is also very budget friendly.

If you’re looking for the perfect pairing, try it with my Tilapian Ceviche — both are light, bright, and full of that “Costa Rican summer” feeling.

And if you’re in the mood for more tropical inspiration, you can also check out my Tropical Fruit Salad or Dragon Fruit Lemonade — two of my favorite ways to bring sunshine into a table.

If you make this or any of my recipes, let me know on my social media — and send me your photos! I love seeing your creations.


Besitos (kisses),
Mara

A glass of tamarind drink with yellow lemon slices on the rim and inside the glass. Decorative tamarind pods are placed at the base. In the background, there are a few lemons and two more glasses of the same drink.

Fresco de Tamarindo

Refreshing, tangy, and naturally sweet — Fresco de Tamarindo is one of those simple drinks that capture the taste of the tropics. Made from real tamarind pods, water, and sugar, it’s easy to prepare and perfect for any warm day. Serve it cold with ice and lemon slices for the ultimate homemade touch.
Print Recipe Pin Recipe
Prep Time 20 minutes mins
Resting time 30 minutes mins
Course Drinks
Cuisine Latinx
Servings 6 people

Equipment

  • 2 bowls
  • 1 strainer
  • 1 pitcher
  • 1 measuring cups
  • 1 potato masher optional

Ingredients
  

  • 1 lb tamarind pods or 1 cup peeled pulp
  • 4 cups water
  • 1 cup sugar
  • ice
  • lemon slices

Instructions
 

  • Crack the tamarind pods, peel off the shells, and remove the veins.
  • Place the peeled tamarind in a large bowl. Add 2 cups of water and use your hands (or a potato masher / blender pulse) to massage the pulp for about 3–4 minutes. Let it rest for 10–15 minutes.
  • Pour through a fine-mesh strainer into a bowl, pressing well to extract the liquid. Keep the seeds and pulp for another round.
  • Add 1 cup of water to the remaining pulp and seeds, massage again, and rest for 10 minutes. Strain again.
  • Repeat once more with 1 cup of water, or as many times as needed until no more flavor or pulp comes out.
  • Check your tamarind concentrate. Depending on how much water you used, you may want to add a little more water to adjust consistency, but avoid adding too much — you don’t want to lose that rich flavor.
  • Add sugar to taste. Stir with a spatula until it dissolves completely.
  • Refrigerate until very cold. Serve over ice, add lemon slices, and enjoy.

Video

Notes

  • Leave the tamarind soaking overnight — it helps release the pulp naturally.
  • Cooking works too, but the flavor becomes less fresh.
  • Keep refrigerated and tightly covered for up to 2 weeks.
  • Replace sugar with honey or panela for a different sweetness.
  • Add a few drops of lemon juice if you like it tangier.
 
🏝️For more recipe visit: thelatinspoon.com
Keyword Drinks, Frescos

Homemade Corn Tortillas

Oct 25, 2025 · 8 Comments

Freshly hand-shaped tortillas resting on a traditional Costa Rican cloth, with tomatoes in the background.

There’s something magical about making corn tortillas from scratch. The warmth of the masa, the smell of corn on a hot pan, and that first little puff. With just three ingredients and a little patience, you can make soft, authentic tortillas at home.

Freshly hand-shaped tortillas resting on a traditional Costa Rican cloth, with tomatoes in the background.

Across Costa Rica, tortillas are part of every meal — from breakfast to dinner and everything in between. They show up next to scrambled eggs, a warm serving of Gallo Pinto, pressed with melted cheese, or served alongside a comforting bowl of soup at lunchtime.

You’ll see them paired with picadillos, rolled into gallos, or simply eaten straight off the pan with a little butter and a sprinkle of salt. However you enjoy them, tortillas have this way of bringing comfort to every plate — soft, warm, and perfectly simple.

Tortillas From Scratch

Making them from scratch is easier than you might think. The trick is getting the masa just right — soft but not sticky, smooth but not dry. Once you learn how to feel that balance in your hands, you’ll never forget it. In this recipe, I’ll walk you through every little detail: how to mix, test, and shape your dough until it feels perfect. Whether you make them with a tortilla press or by hand, each one carries its own rhythm.

Top view of a container with water, a bowl with corn dough, a small jar with oil, and a small dish with salt

Ingredients for Corn Tortillas

This is all you need to make real homemade corn tortillas from scratch:

🌽 Corn Flour

Use masa harina, not regular cornmeal — it’s the kind of flour made from nixtamalized corn. Any brand will work, but each one absorbs water differently, so trust your hands and eyes more than the package instructions.

🧂Salt (Optional)

I like adding a little salt to my tortillas for flavor, but it’s completely optional. Some people prefer leaving the dough plain, especially if they plan to serve it with something salty or saucy.

💧Water

Use warm water, not cold — it helps bring the masa together smoothly without creating lumps.

🧴Oil

Oil is not added to the masa, yet it’s used in small amounts when you’re greasing your pan between cooking tortillas.

A plate with three "Costa Rican prensadas" placed on a traditional cloth

💡 Extra Tips for Making Corn Tortillas at home

  • Use warm (not hot) water to mix the masa. Hot water can make the dough sticky, while cold water prevents it from binding properly.
  • Cover the masa with a damp paper towel while you work to prevent it from drying out.
  • Always test one tortilla first to check the moisture of the dough and the heat of the pan. If you notice cracks on the edges, the dough is too dry — add a teaspoon of water at a time and knead again.
  • Let the skillet or comal get very hot before adding the tortillas. This helps them puff and gives that perfect golden color.
  • Flip the tortilla gently with your fingers or a spatula once it releases naturally from the surface — forcing it too early can tear it.
  • Always keep your tortillas wrapped in a clean kitchen towel right after cooking. This helps them stay warm and soft until serving time.
  • When reheating tortillas in the microwave, wrap them in a damp paper towel. The steam keeps them moist so they don’t dry out.

Step-by-Step Guide

Here’s a step-by-step with photos (and just a few words) to show you how to make Homemade Corn Tortillas, from mixing the masa to watching them puff beautifully on the pan.

A hand touches the corn dough inside a large glass bowl as water is poured from a glass pitcher. In the background, there’s a small bowl with salt and two tomatoes.

Step 1: Mix dry ingredients

Place the corn flour (masa harina) in a large bowl. Add the salt and mix lightly to distribute. Then pour in the same amount of lukewarm water as flour.

A hand mixes the corn dough inside a glass bowl, with a small bowl of salt in the background and tomatoes in the foreground.

Step 2: Mixing the dough

Mix the masa with your hands until it forms a soft dough. Test the texture. If the dough feels dry, add a little water, one spoonful at a time, until it no longer cracks or sticks to your hands.

Small dough balls of similar size arranged inside a clear glass bowl.

Step 3: Shape your masa.

Once the masa is ready, form small dough balls, their size will determine how big or thick your tortillas will be.

A ball of dough placed on a circular piece of plastic over a tortilla press.

Step 4: Option 1 - Flatten the tortillas.

Place one plastic circle on the bottom of your tortilla press, a ball of dough in the center, and another piece of plastic on top. Press gently to flatten, then turn it a quarter turn and press again for even thickness.

The right hand presses the dough into a tortilla shape over a circular piece of plastic, while the left hand forms a “C” shape to shape the edges.

Step 4: Option 2 - Make by hand.

Place a piece of plastic on your work surface and set a ball of dough in the center. Flatten it gently with your palm. Use your fingers to shape the edges into a round form, making small circular movements.

A comal on a stovetop cooking two tortillas, with a clear bowl holding an oiled napkin visible in the background.

Step 5: Cook your tortillas

Preheat a comal or heavy skillet over medium-high heat. Lightly grease it with a bit of oil using a folded napkin. Carefully peel the tortilla off the plastic and place it on the hot surface. Cook each side for about 40 seconds, then flip.

Two tortillas cooking on the top side, ready to be flipped and puff up

Step 6: Cooking both sides

Cook another 40 seconds and flip one more time, you’ll notice it starts to puff up like a balloon.


💬 Questions About Making Corn Tortillas

What’s the best brand of corn flour to use?

That depends on your taste and what’s available at your local store. Always look for a masa harina that says “for tortillas” on the package, and adjust the amount of water as shown in the video — every brand absorbs it differently.

What if my dough turns out too watery?

No problem! Add a bit more corn flour, little by little, until you reach the right consistency — soft, smooth, and easy to shape.

Why aren’t my tortillas puffing up?

Don’t worry! not all tortillas puff perfectly, especially at first. Make sure your skillet or comal is very hot and flip the tortilla a couple of times to help it puff.

How long do homemade tortillas last?

Homemade tortillas stay fresh for about three days in the refrigerator. Keep them in an airtight container or sealed bag, and reheat them before serving so they regain their soft, warm texture.

🥙 Before You Go…

In Costa Rica, everything wrapped in a tortilla is called a "Gallo" or "Gallito" — much like in Mexico they call them tacos. And because gallitos can be made with almost anything tortillas have become part of our identity.

Most Costa Ricans still prefer handmade tortillas. Factory-made ones may look perfect, but they’ll never have the same heart.

We usually make our tortillas a little thicker, so just one is enough for each gallo. And when they get a bit older, we give them a second life, turning them into prensadas de queso, tortilla soup, or other comforting homemade favorites you’ll soon see on The Latin Spoon.

So when you make these tortillas, remember — you’re not just cooking. You’re connecting with something timeless, humble, and full of soul.

Besitos (kisses),
Mara

Freshly hand-shaped tortillas resting on a traditional Costa Rican cloth, with tomatoes in the background.

Homemade tortillas

Nothing compares to the smell of freshly made tortillas warming on the comal. These homemade corn tortillas are soft, earthy, and full of flavor — the kind that remind you of slow mornings and family gatherings.
5 from 4 votes
Print Recipe Pin Recipe
Prep Time 10 minutes mins
Cook Time 10 minutes mins
Total Time 20 minutes mins
Course Side Dish
Cuisine latina
Servings 12 unidades

Equipment

  • 1 Bowls and spatulas
  • 1 tortilla press (optional)
  • 1 Measuring cups and spoons
  • 2 Round Plastic Sheets
  • 1 Non-stick skillet or comal
  • 1 kitchen towel

Ingredients
  

  • 1 cup corn flour
  • 1 cup water + 2 tablespoons
  • ¼ tablespoons salt

Instructions
 

  • In a large mixing bowl, combine the masa harina and salt. Slowly pour in the warm water while mixing with your hand until the dough starts to come together.
  • Work the dough for a few minutes until it feels soft, smooth, and not sticky. If it’s too dry, add a little more water—just one tablespoon at a time.
  • Divide the dough into small, even balls (about the size of a golf ball) and cover them with a damp cloth to prevent drying.
  • Option 1–Pressed tortillas: Place one dough ball between two pieces of plastic (or parchment paper) inside a tortilla press. Gently press down to flatten it into a thin circle.
  • Option 2–Hand-patted tortillas: Moisten your hands slightly, place the dough ball in one palm, and gently pat it back and forth between your hands, turning it as you go, until you form a round, even tortilla about ⅛ inch thick.
  • Heat a non-stick skillet or comal over medium-high heat. Once hot, place the tortilla on it and cook for about 30–45 seconds on each side, until it puffs slightly and gets light brown spots.
  • Transfer the cooked tortillas to a plate lined with a clean kitchen towel. Cover to keep them soft and warm while you cook the rest

Video

Notes

  • Use warm (not hot) water to mix the masa — hot water makes it sticky, cold water won’t bind.
  • Keep the dough covered with a damp towel so it doesn’t dry out.
  • Test one tortilla first to check dough moisture and pan heat.
  • Make sure the comal is very hot before cooking so tortillas puff nicely.
  • Flip gently once it releases from the surface.
  • Wrap tortillas in a clean towel right after cooking to keep them soft.
  • When reheating, cover with a damp paper towel to keep them moist.
    📌 For more recipes visit: thelatinspoon.com
Keyword Costa Rican Basics

Tilapia Ceviche — Costa Rican Style

Oct 18, 2025 · Leave a Comment

A bowl with small pieces of fish, tomatoes, cilantro, and onion, topped with two slices of avocado. On the side, a small cup with sliced hot peppers and a few tortilla chips.

There’s something about tilapia ceviche that just feels like Costa Rica on a plate — fresh, bright, and full of life. It’s one of those dishes that brings people together, whether it’s for a beach afternoon, a family lunch, or simply a craving for something light and full of flavor. With just a few simple ingredients like tilapia, lime, onion, tomato, and cilantro, you can make a dish that tastes like home, no matter where you are.

A bowl with small pieces of fish, tomatoes, cilantro, and onion, topped with two slices of avocado. On the side, a small cup with sliced hot peppers and a few tortilla chips.

I’ve made this recipe so many times, and somehow it never feels repetitive. Some days I keep it classic with just fish, other times I mix things up, adding shrimp, a few chunks of ripe mango, or even a touch of spice for something bold. That’s what I love most about ceviche — it has the audacity to transform, to become whatever you want it to be. Every version tells its own story, but they all share that same freshness, that same spark of flavor that makes you stop and smile after the first bite.

This version is light, balanced, and simple, but it carries all that brightness I love. The freshness of the fish, the crisp onion, the kick from the lime. It all comes together like a little symphony of flavor. And while every region has its own way of making it, this one is mine: straightforward, full of personality, and made to be shared.

What is Costa Rican Ceviche?

Ceviche is a dish made with raw fish (it can also be prepared with shrimp, crab, octopus, or other shellfish) that is marinated in lime or lemon juice for at least 20 minutes. During this time, the acid in the citrus juice “cooks” the fish through a scientific process called denaturation, where the acid causes the proteins in the fish to change. This happens without any heat. As the process occurs, the fish changes color — it becomes more opaque, almost white — and its texture turns firm and pleasant to eat. Even though the fish is still technically raw, this process makes it safe for human consumption.

Now, this doesn’t mean ceviche is completely free of bacteria, parasites, or harmful pathogens. It simply means the fish has been prepared in a way that makes it safe to eat, but there’s still a risk of foodborne illness. That’s why food safety precautions are essential when preparing ceviche: always use high-quality fish, ask your fishmonger for sushi-grade fish, buy from a trusted source, keep it refrigerated at all times, and serve it immediately after preparation. (Visit the FAQ to learn more about how long ceviche is good for.)
In Costa Rica, the term ceviche has taken on a broader meaning. For us, anything that’s marinated in lemon juice is considered a ceviche — not just fish. That’s why you’ll find plantain ceviche, heart of palm ceviche, pejibaye ceviche, and many other creative versions. Each one reflects the Costa Rican way of enjoying fresh, simple ingredients with a bright citrus flavor.

(And if there’s a particular version you’d like to see on the channel, let me know in the comments!)

Let’s move into the Ingredients section for your Costa Rican-style Tilapia Ceviche

Top view showing the following ingredients: fresh tilapia, red onion, tomato, yellow lemons, black pepper, salt, cilantro, jalapeño pepper, and sugar.

Ingredients for Ceviche

I want you to feel bold and inspired to create your own ceviche at home, so please use the following ingredients as a guide, not as the only options available.

🐟 Tilapia

For this recipe, I’m using fresh tilapia, but feel free to substitute it with sea bass, cod, or even shrimp if you prefer. Tilapia is mild and tender, which makes it perfect for soaking up all that citrus flavor.

🧅 Red Onion

I love using red onion for ceviche because it adds color and a little sharpness. If you prefer a milder flavor, go with sweet or yellow onion — or simply use whatever you already have at home.

🍋 Limes and Lemons

In this recipe I prefer to mix limes and lemons — they each bring a different kind of brightness. Limes are sharper, lemons are smoother, and together they create the perfect balance.

🍅 Tomatoes

For this recipe, I used beefsteak tomatoes, but feel free to use any variety you like. Even cherry tomatoes work beautifully — just cut them in halves or quarters.

🌶️ Pickled Jalapeños

I’m using my own recipe for pickled jalapeños (recipe coming in about two weeks, stay tuned), but canned jalapeños work just fine. And don’t forget about fresh jalapeños — they’re amazing too!

🌿 Cilantro (or Culantro)

Cilantro is the star of this recipe, and it should always be fresh. You can swap it for culantro if that’s what you have — the flavor is stronger, but equally delicious. Even though there’s a dried version, I really recommend using fresh leaves for that burst of flavor and vibrant color that makes the ceviche come alive.

🧂 Salt

I prefer using Unrefined Mineral Salt in my recipes, but honestly, any kind of salt works just fine. Use whatever you have at home — it won’t change the flavor or the quality of your ceviche.

Black Pepper

The flavor of freshly cracked black pepper tastes amazing in this recipe — it adds a bright, fresh touch. But if you already have it pre-ground, like I did this time, that works perfectly too.

Sugar

I used regular white sugar to balance the flavors, but you can use any substitute you like. You can even add a splash of 7UP — it gives a gentle sweetness and adds a bit more liquid to the ceviche. This is a good technique if you want your ceviche to be very caldoso (see the FAQ for more on this).

A bowl with small pieces of fish, tomatoes, cilantro, and onion, topped with two slices of avocado. On the side, a small cup with sliced hot peppers and a few tortilla chips.

💡 Extra Tips for Making the Best Ceviche Ever

  • Freshness is everything. Look for fish that’s firm, with no strong smell, and buy it the same day you plan to make your ceviche.
  • It’s best when all the pieces of fish are cut to about the same size. It doesn’t matter if they’re big or small, what matters is that they’re even, so every bite feels balanced and the ceviche looks beautiful when served.
  • Use fresh lime juice only, it makes a world of difference. Bottled lime juice tends to taste flat or bitter, so squeeze it fresh if you can, it’s worth the extra minute.
  • Refrigerate your ceviche for about 20 to 30 minutes before serving. That’s enough time for the lime to finish “cooking” the fish and for all the flavors to come together. Serve it right after chilling.
  • Avoid using an aluminum or copper bowl when mixing ceviche. The acid from the citrus juice reacts with those metals and can leave a metallic taste in your dish. Stick to ceramic, glass, or stainless steel bowls instead.

Step-by-step photos

Now it’s time to roll up our sleeves and make some kitchen magic happen-bright, zesty, and full of flavor, just like a perfect summer afternoon.

On a cutting board, tilapia is being cut into small cubes with a knife

Step 1: Prepare the fish.

Cut the thinner side of the fillet into strips, then into small cubes. Do the same with the thicker part, slicing it in half first so everything ends up about the same size.

On a cutting board, a red onion is being chopped into small pieces with a knife.

Step 2: Dice the onion

Cut the onion in half, remove the skin, slice it into thin strips, and then cut diagonally to create small cubes.

In the foreground, a clear bowl contains pieces of fish and chopped onion. In the background, hands are cutting lemons in half on a cutting board.

Step 3: Add the onion and Lemons.

Add the onion to the bowl with the tilapia. Cut the lemons in half and squeeze the juice over the diced tilapia.

A clear bowl filled with small diced fish and onion, with a lemon squeezer positioned above it as juice drips down

Step 4: Cover the fish with enough lemon juice

The recipe calls for 8 to 10 lemons, but you may need more or less depending on how juicy they are.

A clear bowl held by two hands, containing pieces of fish and chopped red onion, lightly covered with lemon juice.

Step 5: Let it rest.

Set it aside. The lime will keep “cooking” the fish while you get the rest ready.

On a cutting board, hands are cutting a tomato into pieces with a knife.

Step 6: Prepare the tomato.

Cut the tomato in half, then into wedges, and scoop out the seeds. Then, cut the tomato flesh into small cubes — about the same size as the tilapia.

A clear bowl with diced tomatoes and finely chopped jalapeño. Above it, a cutting board is held at an angle while a knife slides chopped cilantro from the board into the bowl.

Step 5: Add jalapeño and cilantro.

Add chopped pickled jalapeños to the bowl with the tomato. Wash and finely chop the cilantro (or culantro), add it in, and give everything a quick mix.

A clear bowl with tomato, cilantro, and jalapeño mixture is being tilted over another bowl on the table that contains diced tilapia, red onion, and lemon juice.

Step 6: Combine everything.

Add the tomato, cilantro, and jalapeño mixture to the ceviche base.

The left hand holds a small bowl with sugar, while the right hand uses a measuring spoon to scoop sugar from the bowl to add it into a clear bowl below that contains the ceviche mixture.

Step 5: Add sugar.

Add the sugar, black pepper, and salt, then mix everything together until the flavors taste just right.

Two bowls with small pieces of fish, tomatoes, cilantro, and onion, topped with two slices of avocado. On the side, a small cup with sliced hot peppers and a few tortilla chips.

Step 6: Serve and enjoy.

Serve it with a few slices of avocado, and enjoy it with tostada chips or your favorite crackers.

💡 All Your Tilapia Ceviche FAQs Here

Why add sugar to my tilapia ceviche?

Just a little sugar helps balance the acidity from the lime juice. It doesn’t make this tilapia ceviche sweet — it simply smooths out the sharpness and gives it a perfect flavor balance.

How long should the fish sit in the lime juice?

About 20 to 30 minutes is usually enough. You’ll know it’s ready when the fish turns opaque and firm. Letting it sit too long can make the texture a bit rubbery.

Can I make tilapia ceviche ahead of time?

You can prep everything in advance and mix it shortly before serving. If you let it sit too long (more than a few hours), the fish can over-marinate and lose that fresh, bright flavor.

Do I have to add tomato or jalapeños?

Not at all. Both are optional — the tomato adds color and jalapeños a little kick, but you can skip or substitute them with what you like.

How long can I keep ceviche in the fridge?

Ceviche is best enjoyed the same day it’s made. You can refrigerate it for up to 24 hours, but after that, the texture of the fish starts to change and the flavors lose their brightness.

How long does it take ceviche to go bad?

Spoiled ceviche can turn slimy and may even start changing to a grayish color. The smell is usually the biggest giveaway — ceviche will tell you right away, “Hey! I’m no longer good.”
My rule of thumb is simple: if you’re unsure about the smell or appearance, don’t eat it. Trust your gut — it has been saving humans for thousands of years.

What is Ceviche Caldoso/a?

Since ceviche can be made in many ways, in Costa Rica people often prefer it very caldoso, meaning it has plenty of juice or broth to enjoy with the fish. Because you don’t want to eat straight lemon juice, other liquids are sometimes added to balance the flavor — like sparkling water, clear sodas such as 7UP or ginger ale, and even orange soda in some variations.

🐟 Why You’ll Love this Tilapia Ceviche?

Ceviche is part of the Costa Rican street food repertoire, but it’s also enjoyed at parties, get-togethers, and family gatherings. It’s not just something you eat on the go; it’s a dish that’s deeply rooted in the culture and enjoyed on a regular basis. Because fish is so easy to find on both the Pacific and Atlantic coasts, ceviche is loved all year round, whether it’s raining, sunny, or windy.
This ceviche is quick to make, fresh, lemony, and juicy. It’s a recipe I’ve tested for many years, and it’s so good you’ll want to make it again and again.

I love ceviche and have so many other versions — some with fruit (yes, fish and fruit are a delicious combo), others with coconut milk or different types of fish. I can’t wait to share them all with you. Just let me know in the comments if you’d like to see more ceviche recipes.
In the meantime, I’ll be sharing more Costa Rican recipes with you, like:

Heart of Palm Salad
Costa Rican Gallo Pinto
Hot Dogs with Cabbage
Yucca Flower Picadillo
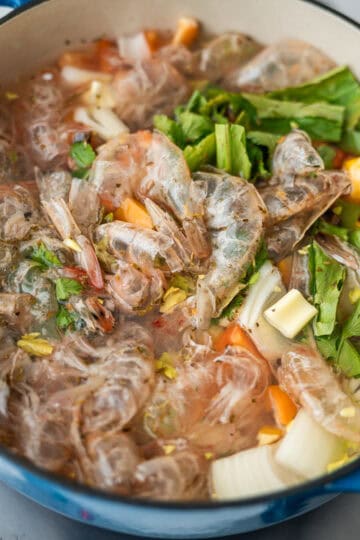
See you next time with more delicious Costa Rican dishes!

Besitos (kisses),
Mara

A bowl with small pieces of fish, tomatoes, cilantro, and onion, topped with two slices of avocado. On the side, a small cup with sliced hot peppers and a few tortilla chips.

Tilapia Ceviche (Costa Rican Style)

This Costa Rican Tilapia Ceviche is light, fresh, and full of tropical flavor. Made with diced tilapia, lime juice, red onion, tomato, and cilantro, it’s a simple yet vibrant dish that captures the essence of coastal cooking.
Print Recipe Pin Recipe
Prep Time 15 minutes mins
Refrigeration Time 20 minutes mins
Total Time 35 minutes mins
Course Appetizer, Main Course
Cuisine Costa Rican
Servings 8 servings

Equipment

  • Bowls and spoons
  • chopping board and knife
  • lemon juicer

Ingredients
  

  • 2 lbs of fresh tilapia
  • 1 red onion
  • 8-10 limes/lemons
  • 3 tomatoes
  • 1 small bunch of cilantro
  • 1 teaspoon of black pepper
  • 2 teaspoons of sugar
  • 2 ½ teaspoons of salt
  • Chile jalapeño to taste

Instructions
 

  • Separate the thinner part of the tilapia from the thicker part. Cut the thin pieces into long strips, then into cubes. Slice the thicker part in half to make it thinner, and repeat the same process so all pieces are about the same size. Place the fish in a mixing bowl.
  • Cut the red onion in half, remove the skin, slice lengthwise, then dice. If you prefer smaller pieces, mince to your liking. Add to the bowl with the fish.
  • Squeeze enough lime or lemon juice to fully cover the fish and onion. Mix to coat evenly. Let sit while you prep the rest.
  • Optional: Cut tomatoes into wedges, remove the seeds, then slice into strips and dice. Add finely chopped pickled jalapeños and chopped cilantro to the same bowl. Give it a quick stir just to combine, then add this mixture to the ceviche bowl.
  • Add black pepper, sugar, and salt. Mix gently to combine.
  • Refrigerate for at least 20 minutes so the citrus can finish “cooking” the fish.
  • Taste and adjust seasoning with more salt, black pepper, jalapeños, or a touch of sugar if needed.
  • Serve in small cups. Optional: garnish with avocado slices and serve with tortilla chips or regular crackers.

Video

Notes

  • Use firm, fresh fish with no strong smell, and buy it the same day you plan to make your ceviche.
  • Keep all fish pieces about the same size so every bite feels balanced and the ceviche looks beautiful when served.
  • Bottled lime juice can taste flat or bitter. Freshly squeezed makes a world of difference.
  • Refrigerate for 20–30 minutes so the lime finishes “cooking” the fish and all the flavors come together. Serve right after chilling.
  • Acid reacts with aluminum or copper and can leave a metallic taste. Use ceramic, glass, or stainless steel bowls instead.
  • Ceviche is best enjoyed the same day. You can refrigerate it up to 24 hours, but after that the fish loses its texture and flavor, and the risk of foodborne illness increases.
  • In Costa Rica, we love ceviche caldoso, with plenty of broth or juice. Some people add sparkling water, clear sodas like 7UP or ginger ale, or even orange soda to balance the acidity.
 
📌 For more recipes, check www.thelatinspoon.com
Keyword No Cook, Seafood

Fig Cake with Condensed Milk Glaze-Queque de Higos

Oct 11, 2025 · Leave a Comment

A close-up of a slice of fig cake with a caramelized fig from the preserves in front of it, while the rest of the cake is visible in the background.

After making my fig preserves with all the delicious fresh figs I found at the store, I decided to create another recipe using them. In Costa Rica, Fig cake is a well-known and beloved dessert throughout the year, but it becomes especially popular during Christmas time. Here in the United States, figs are in season right when we start transitioning from summer to fall, and making this cake during that time not only made me feel like I was back home, sitting with my family enjoying a slice of fig cake, but also made me feel like Christmas had already arrived.

Two slices of fig cake in the front, with the main cake in the back showing where those slices were cut, and a fork placed beside them

We’re also making this cake using the creaming method, which involves beating the butter and sugar together for a few minutes to incorporate air into the mixture. This acts as a leavening agent, helping the cake turn out soft yet firm, with a tender crumb that holds together beautifully without falling apart.
Not only is the fig cake delicious, but the condensed milk glaze on top is the perfect match for it. I really hope you give the glaze a try as well.

What is Condensed Milk Glaze?

Condensed milk glaze is a simple, rich, and glossy topping made by gently heating sweetened condensed milk with butter, heavy cream, and sometimes vanilla extract.

As it cooks, the mixture thickens and becomes smooth and pourable. When poured over cakes, it sets into a shiny layer that adds sweetness and moisture without being as heavy as frosting.

It is very common in Latin American desserts, especially in Costa Rican and Brazilian recipes, because it adds a creamy, caramel-like flavor that pairs beautifully with sponge cakes, fruit cakes, and even pastries.

Overhead view of all the ingredients used to make the fig cake, each labeled with its name.

Ingredients for The Fig Cake Batter

These are the ingredients we’re going to use for the cake.

🌾 All-purpose flour

This is the regular flour most people already have at home. If you want to make this recipe gluten-free, use a flour that says 1:1 gluten-free baking mix so you can replace it in the same amount without changing the texture of the cake.

🍯 Brown sugar

In Costa Rica, this cake is traditionally made with tapa de dulce (unrefined cane sugar). If you want to try the authentic version, you can find it here. I didn’t have any on hand and didn’t want to wait for it to arrive, so I used regular brown sugar instead, and I was very happy with the final result.

🧈 Butter

I use unsalted butter, but if you decide to use salted butter, simply skip the salt in the recipe.

🥚 Eggs

Make sure the eggs are at room temperature, just like the butter. This helps everything mix together smoothly and evenly.

🍈 Fig preserves

I used my own Fig Preserves recipe to take advantage of the fig season. It gives the cake an amazing flavor and a beautiful texture.

🧂 Salt, baking powder, and vanilla extract

These ingredients help create a nice balance of flavors and ensure the cake rises perfectly while baking.

Overhead photo of the ingredients for the condensed milk glaze, with each ingredient labeled by name

Ingredients for The Condensed Milk Glaze

This fig cake is already delicious on its own, but adding the glaze takes it to another level. Here are the ingredients.

🥛 Condensed milk

This ingredient is very common in Latin cooking, and it’s easy to find in almost any grocery store in the United States, usually in the baking aisle. You can also use vegan condensed milk, and it will give you the same delicious result.

🍶 Heavy cream

Adds richness and helps thin out the condensed milk just enough so it becomes a smooth, pourable glaze that drips beautifully over the cake.

🧈 Butter

Gives the glaze a silky texture and a soft, creamy shine once it sets on the cake.

🌿 Vanilla extract

Adds that warm, aromatic flavor that balances the sweetness of the condensed milk.

🍈 Figs

You can use fresh figs or the fig preserves from our recipe. They’re meant for decorating the top of the cake, making it look even more delicious while showing everyone what kind of cake it is.

Overhead shot of the fig cake with two missing slices, beside the large plate are those two slices served on individual plates with forks next to them.

💡 Extra Tips for a Fluffy and Creamy Cake

  • Always preheat the oven and prepare your baking pan before you start mixing. This makes the process smoother and helps the cake bake evenly.
  • Always use butter at room temperature. If you forgot to take it out earlier, microwave it in 10-second intervals until softened, but do not melt it.
  • The same goes for the eggs. They should also be at room temperature. If they’re cold, place them in a bowl with warm (not hot) water for a few minutes to bring them up to temperature faster.
  • Do not overmix the batter. Overmixing activates the gluten and can make the crumb dense and tough instead of light and fluffy.
  • Check the thickest part of the cake to make sure it’s fully baked. Insert a bamboo stick or a knife, and if it comes out clean, the cake is ready.
  • Let the cake rest for 10 minutes before unmolding. If you flip it right out of the oven, there’s a higher chance it will break.

Step-by-step photos

Pictures speak louder than words, so here’s a step-by-step with photos (and just a few words) to show you how to prepare Fig Cake.

A bundt cake pan seen from the side, with the left hand holding and rotating the pan to spread the flour evenly on the sides.

Step 1: Preheat the oven to 350°F (175°C) and prepare your bundt cake pan. Grease it with oil spray, spread evenly, dust with a little flour, and set aside.

A clear glass bowl with flour at the bottom, and two hands above it, the right hand holding a small cup of salt and the left hand holding a small cup of baking powder.

Step 2: In a medium bowl, combine the dry ingredients (flour, baking powder, and salt). Mix well and set aside.

A clear glass bowl containing medium-sized cubes of butter with brown sugar being poured in.

Step 3: In a large bowl, cream the butter and sugar for about 5–7 minutes, until the mixture looks lighter in color and airy.

A glass bowl showing the mixture of butter and brown sugar with a freshly added egg, while the mixer is turned off.

Step 4: Add one egg at a time, mixing for about 40 seconds or until fully incorporated before adding the next one. Repeat until all eggs are added.

The cake-making process showing dry ingredients — flour, salt, and baking powder — being added to the butter mixture while the mixer is stopped.

Step 5: Add one-third of the dry ingredients and mix slowly until combined.

The cake batter preparation process showing milk being added slowly while the stand mixer is paused.

Step 6: Then add half of the milk and continue mixing. Alternate between dry ingredients and milk until everything is incorporated.

A glass bowl with the cake batter, and a second bowl adding diced figs into the mixture.

Step 7: Add the fig preserves and gently fold with a spatula until the mixture is well combined. Do not overmix.

A prepared bundt cake pan, greased and floured, being filled with the fig cake batter, ready to be baked.

Step 8: Pour the batter into the prepared pan and bake for about 55 minutes, or until a bamboo stick inserted in the center comes out clean. Remove from the oven and let it rest before unmolding.

A small pot with condensed milk as heavy cream is slowly being added to the mixture

Step 9: To make the condensed milk glaze, add all the glaze ingredients to a small pot and cook over medium heat for 7-10 minutes, stirring constantly.

A small pot cooking the condensed milk frosting for the cake, with small bubbles showing it is thickening over medium heat, and a pink spatula dripping a bit to show the consistency.

Step 10: Once it starts to thicken, check the consistency by lifting the spatula to see how it runs down. When it reaches your preferred thickness, remove it from the heat.

A baked bundt cake as condensed milk glaze is slowly poured on top, spreading across the surface.

Step 11: Pour the condensed milk glaze over the cake, letting it drip naturally down the sides. Decorate with small pieces of figs on top to make it look even more beautiful and hint at the flavor inside.

💡 Your Fruit Salad Questions, Answered

Can I use fresh figs instead of fig preserves?

Yes, you can use fresh figs instead of preserves. Just make sure to remove the stems, wash them well, and chop them into small pieces. Keep in mind that fresh figs have more water, so the texture might be slightly softer. If you want to keep the same balance of sweetness, you can sprinkle a little brown sugar over the chopped figs before adding them to the batter.

Can I make this recipe gluten-free?

Absolutely. Use a 1:1 gluten-free baking flour (the kind that says “cup-for-cup” or “measure-for-measure”) and substitute it in the same amount. The texture will remain soft and delicious, just like the original recipe

My glaze turned too thick, how can I fix it?

If your condensed milk glaze thickened too much, don’t worry. Simply add one or two tablespoons of heavy cream or milk and stir over low heat until smooth again. The glaze will loosen up and become easier to pour over your cake.

Can I make this recipe dairy-free?

Yes. You can replace the butter with vegan butter, the milk with plant-based milk (such as almond or oat milk), and the condensed milk with vegan condensed milk. You’ll still get a creamy and flavorful result.

Why did my cake turn out dense instead of fluffy?

This usually happens when the butter and sugar are not creamed long enough or when the batter is overmixed after adding the dry ingredients. Make sure to cream the butter and sugar for 5–7 minutes to incorporate enough air, and mix the batter only until everything is just combined.

Can I use this batter to make cupcakes instead of a full cake?

Yes, you can. Fill your cupcake liners about three-quarters full and bake at 350°F (175°C) for 22-25 minutes, or until a toothpick inserted in the center comes out clean. You’ll get the same delicious flavor in a smaller, individual size.

🍈 Why you will love this recipe

Figs are in season right now, which makes it the perfect time to make a batch of Fig Preserves. Once you have them ready, this cake becomes a recipe you can enjoy any time of the year. Every bite of this fig cake is filled with the rich flavor of sweet, ripe figs. It’s sweet but not overly sweet, with a crumb that is soft yet firm, and the condensed milk glaze on top ties everything together beautifully. The result is a dessert that feels cozy, festive, and perfect for sharing with family and friends.

I hope you give this one a try, and let me know in the comments if there’s another Costa Rican dessert you’d like to see next

Besitos (kisses),
Mara

A close-up of a slice of fig cake with a caramelized fig from the preserves in front of it, while the rest of the cake is visible in the background.

Fig Cake with Condensed Milk Glaze

This Costa Rican Fig Cake is soft, fluffy, and perfectly sweet, made with homemade fig preserves and topped with a creamy condensed milk glaze. Every bite is rich, comforting, and full of flavor.
Print Recipe Pin Recipe
Prep Time 20 minutes mins
Baking Time 55 minutes mins
Total Time 1 hour hr 15 minutes mins
Course Dessert
Cuisine Costa Rican
Servings 12 servings

Ingredients
  

Ingredients for the Fig Cake

  • 2 sticks butter
  • 1 cup brown sugar
  • 4 eggs
  • 2 ½ cups flour
  • ½ teaspoon salt
  • 3 teaspoons baking powder
  • 1 teaspoon vanilla extract
  • 1 cup milk
  • 1 ½ cups figs about 10–12 caramelized figs

Ingredients for the glaze

  • 1 can sweetened condensed milk
  • ½ stick butter
  • ½ cup heavy cream
  • 1 teaspoon vanilla extract
  • Figs for garnish

Instructions
 

Instructions for the Cake

  • Preheat the oven to 350°F (175°C). Grease a bundt cake pan with oil spray, spread it evenly using a paper towel or napkin, remove any excess, and dust lightly with all-purpose flour. Tap gently to coat all corners, then discard the excess flour. Set aside
  • In a medium bowl combine the flour, salt, and baking powder. Whisk for a few seconds until evenly mixed and set aside
  • Drain the syrup from the figs, pat them dry, cut them in half, then in quarters, and into medium-sized pieces. Set aside
  • In a large bowl add room-temperature unsalted butter (if using salted butter, skip the salt in the dry ingredients) and brown sugar. Beat at medium speed for 1–2 minutes, then increase to high speed and mix for 5–7 minutes until light, fluffy, and creamy. Stop the mixer occasionally to scrape the bottom and sides of the bowl.
  • Add one egg at a time, mixing for about 40 seconds or until fully combined before adding the next. Repeat until all eggs are incorporated
  • Stop the mixer before adding dry ingredients to avoid a mess. Add one-third of the dry mixture, mix on low speed just until combined, then add half of the milk. Repeat with another third of the dry ingredients, the remaining milk, and the final third of the dry ingredients. Mix only until everything is combined, do not overmix.
  • Gently fold the chopped figs or fig preserves into the batter with a spatula until evenly distributed. The batter will look creamy and slightly darker if using black figs.
  • Pour the batter gently into the prepared bundt pan, spreading it evenly with a spatula. Bake on the middle rack for 55 minutes, or until a bamboo stick inserted in the center comes out clean.
  • Let the cake rest for about 10 minutes before flipping it onto a serving plate.

Instructions for the Glaze

  • In a small pot add sweetened condensed milk, heavy cream, butter, and vanilla extract.
  • Place over medium heat and cook for 5–10 minutes, stirring constantly. The butter will melt, and the glaze will begin to thicken.
  • When the glaze lightly coats the spatula, remove it from the heat. Keep in mind it will thicken more as it cools.
  • Pour the warm glaze over the cooled cake, letting it drip naturally down the sides for a glossy finish. Garnish with fresh or preserved fig pieces on top.

Video

Notes

  • Always preheat the oven before mixing the batter.
  • Use butter and eggs at room temperature for best results.
  • Cream the butter and sugar for 5–7 minutes to get a fluffy texture.
  • Add one egg at a time and mix only until combined.
  • Do not overmix the batter.
  • Let the cake rest for 10 minutes before unmolding.
  • If the glaze gets too thick, add a little cream or milk and stir over low heat.
 
📌 For more recipes, check www.thelatinspoon.com
Keyword Fig Preserves

Costa Rican Heart of Palm Salad

Oct 3, 2025 · Leave a Comment

A brown bowl holding the heart of palm salad, showing pieces of heart of palm, tomato, red bell peppers and other ingredients.

You’ve heard heart of palm is good for your health and went straight to the store to get some. Now you have one or two cans sitting in your pantry and don’t really know what to do with them? Well… in this blog, I’m going to show you a very easy, very quick, and delicious salad you can make in less than 15 minutes . The perfect way to finally use that can of palmito sitting in your pantry. Today is the day you’ll fall in love with heart of palm. If you want to watch the video instead click here.

A brown bowl holding the heart of palm salad, showing pieces of heart of palm, tomato, chili, and other ingredients, with green lemons and a small cup of black pepper visible outside the bowl.

Heart of palm (or palmito in Spanish) is an incredibly versatile ingredient that’s easy to work with. This salad pairs beautifully with just about any meal you’re planning, from grilled fish and chicken to a simple bowl of rice. And here’s a fun twist: if you chop the heart of palm a little finer, you can even turn it into a dip to enjoy with chips or tortilla chips.

What Exactly Is Heart of Palm?

Heart of palm is the core of a palm tree. Only certain palm tree species are suitable for harvesting the heart, and not all palm trees are edible. In Costa Rica, finding fresh palmito is very common, but because it has a short shelf life, it cannot be exported in its fresh form. Instead, it’s usually canned in a brine to preserve it for longer storage.

During the canning process, palmito is cooked, which means that once you open a can, it’s ready to use and doesn’t require any additional cooking. However, it’s worth noting that the brine can sometimes be too salty or too vinegary, so rinsing it off right after opening the can helps remove that strong flavor.

The reason you’ve probably heard that heart of palm is good for your health is because it’s very low in carbohydrates and helps satisfy your appetite quickly. It’s also rich in fiber, which supports digestion, and contains important minerals such as potassium, zinc, copper, and iron. Additionally, it provides all nine essential amino acids, making it a valuable plant-based source of protein.

But What Does It Taste Like?

Some people compare heart of palm to artichokes, while others say it’s similar to white asparagus. I honestly can’t tell you exactly what it tastes like because I’ve been eating heart of palm my entire life, and to me, it simply tastes like heart of palm. But what I can assure you is that it’s delicious.

It has a mild, earthy flavor and a texture that’s both crunchy and creamy. If you want to hear how crunchy it is straight from the can, go watch the video here. The outside is crisp, while the inside is soft and creamy.

Even though it has its own unique flavor, heart of palm is very versatile and absorbs the flavors of whatever you pair it with. That’s why we love it and use it so much. We add heart of palm to a wide variety of dishes such as empanadas, salads, rice, casseroles, dips, and many more recipes.
Like I said before, it’s not only very healthy and nutritious, it’s also delicious and low in carbs. If you’d like me to show you more delicious ways to cook with this ingredient, let me know in the comments!

Overhead photo showing all the ingredients used for the heart of palm salad, each labeled with its name.

Ingredients for Heart of Palm Salad

Here’s a list of the ingredients I used to make my heart of palm salad, along with some suggestions for possible substitutions.

🌴Heart of palm

The one I’m using is from Melissa’s Produce (not sponsored), and from all the canned palmito I’ve tried, this one is by far my favorite. It has a fresh, delicate flavor that’s as close as it gets to fresh palmito, which is easy to find in Costa Rica. I even made a short video explaining why I love it and how fresh it tastes, and you can find it here.

I was able to buy Melissa’s at my regular grocery store in Missouri, in the produce section under the refrigerated items. I’ve also seen it at Costco (although I haven’t tried that one yet, I’ve heard good things about it). Also, check the canned goods aisle of your supermarket, where you’ll likely find a few other brands. Whichever one you choose, I recommend rinsing off the brine they’ve been sitting in before using them. That liquid can sometimes be too salty or vinegary, and I prefer the cleaner taste without it. Of course, if you like the flavor of the brine, you can skip rinsing and use them straight from the can.

🧅 Onion and 🌶️ Bell peppers

I’m using yellow onion and red bell pepper for this recipe. Please use what you have, if you only have red onion, use that, and if you only have green peppers, don’t run to the store to get anything else. The main point of this salad is to highlight the palmito, and since it’s the main ingredient, everything else will simply complement it.

🍅 Tomatoes, 🌿 Celery, and 🌱 Cilantro

For tomatoes, I’m using cherry tomatoes because I think they look very fancy, but any type of tomato will work just fine. I’m also using only the tender leaves of celery, since they have a slightly stronger flavor than the stalks. Using the stalks would compete with the crunchiness of the palmito, and I only want that texture coming from the palmito (remember, heart of palm is the star here). Finally, cilantro will add a burst of freshness to this salad.

🍋 Limes or lemons, 🥄 Mayo, and 🌶️ Mustard

For this salad, you can use either limes or lemons. Limes will give the salad a brighter, slightly more tangy flavor, while lemons add a softer, more mellow acidity. Either way, the result will be delicious. For the mayo, I’m keeping it very light here, but if you want a creamier consistency, you can skip the lemon juice and increase the amount of mayo. It will be awesome too. Add mustard to boost the flavor of the dressing. It brings a gentle tangy note, helps balance the acidity, and makes the dressing come together beautifully.

🥫 Lizano Sauce

Lizano sauce, or salsa Lizano, is a beloved Costa Rican sauce that’s been around for more than 120 years. It’s made from a mix of vegetables and spices, and it adds a savory, tangy, slightly sweet flavor that’s hard to replicate. A little goes a long way. You can get it here, but if you can’t find it or just don’t feel like trying something new, I get it. Some days I’m in the mood to experiment and some days I’m not. You can simply skip it, and your salad will still taste delicious without it.

🍯 Agave

It doesn’t have to be agave specifically, but adding something sweet to this salad is exactly what’s needed to balance the tangy, acidic, and pungent flavors with a sweet, gentle note. You could use maple syrup, honey, or even sugar — just a little bit. Your salad won’t taste sweet, but that small amount will make it much more pleasant and balanced to eat.

🧂 Salt and Pepper

I’ll leave in the recipe the exact amount I used, but please adjust to your liking. Everyone’s taste is different, so feel free to add a little more or a little less to make the salad perfect for you.

A white plate with a finished dish ready to enjoy, featuring white rice, heart of palm salad, and a breaded tilapia fillet.

💡 Extra Tips for Making Tropical Fruit Salad

  • Choose the freshest heart of palm you can find. Look for heart of palm in the refrigerated section of the produce aisle, usually sold in clear glass jars. It tends to have a shorter shelf life, but that’s a good sign — it means it contains less salt and fewer preservatives and will taste fresher.
  • Don’t worry if canned is your only option. If refrigerated palmito isn’t available, canned works just fine. Simply rinse it thoroughly with plenty of water after opening to remove some of the salty or vinegary brine.
  • Cut it the way that works best for your dish. You can slice heart of palm into rounds or lengthwise depending on the look and texture you want. Some people even substitute traditional spaghetti with heart of palm spaghetti for a lighter, low-calorie alternative. (There’s nothing wrong with calories, but if it tastes good and has fewer — heck, count me in!)
  • Add the dressing at the right time. Only add the dressing right before serving the salad. This keeps the vegetables crisp and the flavors fresh. You can also adjust the amount depending on how creamy or light you want it.
  • Make it your own with extra vegetables. This salad is super flexible, so feel free to customize it. Add spinach, sliced radishes, avocado, or any other veggies you enjoy.
  • Adjust the dressing to your taste. If you prefer a creamier dressing, use less lemon juice and increase the amount of mayonnaise. Small adjustments can make a big difference in flavor and texture.

Step-by-step photos

Pictures speak louder than words, so here’s a step-by-step with photos (and just a few words) to show you how to prepare Heart of Palm Salad.

A wooden cutting board with a white onion being cut, the left hand holding the onion and the right hand cutting it with a knife.

Step 1: Prep the onion

Slice the onion very thin, either lengthwise or against the layers.

A wooden cutting board with a small glass bowl of onions, and above it a yellow lemon squeezer juicing a green lemon.

Step 2: Marinate with lemon juice

Add the juice of 1 lemon, stir, and make sure the onion is fully coated with the juice.

A wooden cutting board with two hands cutting heart of palm, with sliced pieces already on the board.

Step 3: Slice the heart of palm

Cut the heart of palm into rounds, making sure they are all about the same size, and place them in a large bowl.

A brown bowl with the salad ingredients, while a left hand holds a second bowl above it, separating the onions from the lemon juice left in the bowl.

Step 4: Combine onion and heart of palm

Remove the onion from the lemon juice and add it to the bowl with the salad. Save the lemon juice for the dressing.

A medium clear glass bowl with lemon juice and mayonnaise at the bottom, and a spoon adding agave syrup.

Step 5: Prepare the dressing

Add the mayonnaise, agave, and the remaining dressing ingredients to the reserved lemon juice.

A small clear glass bowl with liquid ingredients inside and a whisk mixing what appears to be the salad dressing.

Step 6: Whisk until smooth

Using a whisk, combine all the ingredients until smooth and free of lumps.

A brown bowl with all the salad ingredients separated — heart of palm on one side, onion, tomatoes, and other vegetables next to it — and a second bowl pouring dressing on top.

Step 7: Add dressing before serving

Add the dressing to the salad right before you’re about to serve it.

A brown bowl with heart of palm salad being mixed with a blue spatula, with a small cup of black pepper and fresh cilantro visible outside the bowl.

Step 8: Mix gently

Gently mix the salad with a spatula. Avoid using a fork, as it could break the heart of palm and you want to keep the round shape intact.

💡 Your Fruit Salad Questions, Answered

Can I make this salad ahead of time?

Yes, you can prep all the ingredients a few hours in advance, but wait to add the dressing until just before serving. This keeps the salad fresh and prevents the heart of palm from becoming too soft.

Does heart of palm need to be cooked before eating?

No, canned heart of palm is already cooked during the preservation process, so it’s ready to eat straight from the can or jar.

What can I substitute for heart of palm if I can’t find it?

There’s no exact substitute, but if you’re making a salad, you can replace heart of palm with other vegetables like cucumbers, zucchini, or yellow squash. If you want to keep a flavor closer to the original, try using artichokes or white asparagus instead.

Is heart of palm salad vegan?

This version is not, because it includes mayonnaise, but you can easily make it vegan by replacing it with vegan mayo or skipping it altogether. Salsa Lizano is vegan, so you can use that as well for extra flavor.

What does heart of palm pair well with?

Heart of palm pairs beautifully with a variety of foods. It goes especially well with grilled fish, chicken, or shrimp, and it’s a great complement to rice dishes or casseroles. You can also serve it alongside fresh greens, avocado, or citrus-based dressings for a light, refreshing meal.

🌴 Why You’ll Love Heart of Palm Salad

It’s crunchy, full of great flavor, and packed with health benefits. What else can I say? Oh! It’s fresh and it reminds me of Costa Rica — it takes me straight to a beautiful beach, enjoying this salad with some fresh-caught fried fish and a very cold passion fruit juice, all while listening to Bob Marley’s “Every Little Thing Is Gonna Be Alright” 🎶

Singin’: “Don’t worry about a thing…” 🎶 Haha, now I can’t get the song out of my head. This is still a very young blog, but I’ll be bringing you recipes like breaded tilapia, grilled chicken, and other Costa Rican dishes you can enjoy with this amazing salad.

For now, you can:
Make white rice
And black beans to enjoy alongside this beautiful salad.

Besitos (kisses),
Mara

A brown bowl holding the heart of palm salad, showing pieces of heart of palm, tomato, red bell peppers and other ingredients.

Costa Rican Heart of Palm Salad

A quick, fresh, and flavorful salad made with heart of palm, crisp vegetables, and a tangy homemade dressing. Perfect as a side dish or light meal, and ready in less than 15 minutes.
Print Recipe Pin Recipe
Prep Time 15 minutes mins
Total Time 15 minutes mins
Course Salad
Cuisine Costa Rican
Servings 8 servings

Equipment

  • Cutting board and knife

Ingredients
  

Ingredients for Heart of Palm Salad

  • 550 g heart of palm about 2 jars
  • ¼ sweet onion julienned
  • ¼ bell pepper julienned
  • 2 celery sticks diced
  • 1 small bunch cilantro chopped
  • 10-12 cherry tomatoes halved

For the Dressing

  • 1 lemon juiced
  • 1 tablespoon agave
  • 2 tablespoons mayonnaise
  • 1 teaspoon Lizano sauce
  • ½ teaspoon mustard
  • ½ teaspoon salt
  • ½ teaspoon black pepper

Instructions
 

Prep the vegetables:

  • Slice ¼ of a medium onion into very thin slices. Place them in a small bowl with the juice of 1 lime, stir well to coat, and set aside. This helps remove the raw flavor and makes it more pleasant in the salad.
  • Julienne the red bell pepper, cut the cherry tomatoes in half, chop the tender celery leaves or celery stalks, and finely chop the cilantro. Place everything in a large mixing bowl.
  • Add the heart of palm: Slice the heart of palm lengthwise or into rounds, keeping the thickness even, and add it to the bowl with the rest of the vegetables.
  • Combine the onion: Remove the onion from the lime juice and add it to the salad. Save the lime juice for the dressing.

Make the dressing:

  • In the same bowl with the lime juice, whisk together the mayonnaise, mustard, Salsa Lizano (optional), agave, salt, and black pepper until smooth. Taste and adjust seasoning if needed.
  • Dress and serve: Add the dressing to the salad right before serving. Start with a small amount, mix gently with a spatula, taste, and add more if desired. Adjust salt and pepper one last time and serve immediately.

Video

Notes

  • Choose heart of palm from the refrigerated section when possible; it’s fresher and has fewer preservatives.
  • If using canned heart of palm, rinse it well to remove excess salt or vinegar from the brine.
  • Slice it into rounds or lengthwise depending on your preference. You can even use heart of palm as a pasta substitute.
  • Add the dressing right before serving to keep the salad fresh and crisp.
  • Add extra veggies like spinach, radishes, or avocado to customize your salad.
  • For a creamier dressing, reduce the lemon juice and add more mayonnaise.
📍 For more delicious recipes, visit thelatinspoon.com
 
 
Keyword Healthy sides

Costa Rican Fig Preserves Recipe

Sep 26, 2025 · Leave a Comment

Overhead view of fig preserves in their syrup, with cinnamon sticks, fresh figs, and whole cloves visible in the background.

I promise you, I was not planning on making this recipe. But then I went to Whole Foods because I needed to restock the pantry, and they had fresh figs right at the entrance of the store. I thought, "Ok, they have figs." Then I went to Costco, and they also had figs in their refrigerated section (it’s not technically a freezer, but it’s so cold you need a jacket in there!). Costco had a better deal, but I still decided not to get figs that day because I hadn’t planned on making anything with them. Watch video here.

The following day, I went to Trader Joe’s and OMG, they had like five different types of figs. That’s when I said, "Ok, this is a sign from the Universe that I have to make something with figs." And that’s how I ended up here, making Higos en miel, which translates to Fig Preserves.

This is the Costa Rican version of fig preserves. It’s not just figs and sugar, the combination of lemon, cinnamon, and the natural flavor of the figs makes this recipe so delicious that I can’t wait for you to try it at home. Make sure to tune in next week, because I’ll be making an amazing recipe that uses these fig preserves.

What is Fig Preserves?

A fig preserves is a sweet, thick mixture made by slowly cooking fresh figs with sugar (and often spices like cinnamon, cloves, or lemon peel) until they break down and release their natural juices, creating a flavorful syrup. The result is similar to a jam or marmalade, but preserves usually keep the fruit pieces more intact, so you still get bites of soft, caramelized figs in every spoonful.

They’re traditionally stored in jars and can be enjoyed on toast, with cheese, over desserts, or even in savory dishes. In Costa Rica, higos en miel (figs in syrup) is a classic homemade version that’s often made during fig season and enjoyed throughout the year.

They are also used in other pastry deliciousness, like a bread filled with fig preserves and pastry cream, the famous Costa Rican queque de higos, fig ice cream (helado de higos), and many more. And even though all those treats exist, Costa Ricans love to eat miel de higos or caramelized figs on their own, usually with a cup of coffee in the mid-afternoon, surrounded by family and friends. (Which is my favorite time of the day: coffee time 😉)

I will not be showing you in this video or blog how to can your preserves, since the amount I made was just enough for the next recipe I’m preparing. But if you harvest your own figs, you will probably need to can some because of the quantity you’ll be making. In that case, I suggest you watch a video on YouTube about canning, or leave me a comment letting me know if you’d like me to show you how to do it.

Ingredients for Your Fig Preserves

Remember, these are the ingredients I used, along with some substitutions you can try. Feel free to add or remove ingredients as you like (if the recipe allows it, of course).

🍈 Fresh Figs

I’m using black figs (Black Mission), but there’s a wide variety of figs out there. Some are green, brown, or black, and they come in different shapes and sizes, some are big and round, while others are smaller and more elongated around the neck. They all taste like figs, but at the same time, each variety has its own unique flavor. Some are sweet and jammy, with notes of honey, berries, dates, or melons.

You can use whichever type is available to you. The only suggestion is to keep an eye on the cooking time. If your figs are not fully ripe, they’ll be a bit firmer, and you’ll need to extend the cooking time.

🍬 Brown Sugar

To make an authentic Costa Rican fig preserve, I would have used tapa de dulce, which is the equivalent of brown sugar over there. It’s definitely not the same. Tapa de dulce is a type of raw sugar, while brown sugar is regular sugar mixed with molasses. But honestly, since I was not planning to make this recipe, I didn’t have tapa de dulce in my pantry and didn’t feel like waiting for it to be delivered from Amazon (find the link here). So I substituted it with brown sugar, and let me tell you, the flavor and final result were just as good as with tapa de dulce.

If you don’t have regular brown sugar, you can add some molasses to white sugar, and it will taste delicious. Regular sugar on its own will also work and still be delicious.

🍋Lemon Juice or Rind

Both bring that touch of acidity to the recipe, and they both also act as a natural preservative. You can use either one, but I like using the rind because the oils in the peel add a more concentrated aroma and flavor that’s often sweeter and more intense than the juice. Whether you use the juice or the rind, both will help your fig preserves last longer.

🧂 Seasonings

Here we add the cinnamon, vanilla extract, cloves, and a little bit of salt. You could skip any or all of them, but adding them won’t add any calories and will bring lots of flavor to your fig preserves. The salt won’t make it salty, but it will accentuate the flavors and help everything blend beautifully.

I like using cinnamon sticks, but you can use ground cinnamon if you prefer. It’s one of those ingredients I suggest not skipping, because it adds a warm, comforting flavor that makes this recipe extra delicious.

You can also experiment with other seasonings like nutmeg, cardamom, or star anise to give your fig preserves a special flavor twist

💡 Pro Tips for the Most Delicious Fig Preserves

  • Choose the best figs. Pick the ones that look fresh and healthy, without bruises, soft spots, or bumps on the skin.
  • Cook them until soft or to your preferred doneness. Depending on how ripe they are, this could take as little as 10 minutes.
  • Don’t overcook them. They can become mushy. They’ll still taste good, but they’ll lose their shape.
  • Thicken the syrup separately. This way you avoid overcooking the figs while still getting that perfect consistency.
  • Let the preserves cool completely before refrigerating, or can them immediately if you plan to store them long-term.

Step-by-step photos

Even though making fig preserves isn’t complicated, I’ll walk you through it with step-by-step photos so you can see each stage. Use them as a quick reference while you cook.

Two hands holding figs, with the right hand cutting off the stems using a knife.

Step 1: Remove the stems

Use a knife to cut off the stems from the figs. Check each one and remove any bad or damaged parts before cooking.

Step 2: Rinse the figs

Wash them with plenty of water to remove any dirt, then place them in a tall pot or pan.

A pot filled with fresh figs while a pitcher pours water into it.

Step 3: Add the water

Pour the water into the pot with the figs.

Step 4: Add lemon rind or juice

Peel the rind of a lemon and add it to the pot, or use lemon juice if you prefer. Both work well.

Step 5: Add sugar and seasonings

Add the sugar, salt, cinnamon, vanilla extract, and cloves. These ingredients will give your preserves a rich, delicious flavor.

Step 6: Cook the preserves

Cook over medium heat for about 40 minutes, or until the figs reach your desired consistency.

Step 5: Thicken the syrup

Remove the figs from the pot and boil the syrup again on its own for about 5 minutes or until it thickens to your liking.

Step 6: Strain and combine

Strain the syrup to remove the cinnamon stick, lemon rind, and cloves. Then pour the syrup back over the figs and enjoy your delicious preserves.

❓ Frequently Asked Questions

Can I use a different type of fig for this recipe?

Yes! You can use any variety you have available. Green, brown, or black figs all work. Just keep in mind that if your figs are not fully ripe, they’ll be firmer and might need a longer cooking time.

Can I make this recipe without cinnamon or cloves?

Absolutely. While they add wonderful flavor, you can skip them if you’re allergic or sensitive, or replace them with other spices like cardamom, nutmeg, or star anise.

What if I don’t have tapa dulce?

No problem. You can substitute it with brown sugar, or mix white sugar with molasses to get a similar flavor.

How long do fig preserves last?

Stored in an airtight jar in the refrigerator, they’ll last for about 2 to 3 weeks. If you properly can them, they can last for several months.

What can I use fig preserves for?

They’re delicious on toast, with cheese, in pastries, cakes, ice cream, or simply on their own with a cup of coffee.

❤️ Why You’ll Love This Fig Preserves Recipe

First, if you’re a fig lover, this recipe lets you enjoy figs long after the season is over. It’s a simple way to preserve their sweetness and enjoy them all year round.

You can also make it a bit healthier by using a sugar substitute instead of brown sugar. It won’t thicken as much (since sugar helps with that), but you’ll still have delicious preserves to use in many ways.

And that’s another reason to love it: this recipe isn’t just about making fig preserves. It’s about creating a versatile ingredient you can use in breads, pastries, ice cream, and so much more. Plus, nothing beats enjoying a spoonful of higos en miel with a warm cup of coffee and good company.

Make sure to tune in next week, when I’ll be using these fig preserves in another delicious Costa Rican recipe you won’t want to miss. In the meantime, go and make yourself a delicious bowl of:

  • White Rice
  • Black Beans
  • Tropical Fruit Salad

All done the Costa Rican way.
Besitos (kisses),
Mara

Overhead view of fig preserves in their syrup, with cinnamon sticks, fresh figs, and whole cloves visible in the background.

Costa Rican Fig Preserves

Make the most of fig season with this traditional Costa Rican fig preserves recipe (Higos en Miel). Fresh figs are gently cooked with sugar, lemon peel, and spices to create a sweet, rich preserve you can enjoy on its own or in many desserts.
Print Recipe Pin Recipe
Prep Time 10 minutes mins
Cook Time 40 minutes mins
Total Time 50 minutes mins
Course Dessert
Cuisine Costa Rican
Servings 1 container

Equipment

  • Knife and cutting board
  • Saucepan and stove

Ingredients
  

  • 2 lbs fresh figs
  • 1 cup brown sugar
  • ½ teaspoon salt
  • 1 teaspoon vanilla extract
  • 2 cinnamon sticks
  • 5-7 whole cloves
  • Rind of half a lemon

Instructions
 

  • Remove the stems from the figs with a knife and check their quality, trimming off any parts that are bad or damaged. Then rinse the figs with plenty of water and place them in a tall pot or saucepan.
  • Add the water to the pot with the figs. Peel the rind of half a lemon and add it to the pot, or use lemon juice if you prefer. Both will add flavor and help preserve the figs longer.
  • Add the brown sugar (or tapa de dulce), salt, cinnamon, vanilla extract, and cloves. You can also add spices like nutmeg, cardamom, or star anise if you want extra flavor.
  • Set the stove to medium heat and cook for about 40 minutes, or until the figs are soft and reach your desired consistency. If your figs are less ripe, they may take longer.
  • Remove the figs from the pot and boil the syrup by itself for about 5 minutes, or until it thickens to your liking. Strain the syrup to remove the cinnamon sticks, lemon rind, and cloves, then pour the syrup back over the figs.
  • Let the preserves cool completely before refrigerating, or can them immediately if you plan to store them for longer.

Video

Notes

  • Pick the figs that look fresh and healthy, without bruises, soft spots, or bumps on the skin
  • Cook them until soft or to your preferred doneness; depending on how ripe they are, this could take as little as 10 minutes
  • Don’t overcook them, as they can become mushy. They’ll still taste good, but they’ll lose their shape
  • Thicken the syrup separately to avoid overcooking the figs while still getting that perfect consistency
  • Let the preserves cool completely before refrigerating, or can them immediately if you plan to store them long-term
📌 For more recipes, check www.thelatinspoon.com
Keyword Preserves

Costa Rican Hot Dogs

Sep 19, 2025 · Leave a Comment

Side view of a Costa Rican hot dog in a bun topped with cabbage, pink sauce, and cilantro. Two hot dogs are on the same square plate with cabbage in the background.

If you like regular hot dogs, then you’ll love the Costa Rican version. They may look the same, with the sausage and the bun you already enjoy, but one bite of a Costa Rican perro caliente will surprise you with crispy cabbage, tangy sauce, and a flavor that feels like home. Watch the video here.

You might think hot dogs are only eaten in the United States, but this dish has been reimagined all over the world. In Costa Rica, it has been made part of the food culture, just like it has ben done with many other imported foods. Even McDonald’s had to adapt, adding Gallo Pinto to their breakfast menu to compete in the local market. In that same spirit, we gave hot dogs our own twist with fresh vegetables and the famous salsa rosada, a pink sauce made with Lizano sauce.

And since I learned to eat hot dogs this way, now that I live in the United States, whenever I make them at home this is how I prepare them. If I’m invited to a party and there’s only ketchup and mustard, I’ll still enjoy my hot dog, but my heart always goes back to the Costa Rican version.

What is Costa Rican Salsa Rosada?

Salsa rosada translates to pink sauce, which comes from mixing mayonnaise and ketchup. It is used throughout Latin cuisine, and each country has its own version of it. I like to add Salsa Lizano and a few other ingredients to mine, but at its core salsa rosada is basically just mayonnaise and ketchup. Let’s take a look at the ingredients you’ll need to make Costa Rican salsa rosada at home.

Ingredients for Costa Rican Hot Dogs

Let’s talk about some of the ingredients you’ll be adding to your Costa Rican hot dogs. You can find the complete list in the recipe card below.

🧴 Mayonnaise

Any type of mayo will work, even vegan if you want to make your hot dogs vegan. Just make sure it’s a mayo you’re used to. For example, if you’ve never had olive oil mayo, this is not the recipe to experiment with it.

🍅Ketchup

Costa Rican ketchup is a lot sweeter than American ketchup. If you want to add a little bit of sweetness, like sugar or honey, you could, and it will taste very delicious and much closer to the Costa Rican way.

🧴Salsa Lizano

Salsa Lizano is a staple in Costa Rican cuisine. It’s a mixture of vegetables and spices that has been around for over 120 years. Costa Ricans like to add it to many dishes, and I love adding it to my pink sauce. It is easy to find at Latin or Asian stores, but I’ll leave a link here so you can also get it on Amazon.

🧂 Seasonings

Other ingredients you can add to your salsa rosada, if you like, include hot sauce, mustard, salt, and pepper.

🌭 Hot Dogs and Bun

This would be your regular hot dog and hot dog buns, in the size of your choice. I’m using chicken because of personal preference, but you can use beef, pork, a mixture of both, or even vegan options.

🥗 Vegetables

We love to add greens to our hot dogs, such as cabbage, lettuce, and cilantro. You can also include other vegetables like tomatoes, onions, and the all-time favorites pickles or pickled radish.

💡Pro Tips to Elevate Your Costa Rican Hot Dogs

  • Boil your hot dogs if you don’t want to add extra oil, or grill them if you’d like a smoky flavor.
  • I haven’t found a big difference in flavor when making cuts on hot dogs before cooking, but if you like the look, go ahead and do it.
  • Heat up the hot dog buns in the air fryer for a few seconds to get a toasted edge and a warm inside.
  • Use gluten-free buns if you need a gluten-friendly option.
  • Top your hot dogs with crushed potato chips or fries, a popular Costa Rican street-food style touch.
  • Keep your salsa rosada chilled until serving so it stays fresh and creamy.

Step-by-step photos

Hot dogs are very easy to make, but I still like to include step-by-step pictures so you can see exactly what’s going on in the process.

Step 1: Make the Salsa Rosada

In a small bowl, mix all the ingredients for the salsa rosada: mayonnaise, ketchup, mustard, Salsa Lizano, and hot sauce (optional).

Step 2: Adjust the Flavor

Add salt and pepper, a bit of sugar, or any other ingredient you like. Taste and adjust the seasoning to your preference.

Step 3: Prep the Toppings.

Chop your cabbage, onion, tomatoes, and any other toppings you’re planning to use.

Step 4: Cook the Hot Dogs.

Add a little bit of oil to a large pan, place your hot dogs inside, and cook at medium heat for 5–6 minutes or until golden brown.

Step 5: Flip the Hot Dogs.

Turn them from time to time to make sure they cook evenly. Remove from the heat and place them inside the buns.

Step 6: Add the Toppings.

Top your hot dogs with cabbage, salsa rosada, red onions, cilantro, and any other favorites.

💡 FAQs for Costa Rican Hot Dogs

Can I use gluten-free buns?

Yes, you can!

Can I use vegan hot dogs?

Yes, absolutely.

I don’t like cabbage but I like the idea of adding veggies. Which can I add?

You can use lettuce or kale. Have you ever tried microgreens? They’re an excellent option if you want to add more nutrition to your hot dogs, plus they look adorable and give you that professional chef vibe.

I can’t find Salsa Lizano. What can I substitute it with?

Technically, Salsa Lizano is not included in traditional Costa Rican pink sauce, but I like to add it. You can skip it altogether or add fresh herbs like oregano, thyme, or basil to give your sauce a twist.

Can I prepare the salsa rosada ahead of time?

Yes, you can make it a day or two in advance. Just store it in the fridge in an airtight container.

🌭 Why are Costa Rican Hot Dogs included in the blog?

Humans tend to copy things from one another, especially when those things have proven to work over time. It does not mean there is a lack of authenticity when they do, it simply shows a natural curiosity to try something new. And if it is good, people will want to have it again and again. That is where culture plays a huge role. Yes, we copied hot dogs from Americans, but we made them our own by adding elements that reflect our heritage, local flavors, and what was available to us at the time.

Since I am both Costa Rican and American, I believe this is the best way to represent both nations that I love with all my heart. This is just one example of Costa Rican street food. If you want to explore more classic Costa Rican dishes, I suggest you check out:

Costa Rican Gallo Pinto
Tropical Fruit Salad
Yucca Flower Picadillo

I hope you like them too and give them a try. They might surprise you with how good they taste 😉

Besitos (kisses),
Mara

Side view of a Costa Rican hot dog in a bun topped with cabbage, pink sauce, and cilantro. Two hot dogs are on the same square plate with cabbage in the background.

Costa Rican Hot Dogs

These Costa Rican hot dogs, take the classic sausage-and-bun combo and make it uniquely with finely shredded cabbage, fresh veggies, and a creamy salsa rosada made with Lizano sauce. Simple, flavorful, and perfect for parties or a quick family meal.
Print Recipe Pin Recipe
Prep Time 10 minutes mins
Cook Time 10 minutes mins
Total Time 20 minutes mins
Course Main Course
Cuisine Street Food
Servings 8 servings

Equipment

  • Cutting board and knife
  • Large Pan

Ingredients
  

Ingredients for Salsa Rosada

  • ⅓ cup mayonnaise
  • 2 tablespoons ketchup
  • 1 tablespoon mustard
  • 1 tablespoon Lizano sauce
  • ½ teaspoon hot sauce optional
  • Salt and pepper to taste

Ingredients for Hot Dogs

  • 8 Hot Dogs
  • 8 hot dog buns
  • 1 small cabbage finely shredded
  • ½ red onion diced
  • Fresh cilantro to taste

Instructions
 

Make the Salsa Rosada:

  • Add all the ingredients to a small bowl: mayonnaise, ketchup, mustard, Salsa Lizano, and hot sauce (optional). Stir well, then season with salt and pepper to taste.
  • Transfer the pink sauce to a plastic bag, seal it at the top, and refrigerate until ready to serve. When you are ready, make a small cut on the tip of the bag and drizzle the sauce over your Costa Rican hot dogs.

Instructions for the Hot Dogs:

  • Add a little oil to a large pan. Cook the hot dogs over medium heat for 5–6 minutes, or until golden brown. Be sure to flip them every once in a while so they cook evenly. Once ready, place them inside the buns.
  • Add plenty of cabbage on top of the hot dogs, then drizzle with pink sauce. Finish with red onions, cilantro, and any other toppings of your choice.

Video

Notes

  • Use gluten-free buns and vegan hot dog options if you desire.
  • Boil the hot dogs to avoid using oil, or grill them for a smoky flavor.
  • Toast the buns in the air fryer for a few seconds for a warm and crispy bite.
  • Spread a little butter or garlic butter on the buns before toasting for extra flavor.
  • Top your hot dogs with crushed potato chips for a Costa Rican street-food style touch.
  • Keep the salsa rosada chilled until serving so it stays fresh and creamy.
 
For more recipes visit www.thelatinspoon.com

How to Make Sofrito (Costa Rican Version)

Sep 12, 2025 · Leave a Comment

Headshot of sofrito served in a bowl on a wooden table; behind it, blurred onions and garlic, and celery sticks placed in front.

Sofrito is the heart of so many Latin American dishes, and every country gives it its own twist. In Costa Rica, we have our version too. No matter where you go, though, there are always four ingredients that show up: onions, peppers, garlic, and oil. From there, each region adds its own touch—different herbs, vegetables, and even ways to preserve it. Today, I’ll show you how we make it the Costa Rican way.

I’ve said it before in other posts—I’m not a food historian, so I can’t tell you for sure where sofrito first originated. What I do know is that the word comes from the Spanish verb sofreír, which means “to sauté.” And that part makes perfect sense: you start by sautéing the base of your dish to build flavor before adding the rest of your ingredients.

That’s the beauty of sofrito—it’s both traditional and practical. I love making a big batch of sofrito and keeping it in the fridge so it’s always ready when I need it. In some countries, people blend the ingredients raw and freeze them in ice cube trays, which works great too. But since the Costa Rican version is cooked, I like to prepare a large batch and then freeze what’s left. Honestly, I go through it so quickly—because I add it to almost every meal—that it rarely lasts long in my kitchen.

When to Use Sofrito

Sofrito is one of those kitchen staples that makes almost any dish better. In Costa Rican cooking, you’ll find it as the base for:

  • Black Beans – it gives depth and flavor to this essential side dish.
  • Gallo Pinto – the national breakfast wouldn’t be the same without it.
  • Picadillos – from chayote to potatoes, sofrito ties it all together.
  • Soups and Stews – a spoonful of sofrito builds layers of flavor right from the start.
  • Rice Dishes – mix it in to transform plain rice into something special.
Headshot of all ingredients needed to make sofrito, each labeled with its name.

Ingredients for Costa Rican Sofrito

These are the ingredients I use to make my sofrito. I’ll also share a list of other ingredients you can add to make it your own.

🧅 Onion

A big ingredient in Latin cuisine. Honestly, the only dishes I don’t add onion to are the sweet ones—everything else includes cebolla in one form or another: raw, sautéed, or caramelized. In Costa Rican cooking, onion is a must, so of course it’s part of sofrito. It adds so much fragrance and delicious flavor to the dish.

🌶Bell Pepper

Another staple in Costa Rican cuisine. Back home, we use a type of pepper called chile dulce—it’s a bit longer and sweeter than bell peppers. Since I’m in the U.S., I use bell peppers because they’re easier to find. Don’t feel bad, though—bell peppers are amazing! I just want to point out that in Costa Rica, we don’t usually consume them as much, and they’re actually more expensive than regular chile dulce.

For this recipe, you can use green, yellow, purple—any type of pepper you find. I personally love using red bell pepper because it gives the sofrito such a beautiful red color (nothing weird about it 😅). But honestly, any pepper works just fine.

🧄 Garlic

What can I say? Garlic makes everything better. In Costa Rican cooking, it’s used all the time to boost flavor and aroma. For sofrito, I like to add plenty—because once it cooks down with the onion and peppers, it creates that irresistible smell that fills the whole kitchen. Don’t be afraid to use garlic! Remember, we’re not eating spoonfuls of sofrito on its own—we’re adding it to other dishes, and garlic is one of the most delicious aromatics you can use.

🧴 Oil

Oil is what actually gives sofrito its name—because you’re sautéing the vegetables. Technically, you could cook it without oil, just letting the vegetables release their own juices while stirring constantly so they don’t burn. But oil is like the glue that brings sofrito together. And since we only use a little bit, I’d say we’re safe to add it without guilt.

🥬 Celery

I believe celery is what really sets Costa Rican sofrito apart from other versions, since most don’t include it—but we do. Celery brings a fresh, slightly peppery flavor with a hint of earthiness that brightens the whole mix. It balances the sweetness of the onions and peppers and makes the sofrito taste even more complex.

Other Ingredients You Can Add

🍅 Tomatoes


Some versions of sofrito include tomatoes—you’ll even find store-bought sofrito made that way. Personally, I only add tomatoes when I know the final recipe will benefit from that flavor. Sometimes I make two batches: one with tomatoes and one without, so I can choose depending on what dish I’m cooking.

🌿 Oregano


Fresh or dried, oregano provides an amazing flavor that blends beautifully with the rest of the ingredients.

🌱 Culantro and/or Cilantro


These are two completely different herbs you can usually find at Latin or Asian markets. In Costa Rica, most people add them while cooking the sofrito. I prefer to add them at the very end of a recipe because that’s when they really shine. Cooking them too long can dull their bright, fresh flavor, but added at the end, they give the dish a fresh taste that stands out.

White round bowl filled with cooked sofrito; behind it, a blurred onion, red bell peppers, and garlic can be seen, while celery sticks are placed in front.

💡 Extra Tips for Making Costa Rican Sofrito

  • Make it spicy: Add jalapeños, habaneros, or any other spicy peppers to give your sofrito more flavor and heat. Just be careful—add a little at a time since you don’t always know what the final dish will be.
  • Use your food processor: Speed things up by pulsing your veggies a few seconds at a time, resting in between. If you let it run non-stop, you’ll end up with vegetable soup instead of a nicely chopped mix.
  • Sauté until the liquid evaporates: Cook your veggies just until all the liquid is gone. You could caramelize them if you like, but that will completely change the flavor profile.
  • Don’t add salt: Since you don’t know what dish you’ll be adding sofrito to, it’s always better to season at the end of the recipe.
  • Freeze in portions: Once cooked, freeze sofrito in ice cube trays. That way, it’s pre-portioned and you won’t waste any by thawing more than you need.
  • Adjust the texture: If you like a chunkier sofrito, chop your veggies by hand. For a smoother base, let the food processor run a little longer (just short of turning it into a paste).
  • Play with herbs: Besides cilantro or culantro, try adding parsley, thyme, or bay leaves depending on the dish. Each one gives a unique twist.
  • Cook a big batch: It takes the same effort to make a small or large batch, so cook plenty at once—you’ll thank yourself later when you always have some on hand.

Step-by-step photos

Pictures speak louder than words, so here’s a step-by-step with photos (and just a few words) to show you how to prepare Costa Rican Sofrito.

Step 1: Chop the onions.

Dice them into small, even pieces so they cook evenly.

Step 2: Prepare the other vegetables.

Chop the red bell peppers into small pieces and set aside. Repeat with the celery (and any other vegetables you decide to add).

Step 3: Start cooking the base.

In a large skillet or pan, add the chopped onions and red bell peppers. Set the heat to medium-high.

Step 4: Add celery and oil.

Mix in the celery and oil. Since adding these ingredients lowers the temperature, adjust the heat as needed. Cook for about 10 minutes.

Step 5: Let the liquid evaporate.

The vegetables will start releasing liquid. Don’t throw it away—keep cooking for another 10 minutes, or until all the liquid has evaporated.

Step 6: Finish with garlic.

Add the garlic and cook for no more than 2 minutes. Garlic turns bitter if overcooked, which is why we add it at the end.

💡 Frequently Asked Questions About Sofrito

How long can I store sofrito in the fridge?

It can last up to 2 weeks in an airtight container. If you haven’t used it after that, move it to the freezer, where it will last for about 2 months (sometimes even longer).

Can I add butter instead of oil?

Yes, you can! You can also use any type of oil—vegetable, avocado, or even lard or bacon fat (yum!). The only one I don’t recommend is olive oil (regular or extra virgin), since sofrito cooks for a long time and olive oil doesn’t handle heat very well.

Do I have to cook it before storing?

Not necessarily. You can chop and mix all your veggies raw, then freeze them to use later. But technically, that’s more like meal prep—still great, but it’s not sofrito until you sauté it.

What can I use sofrito for?

Almost anything! Sofrito is the base for rice, beans, soups, stews, picadillos (a type of stew made with finely chopped vegetables), and honestly, any dish where you want a boost of flavor.

Can I make sofrito without a food processor?

Absolutely! That’s actually how I prefer to make mine. I love the texture of hand-chopped vegetables—it gives the sofrito more body compared to using a food processor, which tends to make it too fine.

👌Why I Love Making Sofrito

We’ve already established that sofrito is the base for so many Latin recipes (including Costa Rican ones). Making it ahead of time not only saves you time, but also ensures you always have those key ingredients ready to go.

Think about it—how many times have you wanted to cook something delicious, but then remembered you’d have to chop onions (and cry for 2–3 minutes while doing it), then cook them down, and so on? Ugh! By the time you’ve thought it all through, you’ve already decided to skip cooking, grab takeout instead, and then regretted it because you know what you wanted to make would have been 100 times better. How many times has that happened?

With sofrito in your fridge, all you need to do is toss in a couple more ingredients and—boom—dinner is ready.

Did I mention the benefits of adding sofrito to your food—the depth of flavor it brings to every dish? Stop overthinking it and just go make yourself a batch of sofrito.

You can start using it right away in the following recipes (see what I did there? 😉)

Authentic Costa Rican Gallo Pinto
Costa Rican Black Beans
Yucca Flower Picadillo
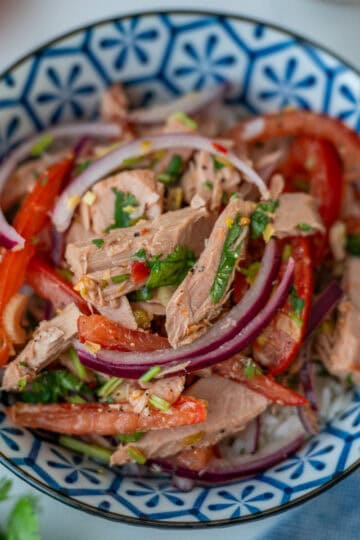
…and lots more (but for now, these are the only recipes I have on the blog 🤣).

Besitos (kisses),
Mara

Headshot of sofrito served in a bowl on a wooden table; behind it, blurred onions and garlic, and celery sticks placed in front.

Costa Rican Sofrito

Costa Rican sofrito is a flavorful base made with onions, peppers, celery, and garlic. Learn how to prepare and use it in your favorite dishes
Print Recipe Pin Recipe
Prep Time 10 minutes mins
Cook Time 20 minutes mins
Course Seasoning
Cuisine Costa Rican, Latinx

Equipment

  • Cutting board and knife
  • Food processor optional
  • Large Pan and spatulas

Ingredients
  

  • 2 medium onions
  • 1 red bell pepper
  • 2 celery sticks
  • ¼ cup vegetable oil
  • 5-7 garlic cloves

Instructions
 

  • Prep the vegetables: Peel and chop the onions into small, even pieces; set aside. Rinse the peppers, slice them into strips, then cut into small cubes; set aside. Peel and finely chop the garlic; set aside. Rinse and chop the celery sticks into small pieces.
  • Start cooking: In a large skillet or pan over medium-high heat, add the onions, celery, and bell peppers. Pour in the oil and cook for about 10 minutes, stirring occasionally.
  • Cook down the liquid: The vegetables will start to release liquid. Do not discard it—continue cooking for another 10 minutes, or until the liquid has fully evaporated. Lower the heat if needed to prevent burning.
  • Add the garlic and finish: Stir in the garlic and cook for no more than 2 minutes. Once your sofrito is fully cooked, remove from heat. Let it cool before storing if you’re saving it for later, or use it right away if needed.

Video

Notes

  • You can add other ingredients like tomatoes, oregano, cilantro, or culantro if you like—adjust based on the dish you’re making.
  • Store sofrito in the fridge for up to 2 weeks or freeze in ice cube trays for about 2 months.
  • Any oil works (vegetable, avocado, lard, even bacon fat)—just avoid olive oil, since it doesn’t hold up well to long cooking.
  • Use 2–3 tablespoons of sofrito as the base for rice, beans, soups, stews, and picadillos.
For more recipes, check out www.thelatinspoon.com
Keyword Costa Rican Basics

Authentic Costa Rican Gallo Pinto

Sep 5, 2025 · Leave a Comment

White plate beautifully arranged with Gallo Pinto, scrambled eggs, fried plantains, and fried cheese. The Gallo Pinto is topped with a cilantro leaf and shown from the front angle.

Gallo Pinto is Costa Rica’s signature rice and beans dish. It’s simple, flavorful, and part of everyday life back home. Made with leftover rice and beans, it turns humble ingredients into one of the most beloved meals in our cuisine.

White plate beautifully arranged with Gallo Pinto, scrambled eggs, fried plantains, and fried cheese. The Gallo Pinto is topped with a cilantro leaf and photographed from the front at a slightly farther distance, with blurred fried plantains and cilantro visible in the background.

There’s no need to translate “Gallo Pinto” into English. What really matters is how it feels when you sit down to a plate of this Costa Rican classic: rice and beans perfectly cooked together, a little sofrito, some fresh herbs, and that flavor that instantly says Pura Vida. This is the dish we eat day in and day out, and today I’m showing you how to make it at home.

Costa Rican Pinto

What is Gallo Pinto?

Gallo Pinto is Costa Rica’s signature rice and beans dish, usually enjoyed for breakfast but loved at any time of day. It’s made by mixing cooked rice 🍚 with beans, a simple sofrito 🧅, and fresh herbs 🌿—and depending on the region or even the household, you’ll find it prepared a little differently each time.

It’s also a big part of Nicaraguan culture (we’re neighboring countries and share a lot of similarities), and yes, we also share Gallo Pinto. Actually, to the point where—believe it or not—Ticos and Nicas argue about who came up with the “brilliant” idea of mixing rice and beans together (yes, I’m being sarcastic).

What I do know is that Gallo Pinto is delicious—both the Nica and the Tico version. And today, I’m going to show you my version. Because even in my own family, you’ll find differences. My sister seasons the beans first; I season the rice first. In Guanacaste, people eat Gallo Pinto crispy (tostado). In San José (the capital, where I’m from), we eat it a little bit wetter (mojado). And you know what? All versions are amazing!

And don’t even get me started on Salsa Lizano. Most Costa Ricans love it (I don’t have statistics—I’m just a cook), but a big part of the population insists you should never add it to Gallo Pinto. I will leave it up to you to decide.

Overhead shot of all the ingredients used for Gallo Pinto, each labeled with its name and title.

Ingredients for Costa Rican Gallo Pinto

These are the ingredients I’m using to make authentic Costa Rican Gallo Pinto. Each family has their own little twist, but this is how I grew up eating it at home.

🍚 Rice

I’m using long-grain white rice for this recipe (you can learn how to make Costa Rican white rice. Originally, Gallo Pinto was created to reuse leftover rice and beans. Since rice and beans are eaten every single day in Costa Rica, people usually cook fresh rice daily (or as often as possible). That means there are always leftovers in the fridge, plenty to make Pinto with.

Now, Pinto isn’t made every day; it’s made when you have enough leftover rice and beans sitting around. Why do I mention this? Because if all you’ve got is jasmine rice, use that. If what’s left in your fridge is basmati, guess what? It’ll work perfectly for your own version of Gallo Pinto. 😉

🥣Beans

Same thing with beans, leftover beans are meant to be used in Gallo Pinto. So just use whatever you have available: red, black, pinto, or even a mix of both (I’ve seen it, I’ve eaten it, and honestly…it’s pretty amazing if you ask me). Find the recipe here.

🧅 Sofrito

Sofrito is the base of many Costa Rican and Latin American dishes. Each region has its own version, some include peppers like ají, cubanelle, or bell peppers, plus ingredients like tomato, celery, or cilantro. But no matter where you go, sofrito always shares the same three essentials: onions, peppers, garlic, and oil. Find the recipe here.

🥫 Salsa Lizano

This sauce originated in Costa Rica over 120 years ago, and it has become such a part of daily cooking that it’s now part of the culture itself. Learn how to make Lizano Sauce from scratch here. And if want to skip the process and get it delivered at your door, get Lizano Sauce here.

🌿 Herbs & Spices

I’m using oregano, cumin, black pepper, and salt. But you could also add extras like garlic powder, onion powder, paprika, chili powder, or annatto/achiote, there are so many ways to season Pinto.

For herbs, I’m using both cilantro (the regular kind you’ll find at any grocery store) and culantro ancho, which you can usually get at Mexican or Asian markets.

White plate with Gallo Pinto topped with a sunny-side-up egg, the runny yolk spreading throughout the rice and beans.

💡 Extra Tips for the Perfect Gallo Pinto

  • Day-old rice and beans are your best friends. Pinto was created to reuse leftovers, so make your rice and beans the day before (or even two days before). Just keep them in an airtight container in the fridge.
  • No leftovers? No problem. If you’re working with fresh rice and beans, make sure they cool completely before mixing them in, otherwise the texture will turn out mushy.
  • Using canned beans? Be sure to drain them first. If you add the bean broth or liquid straight from the can, your Pinto will turn out too mushy.
  • Make the sofrito ahead. Prepping onions, peppers, celery, and garlic in advance can cut down cooking time when you’re ready to make your Pinto. Learn how to make Sofrito here.
  • No Salsa Lizano? Don’t panic, just add a little extra oregano, black pepper, and cumin. It won’t be exactly the same, but it will still taste delicious.
  • Spice it up. Want some heat? Add a touch of cayenne, chipotle, or any hot pepper you like. Remember: this is your Pinto, make it the way you love it.

Gallo Pinto Step-by-Step

Here you’ll find step-by-step photos with short captions so you can nail a delicious Gallo Pinto every time.

Large saucepan or skillet with a little oil. Above it, a left hand holds a small bowl of onionacs, being pushed out of the bowl with a green spatula.

Step 1: Start the sofrito.

In a large pan or skillet over medium heat, add the oil and onions.

Large pan with chopped onions and bell peppers cooking in oil, while a left hand holds a small bowl of chopped celery, showing the next step of adding celery to the pan.

Step 2: Add more veggies.

Add the red bell peppers and celery. Stir and cook 3–5 minutes until softened..

Pan with sofrito (onions, celery, bell peppers, and oil) cooking, while the left hand is about to add minced garlic from a small bowl.

Step 3: Garlic and spices.

Add finely chopped garlic and cumin seeds. Stir constantly 30–60 seconds until fragrant, don’t let the garlic burn.

Large pan showing sofrito at the bottom with fully cooked white rice added on top. In the corner, a green spatula begins to mix the ingredients.

Step 4: Add the rice.

Add your day-old rice (arroz añejo). Break up any clumps with a spatula and toss with the sofrito. Cook 2–3 minutes.

Pan with rice stirred together with sofrito. Above, two hands hold a bowl of beans—the right hand grabbing beans—showing the next step of adding them to the rice.

Step 5: Add the beans.

Add the beans (drain if using canned; avoid the broth or liquid). Fold in and adjust the rice-to-beans ratio if needed.

Pan filled with rice and beans mixed together, while a left hand adds Salsa Lizano to the mixture. Oregano and black pepper are already visible on the rice and beans.

Step 6: Season it.

Add Salsa Lizano (optional), black pepper, dried oregano, and salt to taste. Mix well.

Large pan with fully cooked Gallo Pinto, the white rice now stained from the black beans’ broth. Fresh cilantro is being sprinkled on top as the final step

Step 5: Let flavors develop.

Cook 5–7 minutes so the flavors come together. Turn off the heat, then stir in cilantro and culantro.

White round plate with Gallo Pinto neatly shaped into a mound. Right hand adds a piece of fried cheese to the plate. The cheese is rectangular and golden brown.

Step 6: Plate and serve.

Serve with fried plantains, fried cheese, and scrambled (or fried) eggs. (Optional: mold the Pinto using a small bowl for a neat dome.)

💡 Your Gallo Pinto Questions, Answered

Can I use canned beans?

Yes, you can. Canned beans are delicious too, but they’re usually cooked very plain, so you might have to adjust your seasonings a little bit. If you want to learn how to make beans the Costa Rican way, you can check it out here.

I cannot find Lizano, what can I do?

Learn how to make Lizano Sauce from scratch here. And if want to skip the process and get it delivered at your door, get Lizano Sauce here.

How long does Pinto last?

Up to 7 days in the fridge if stored properly. But it also freezes really well. Sometimes I make a big batch, freeze part of it right away, and it thaws out beautifully when I need a quick meal.

What can I eat it with?

People think Costa Ricans eat Gallo Pinto only for breakfast—but that’s not true! It’s definitely most popular in the morning with fried plantains, cheese, scrambled eggs, natilla (Costa Rican sour cream), plus coffee and some Tropical Fruit Salad on the side. But we also eat Pinto at lunch or dinner. Try it with pollo a la plancha (grilled chicken) and salad, or with carne en salsa (beef stew) and cabbage salad.

Can I make it vegetarian/vegan?

Yes, absolutely. Just make sure you’re using oil or vegan butter. Salsa Lizano is also a vegan-friendly sauce, so you can add that too. For sides, go with fried plantains (a must!) and maybe add some steamed cauliflower and carrots. Yum yum!

Why You’ll Love Gallo Pinto

Because it’s more than just rice and beans, it’s comfort food with history. Every bite carries the flavors of Costa Rica.

It’s simple yet full of flavor, it makes the most out of leftovers, and it’s a dish that adapts to you—black beans, red beans, crispy or soft, with or without Lizano.

It’s also incredibly versatile. Gallo Pinto is naturally vegan, and if we want to get a little scientific, rice + beans together make a complete protein. It’s budget-friendly, lasts a long time in the fridge, and freezes beautifully, perfect for meal prep or feeding a crowd.

And above all, it’s a reminder that food connects us.

📌 Related Recipes:

  • Learn how to make white rice the Costa Rican way
  • Learn how to make black beans the Costa Rican way
  • Enjoy this pinto with Yucca Flower Picadillo

💬 Let’s connect!
Let me know in the comments which Costa Rican recipe you’d like me to upload to the blog next. And if you make this Gallo Pinto, send me your pictures or tag me on social media. I love seeing your creations. ¡Pura vida! 🌿

Besitos (kisses),
Mara

White plate beautifully arranged with Gallo Pinto, scrambled eggs, fried plantains, and fried cheese. The Gallo Pinto is topped with a cilantro leaf and shown from the front angle.

Costa Rican Gallo Pinto

Gallo Pinto is Costa Rica’s signature rice and beans dish. It’s all about giving leftover rice and beans a second life—mix them together with a sofrito and Salsa Lizano, and you’ve got the country’s most iconic comfort food.
Print Recipe Pin Recipe
Prep Time 5 minutes mins
Cook Time 20 minutes mins
Total Time 25 minutes mins
Course Main Course
Cuisine Costa Rican
Servings 8 servings

Equipment

  • Cutting board and knife
  • Large pan (or skillet)

Ingredients
  

  • 2 tablespoons oil
  • ¼ cup red bell pepper chopped
  • ¼ cup onion chopped
  • ¼ cup celery chopped
  • 2 garlic cloves finely chopped
  • ½ teaspoon ground cumin
  • 5 cups cooked white rice
  • 2 cups fully cooked black beans
  • ½ teaspoon dried oregano
  • ½ teaspoon black pepper
  • 2 tablespoons Salsa Lizano
  • Fresh cilantro and culantro to taste
  • Salt to taste

Instructions
 

  • In a large pan over medium heat, add the oil, onions, peppers, and celery. Cook for 3–5 minutes, or until the vegetables look translucent and fully cooked. Add the cumin and finely chopped garlic, and cook for another 2–3 minutes—just be careful not to burn the garlic. This mixture is called sofrito, and it’s the base for many Costa Rican dishes.🌱
  • Next, add the rice. Since we’re using rice from previous days, it might clump together or form little hard balls. Just break them apart with a spatula and stir constantly into the sofrito. Cook the rice for about 3–5 minutes, or until it starts turning slightly reddish from the bell peppers.🧅
  • Add the beans—these can be black, red, or even pinto beans. Make sure you only add the beans and not their broth; otherwise, your Gallo Pinto will turn mushy (unless that’s the texture you’re aiming for). Once the beans are in, stir everything together and check your rice-to-bean ratio. If you feel it needs more rice or beans, adjust it now.🧄
  • Start adding the remaining ingredients: black pepper, Salsa Lizano (optional but highly recommended), oregano, and salt. Stir well to combine and let everything cook together for about 5 minutes so the flavors can really develop and make your Gallo Pinto taste amazing.🍚
  • Turn off the heat and add the final touch: the fresh herbs. In Costa Rica, we call them both culantro. One is the cilantro you usually find in stores, and the other is culantro ancho, which you can often find in Mexican or Asian markets. Stir them in one last time before plating.🌶️
  • To plate your Gallo Pinto the traditional way, grab a small bowl and fill it to the top with the rice and beans. Place the plate you’ll be serving on top of the bowl, flip both upside down, then lift the bowl to release the rice. You’ll have a neat little dome of Gallo Pinto, perfect to pair with fried plantains, fried cheese, scrambled eggs, or anything else you’d like.🌿

Video

Notes

  • Make the rice and beans a day or two before making Gallo Pinto. Keep them in an airtight container in the refrigerator until you’re ready to use them.
  • Gallo Pinto was created as a way to use up leftover rice and beans. If you don’t have day-old rice and beans, make sure to let them cool off completely before mixing them together. Otherwise, the texture will be different.
  • You can prepare the sofrito ahead of time to reduce cooking time.
  • If you don’t have Salsa Lizano, just add a bit more of the other spices like oregano, black pepper, and cumin.
  • Feel free to add a touch of chile picante (hot peppers like cayenne, chipotle, or any other type). This is your Pinto—make it the way you like it!
For more Costa Rican recipes, visit www.thelatinspoon.com
Keyword Costa Rican Basics

Costa Rican Black Bean Recipe

Aug 29, 2025 · Leave a Comment

Medium-sized bowl filled with fully cooked black beans, with a green spoon scooping some out.

Yes! Your homemade black beans are going to look completely different from canned beans. And don’t get me wrong, any bean is a good bean! But when you make homemade black beans the Costa Rican way, you’ll taste rich flavor in every single spoonful. The aroma of beans simmering with garlic, onions, and herbs will fill your kitchen, and the taste is deep, earthy, and comforting.

Medium-sized bowl filled with fully cooked black beans, with a green spoon scooping some out.

In Costa Rica, black beans aren’t just another side dish—they’re part of our identity and culture much like Gallo Pinto. They became a staple of our cuisine not only because they’re versatile and delicious, but also because they’re packed with fiber, protein, and nutrients, while being affordable for everyone.

Long before modern science explained that combining rice and beans creates a complete protein, my ancestors were already enjoying this mixture every single day. It kept them healthy, strong, and if I may say pretty good-looking too (after all, where else would I get the genes to be this cute?).

Watch the video here

How to Make Costa Rican Black Beans at Home

I learned how to make beans in the pressure cooker a couple of decades ago, and I still remember the whistle blowing like crazy. My mom would always say, “As soon as it starts whistling, start counting—20 minutes if the beans were soaked, 45 if not. And don’t even think about opening the lid until the whistle stops!” Of course, we couldn’t have opened it even if we tried. She’d give us these instructions, rush out the door to visit a client, and leave me and my sisters in charge of making dinner that night.

But now… let me tell you about today. Ever since I discovered the Instant Pot, my life completely changed. I can actually sit back and relax, or even hear the TV in the next room while my beans cook with no pressure (pun intended!).

Anyway, you can cook your beans in an Instant Pot, a traditional pressure cooker, or even a regular pot on the stove. The cooking time will vary depending on the gadget you’re using, but if you follow my magic formula for Costa Rican black beans, you’ll get the same delicious result. Here are the ingredients I use.

Ingredients for Costa Rican Black Beans

🌱 Black Beans

I’m using black beans because, well, that’s the name of the recipe! But you could also make this with red beans, pinto beans, garbanzo (chickpeas), or even white beans.

Check the FAQs below for tips on soaking your beans—or whether you need to soak them at all.

🧅 Onions, Peppers, Garlic and celery

These four ingredients are the base of almost any Latin dish (learn how to make Costa Rican sofrito here). I like to dice them into small pieces so I can enjoy a bit in every spoonful of beans. Some people prefer adding them whole and removing them after cooking—this way you still get the aroma, flavor, and nutrients, but without eating the actual pieces. So really, you’ve got two options for how to add yours.

🌿 Fresh and Dried Herbs

Herbs are also a big staple in Latin cuisine, whether fresh or dried. For this recipe, I’m using culantro Castilla (the name used in Costa Rica, but it’s basically the same cilantro you’ll find in any supermarket) and culantro coyote (literally “wolf culantro”). In Costa Rica, we don’t call it cilantro—we’re special like that 😄. You can usually find culantro coyote in Mexican or Asian stores, sold under the name culantro or culantro ancho. Both types of culantro add incredible flavor to the beans. I’m also adding dried bay leaves for even more depth.

🧄Spices

For this recipe I’m using cumin seeds (you can substitute with ground cumin), black pepper, and dried oregano. These spices add warmth, depth, and balance to the beans. Feel free to play around—swap oregano for thyme, add chili flakes for a little heat, or even a pinch of smoked paprika for a subtle smoky flavor. The beauty of beans is that they’re versatile, so you can adapt the spices to match your taste.

🧂 Salt:

I wanted to give salt its own category because it plays a very important role when cooking beans. It’s not so much how much salt you add, but when you add it. Salt should go in at the beginning of the cooking process so the beans can absorb the flavor as they cook. If you’re unsure about the amount, start small—about 1 teaspoon is enough. You can always adjust later once the beans are done. But if you wait until the very end to add salt, you’ll end up with beans that taste bland inside and a broth that’s overly salty.

💧 Water

Water is one of the most important ingredients when cooking beans. It not only rehydrates them and prevents burning, but it also creates a delicious bean broth that you can enjoy with plenty of white rice or even use to make a comforting black bean soup. The amount of water you add will determine how much broth you end up with—so adjust it depending on whether you prefer beans with lots of liquid or just a little.

Medium-sized bowl of fully cooked black beans with a green spoon, served alongside hard-boiled eggs and white rice in the background.

💡 Extra Tips for Cooking Black Beans – The Costa Rican Way

  • Check your beans before buying: If you see little holes, they may have tiny bugs (in Costa Rica we call them gorgojos) that feed on dried beans, especially when the beans are too old.
  • Fresh herbs over dried: If you can, always use fresh herbs instead of dried ones. But whichever you use, don’t be shy—add plenty of flavor, your beans will thank you for it.
  • Cool completely before storing: Let your beans cool down fully before transferring them into a container with a lid. Never leave them uncovered in the fridge.
  • Shelf life: Cooked beans will last up to 7 days in the refrigerator. The longer they stay chilled, the creamier they become.
  • Freezing option: Cooked beans freeze beautifully. Store them in freezer-safe containers or bags in portions, and they’ll last up to 3 months. Just thaw and reheat with a splash of water.

Step-by-step photos to cook Black Beans

Cooking beans is pretty straightforward—you simply add all the ingredients to a pot, close the lid, and let them cook. But instead of just telling you, let me show you what that looks like in pictures.

Step 1: Soak the beans.

Leave your beans soaking overnight in plenty of water. Soaking provides great benefits. The next day, drain the water and rinse the beans with fresh water until it runs clear.

Step 2: Add to the pot.

Place the beans in the pot where you’ll cook them and add plenty of water. If you want to speed up the cooking process, add hot water.

Step 3: Add veggies.

Add onion, celery, and bell peppers. You can chop them finely if you’d like to eat them with the beans, or add them whole for easy removal after cooking.

Step 4: Add herbs.

Toss in fresh herbs like cilantro or culantro. The more herbs and spices you use, the richer the flavor will be at the end.

Step 5: Bay leaves and garlic.

Add bay leaves and garlic. Don’t be shy with the garlic—it brings amazing flavor to the beans.

Step 6: Add spices.

Season with cumin seeds (or ground cumin), black pepper, oregano, and salt. If there’s another spice you love, go ahead and add it.

Step 5: Cook your beans.

Stir everything well, close with the lid, and set the timer. Cook for about 15 minutes if your beans were soaked. If not, double the cooking time.

Step 6: Check and finish.

Once the beans are cooked, release the steam, open the lid, and remove herbs or bay leaves if desired. Taste to check for doneness and adjust seasoning to your liking.

💡 FAQs about Cooking Black Beans

Do I need to soak my beans before cooking them?

No, you don’t need to soak your beans, but it really helps. Soaking can cut the cooking time in half and also makes the beans easier to digest. (No need to get too scientific here—just know your stomach will thank you!)

How do I soak beans?

🌙 Overnight Soak (Traditional Method): Place the beans in a large bowl and cover with plenty of water—at least 3 times their volume, since they’ll expand. Let them soak for 8–12 hours or overnight. Drain and rinse with fresh water until it runs clear before cooking.
⚡ Quick Soak Method: Place the beans in a pot and cover with water. Bring to a boil for 2–3 minutes, then turn off the heat, cover, and let sit for 1 hour. Drain, rinse, and cook as usual.
👩🏻‍🍳 Personally, I’ve never tried the quick soak method myself, but I’ve seen my mom do it. It’s a handy quick fix—especially if you forgot to soak your beans overnight and want to enjoy them the same day.

What happens if I soak my beans for too long?

If beans are soaked for too long, they can start to smell unpleasant, turn mushy or bland, or even sprout and ferment. If you’ve soaked them for more than a day, always check for mold or a sour smell—those are clear signs of spoilage.

How long do I cook beans for?

Instant Pot: If you soaked them, about 15 minutes. If not, double the time.
Regular Pressure Cooker: If soaked, cook for 30–35 minutes, starting the count once the lid is closed and the stove is on. If not soaked, 45–60 minutes.
Regular Pot with Lid: If soaked, 1 hour to 1 hour 15 minutes. If not… well, it can feel like forever 😅—up to 3 hours.

How long can I store beans?

If you keep them in an airtight container in the fridge, cooked beans can last up to 7 days.

How can I keep my beans from spoiling in the fridge?

There’s something tricky about homecooked beans—it’s hard to explain, but here’s what happens: if you take out just a small portion to reheat in the microwave, the beans left behind in the fridge sometimes spoil faster. To prevent this, bring all of your beans to a quick boil every 2–3 days. Add a little extra water if they’re drying out, and they’ll stay fresh longer.

🥭 Why make black beans at home when there are so many canned options?

Fair question! I’ve used canned beans before—they look so perfect it almost makes you wonder what’s wrong with them. Not a single bean is cracked, they shine when you open the can, and they’re all evenly cooked.

But here’s the thing: flavor. Canned beans simply don’t have the same depth of taste. When you cook beans at home, especially the Costa Rican way, they soak up garlic, onions, herbs, and spices. The broth alone is rich, comforting, and full of character. Homemade beans may not “shine” like the ones in a can, but trust me, they taste like home.

So, if you decide to make fresh beans—the Costa Rican way—don’t forget to give my white rice recipe a try. The two pair beautifully together: so simple, yet so immensely delicious.

And if you have lots of left over rice and beans make Authentic Costa Rican Gallo Pinto. Pair it with Freshly made Pico de Gallo and if you want to add some heat make your own pickled jalapeños.

And if there's a recipe you want to see next in the blog, let me know in the comments 😉

Besitos (kisses),
Mara

Medium-sized bowl filled with fully cooked black beans, with a green spoon scooping some out.

Black Beans Costa Rican Style

These Costa Rican black beans are flavorful, comforting, and incredibly versatile. Made with fresh herbs, garlic, onions, and spices, they create a rich broth that pairs perfectly with white rice. Simple to make in an Instant Pot, pressure cooker, or regular pot.
Print Recipe Pin Recipe
Prep Time 10 minutes mins
Cook Time 15 minutes mins
Soaking Time 8 hours hrs
Total Time 8 hours hrs 25 minutes mins
Course Main Course, Side Dish
Cuisine Costa Rican
Servings 8 servings

Equipment

  • Pressure cooker/Instant Pot
  • Cutting board and knife

Ingredients
  

  • 2 cups dried black beans
  • 7 cups water
  • 1 cup diced onion
  • 1 cup diced bell peppers
  • 1 cup diced celery
  • 3-5 garlic cloves
  • 3-5 5 bay leaves
  • 1 teaspoon black pepper
  • ½ teaspoon cumin seeds
  • 1 teaspoon dried oregano
  • 2 teaspoons salt

Instructions
 

  • Soak beans overnight in plenty of water. The next day, drain and rinse until the water runs clear.
  • Add beans to a pot (Instant Pot, pressure cooker, or regular pot) and cover with water. Use hot water if you want to speed up the cooking process.
  • Add onion, celery, and bell peppers. Chop them finely if you want to eat them with the beans, or leave them whole to remove later. 🧅
  • Add fresh herbs such as cilantro and culantro. The more herbs and spices, the richer the flavor will be.
  • Add bay leaves and garlic cloves. Don’t be shy with the garlic—it adds amazing flavor. 🧄
  • Season with cumin (seeds or ground), black pepper, oregano, and salt. Adjust or add other spices you like.
  • Stir everything well, close with the lid, and cook.
    → Instant Pot: 15 minutes if soaked, 30 if not.
    → Pressure cooker: 30–35 minutes if soaked, 45–50 if not.
    → Regular pot: 1–1h15 if soaked, up to 3 hours if not.
  • Once cooked, release steam (if using pressure cooker/Instant Pot), open the lid, remove herbs and bay leaves if desired, taste, and adjust seasoning. 🌿

Video

Notes

  • Soaking beans overnight helps reduce cooking time and makes them easier to digest, but it’s not mandatory.
  • Add salt at the beginning so the beans absorb flavor while cooking.
  • Cooked beans can be stored in the fridge for up to 7 days, or frozen for up to 3 months.
  • Reheat by boiling gently with a little extra water if they dry out.
📌For more recipes, go to www.thelatinspoon.com

Tropical Fruit Salad With Honey Lime Dressing

Aug 22, 2025 · Leave a Comment

Bowl of mixed tropical fruit salad with mango, pineapple, watermelon, and melon pieces."

If you’re like me, you probably love eating fruit but don’t exactly enjoy all the prep that comes with it. Washing, peeling, slicing, and storing—it can feel like such a chore. Sometimes, just thinking about the process is enough to make you push the fruit to the back of the fridge and forget about it. And then, of course, it goes bad before you ever get to enjoy it. Sounds familiar?

That’s why I started doing things differently. Instead of dreading the prep every single day, I dedicate one moment to get it all done at once. I wash, peel, slice, and cube everything in one go, then store it properly. The reward? A colorful, refreshing tropical fruit salad ready to enjoy all week long. No excuses, no wasted fruit—just grab a bowl, scoop, and eat. Trust me, it feels like a little gift you prepared for yourself.
Prefer watching instead of reading? Click here to go straight to the video.

Small blue bowl of tropical fruit salad topped with banana slices.

Fruit salads are wonderful not only for their sweet taste and vibrant colors on the table, but also for the nutrients and vitamins they provide every day. Prepping all the fruit at once ensures you always have a healthy snack ready, the perfect side for breakfast, or even a light dessert—just add a scoop of vanilla ice cream and you’re set! Plus, it helps you make the most of any leftovers: freeze the extra fruit and later turn it into smoothies, shakes, jams, or other delicious treats.

What's a Tropical Fruit Salad?

It’s essentially a regular fruit salad with a tropical twist. The only difference is that it’s made entirely with tropical fruits and paired with a light, flavorful dressing. The dressing is optional, but I highly recommend it—it enhances the natural sweetness of the fruit and brings all the flavors together beautifully.

Fruit salads are especially popular in Costa Rica, where many of these tropical fruits are grown. Because they’re harvested when fully ripened, the flavor is unmatched—sweet, juicy, and incredibly fresh. Unlike fruit that has to travel miles to reach supermarket shelves (often picked green to withstand the trip), fruit in Costa Rica is enjoyed at its peak. That said, I’ve also found amazing fruit here in the U.S., especially during summertime when local farmers harvest it ripe and in season.

Here are some of the fruits I’m using, along with possible substitutions in case you can’t find the exact same ones.

Bowl of tropical fruit salad with mango, pineapple, watermelon, and melon pieces arranged separately.

Ingredients for Tropical Fruit Salad

🍍 Pink Pineapple

A friend of a friend (literally) is part of the team that helped develop this exciting new fruit. Basically, it’s a regular pineapple that was genetically modified to include lycopene—the same antioxidant that gives tomatoes their red color. Pink pineapples are said to be sweeter and juicier than regular ones.

In my opinion, the jury is still out on that. They’re delicious, yes, and they look absolutely stunning, but I’ve also had regular pineapples that were simply to die for. If you can find a pink pineapple and don’t mind splurging (they’re usually double the price), go for it! If not, no worries, regular pineapple works perfectly.

🍉Watermelon

I got my watermelon at a local farmers market, and it was simply delicious. Nothing beats fresh, locally grown fruit that’s picked at the right time. It’s sweet, juicy, and perfect for this salad.

🍈Cantaloupe (Melon)

Just like the watermelon, I got my cantaloupe at the local farmers market, and it was incredibly sweet and juicy. Fresh, in-season melons make all the difference in this salad. If you can’t find cantaloupe, honeydew or any ripe melon will work just as well.

🥭 Mango

Mangoes aren’t usually grown in the U.S., so most of the ones we find here are imported. That means their quality can be a little unpredictable—sometimes amazing, sometimes disappointing. Hint: that’s exactly why I love adding the honey and lemon dressing—it ties all the flavors together, even if the mango isn’t perfect. Personally, I’ve had the best luck buying mangoes at Asian markets, where they tend to be sweeter and juicier. But if you’ve already found a store that always carries good mangoes, stick with it.

🌺🐉Dragon Fruit (Pitaya)

Time to expose the truth! You’ve been lied to—dragon fruit is not originally an Asian fruit. It actually comes from Mesoamerica (the land and culture that existed long before the Spanish conquest). Later on, it was adopted by Asian countries and popularized with the name “dragon fruit.” In reality, it’s the fruit of a cactus plant.

If you can’t find dragon fruit, you can easily substitute it with kiwi, strawberries, or even papaya to keep that bright color and tropical vibe in your salad. Therefore, pitaya is one of the best examples of tropical fruits we can add to this salad.

🍋Lemon Juice and 🍯Honey

I can already picture someone in the comments asking: “Why ruin a perfectly healthy fruit salad by adding lemon juice and honey?” Maybe it’s because I’ve been doing this for so long, but I can almost predict the complaints. To those who dare to ask, here’s my answer: what’s wrong with adding lemon juice and honey? Both add flavor, vitamins, and minerals—and they’re natural. Unless you’re vegan (which I completely understand), there’s really nothing wrong with it. Some people may say I’m adding “extra sugar” when it’s not needed, but trust me, the honey-lemon combo takes this fruit salad to another level.

Plus, think about it—lemon juice and honey are one of those classic natural remedies we use when we’re sick. So really, consider yourself getting a mini doctor’s visit or a dose of natural medicine while enjoying this salad. 😉

🍌Bananas

Always pick the brightest yellow ones—those are perfectly ripe and ready to use. I suggest adding them right before serving since they tend to brown quickly when exposed to air. If you prefer, you can substitute bananas with kiwi, strawberries, or grapes.

Bowl of mixed tropical fruit salad with mango, pineapple, watermelon, and melon pieces."

💡 Extra Tips for Making Tropical Fruit Salad

  • Choose ripe, in-season fruit. The sweeter and juicier the fruit, the better your salad will taste. Seasonal fruit always shines.
  • Cut fruit into similar-sized pieces. This enhances the appearance of the salad. The flavor stays the same, but as they say, we eat with our eyes first—so make it look fancy!
  • Mix gently. Tropical fruits like mango or dragon fruit can bruise easily—use a large spoon and fold rather than stir.
  • Add delicate fruits last. Bananas, apples, or pears brown quickly, so slice and add them just before serving for maximum freshness.
  • Add the dressing before serving. If you plan to eat the salad over several days, keep the fruit plain and only add the lemon-honey mix when ready to serve, since lemon can soften the fruit.
  • Keep it cold. Chill the salad in the fridge before serving—it tastes extra refreshing when cold.
  • Store properly. Place the salad in an airtight container or bag. It will keep in the fridge for up to 6–7 days.
  • Boost the flavor. A sprinkle of shredded coconut, a dash of cinnamon, or a few fresh mint leaves can take it up a notch.
  • Serve smart. Portion into small bowls or cups for gatherings—it looks fancier and helps keep the fruit colder for longer.

Step-by-step photos

Pictures speak louder than words, so here’s a step-by-step with photos (and just a few words) to show you how to prepare Tropical Fruit Salad.

Half watermelon placed upside down on a wooden cutting board while a knife removes the rind.

Step 1: Prepare the fruit.

Cut the watermelon and cantaloupe in half. Place the flat side down and carefully remove the rind. Peel the mangoes, pineapple, and dragon fruit.

Half cantaloupe held in the left hand while the right hand uses a spoon to scoop out the seeds.

Step 2: Remove the seeds.

If your fruit has seeds (like cantaloupe), scoop them out with the help of a spoon.

Peeled pink pineapple sliced into rounds on a wooden cutting board.

Step 3: Slice the fruit.

Cut each fruit into long strips or rounds, depending on its shape.

Watermelon being sliced into long strips on a wooden cutting board.

Step 4: Cube evenly.

Chop the strips into small or medium-sized cubes, making sure they’re all similar in size for a nicer presentation.

Large bowl of assorted tropical fruits with a small cup pouring honey and lemon juice mixture.

Step 5: Add the dressing.

Mix together the honey and lemon juice, then pour over the fruit. Gently toss everything until combined.

Small bowl of tropical fruit salad with two hands adding banana slices on top.

Step 6: Serve and enjoy.

Place the tropical fruit salad in small bowls, top with fresh banana slices, and serve immediately.

💡 Your Fruit Salad Questions, Answered

Can I make tropical fruit salad the day before?

Yes! Just keep the fruit plain and add the honey-lemon dressing right before serving to keep it fresh.

How long does tropical fruit salad last in the fridge?

Stored in an airtight container, it will keep for about 5–7 days.

Can I freeze tropical fruit salad?

It’s not ideal to freeze the salad once mixed, but you can freeze the individual fruits (like pineapple, mango, or watermelon). Later, use them for smoothies or shakes

What fruits should I avoid adding?

Fruits that brown quickly, like bananas or apples, should be added just before serving.

🥭 Why You’ll Love This Tropical Fruit Salad

Tropical fruit salad is one of those recipes that reminds me how food doesn’t need to be complicated to be special. A few fresh fruits, a quick dressing, and you’ve got a dish that’s bursting with color, flavor, and nutrients. In Costa Rica, fruit salads are part of daily life, and sharing this recipe with you feels like sharing a little piece of home—even here in the U.S. I hope you try it, make it your own, and enjoy it as much as I do. And if you do, please leave me a 5-star rating and a comment—I’d love to hear what you think!

And if you’re looking to prepare a delicious and nutritious breakfast, enjoy this refreshing fruit salad with Gallo Pinto and scrambled eggs. It’s the perfect way to start your day.

Besitos (kisses),
Mara

Bowl of mixed tropical fruit salad with mango, pineapple, watermelon, and melon pieces."

Tropical Fruit Salad

This refreshing tropical fruit salad combines mango, pineapple, watermelon, melon, and banana with a light lemon-honey dressing for a colorful and naturally sweet dish. Perfect for breakfast, as a light dessert, or a healthy side to any meal.
Print Recipe Pin Recipe
Prep Time 15 minutes mins
Course Breakfast, Snacks
Cuisine Costa Rican
Servings 6 servings

Equipment

  • Cutting board and knife

Ingredients
  

  • 2 cups of cubed pink pineapple
  • 2 cups of cubed watermelon
  • 2 cups of cubed mango
  • 2 cups of cubed cantaloupe
  • 2 cups of cubed dragon fruit
  • ¼ cup of lemon juice
  • 2 tablespoons of honey
  • 3-4 bananas

Instructions
 

  • Peel the pineapple and cut it into slices. Remove the core and chop the slices into cubes. Place the desired amount in the serving bowl and store the rest in freezer bags if not using right away.
  • Cut the watermelon and cantaloupe in half. Place each half flat-side down, remove the rind, and cut into medium-sized cubes, similar in size to the pineapple. Add them to the same serving bowl.
  • Peel the mango and slice the flesh away from the seed. Cut the slices into cubes and add them to the fruit salad.
  • Cut the dragon fruit in half. Make a small cut in the skin and peel it off with your hands. Cube the flesh and place it in the bowl.
  • In a small cup, mix the lemon juice and honey. Just before serving, pour the dressing over the fruit and gently toss to combine. This step is optional but adds extra flavor and nutrition—both honey and lemon are great for your body.
  • Serve the tropical fruit salad in small bowls. Slice some fresh banana on top just before serving to keep it from browning too quickly.

Video

Notes

  • You can also add papaya, strawberries, grapes, or any other fruit of your choice.
  • Substitute honey with sugar, agave, maple syrup, or any other sweetener you prefer.
  • Add a few fresh mint leaves to take this salad to the next level.
  • Freeze any unused fruit and use it later for jellies, smoothies, or other desserts.
For more recipes visit www.thelatinspoon.com 🍍
Keyword Healthy sides

Fluffy White Rice – Authentic Costa Rican Recipe

Aug 15, 2025 · Leave a Comment

A round ceramic pot filled with fully cooked rice, surrounded by red bell peppers, a small pot of black beans, and fresh cilantro leaves

Rice is one of the most important foods in Costa Rican cuisine. We serve it with beans, picadillos, meat, vegetables, and just about anything else you can imagine. This recipe will show you how I prepare classic Costa Rican white rice with light, fluffy, and perfectly separated grains.

A round ceramic pot filled with fully cooked rice, surrounded by red bell peppers, a small pot of black beans, and fresh cilantro leaves

Growing up in Costa Rica, I never needed a written recipe to make rice. I learned by watching my mom, my aunts, and many other incredible women in my family. No one measured everything precisely or followed a list of instructions. They simply knew how much water to add, when to lower the heat, and how the rice should look at each stage.

For me, making rice became something I did almost by instinct. That changed when I decided to teach the recipe and realized I had to explain every measurement and every step clearly. It took me four attempts to turn something I had always made by feel into a recipe that anyone could follow.

During that process, I also discovered why the familiar 2:1 water-to-rice ratio does not work equally well for every type of rice. The variety of rice, the pan, the cooking temperature, and even whether the rice has been rinsed can affect how much liquid it needs.

This recipe focuses on the traditional white rice we eat most often in Costa Rica. Brown rice is available, but it is not nearly as common on our everyday tables.

🎥Watch Video Here

Ingredients for White Rice-Costa Rican style

Head shot of all ingredients placed on a wooden table, including rice, garlic, oil, water, onion, salt, and bay leaves

🍚 Rice

Long-grain white rice is ideal for this recipe because it can remain light and separated when cooked correctly. It is also one of the varieties most commonly used in Costa Rican homes.

When possible, choose rice with a high percentage of whole grains. Rice containing many broken grains tends to release more starch during cooking and may produce a softer or stickier result.

I found my long-grain white rice at the Mexican store, but if it’s hard for you to find one nearby, I’ve also tried organic white rice and it’s absolutely delicious. If you cannot find Costa Rican rice, any good-quality long-grain white rice will work.

🧈Oil

The oil lightly coats the rice and helps keep the grains from sticking together. You can use vegetable, avocado, canola, or another neutral-flavored cooking oil.

Olive or coconut oil can also be used, but they may add a flavor that is not typical of traditional Costa Rican white rice.

🧅🧄 Onions and garlic

Onion and garlic are not strictly necessary, but they give the rice the familiar homemade flavor found in many Costa Rican kitchens.

Chop them finely so they distribute evenly throughout the rice without affecting its texture.

🌿 Bay Leaves

I haven’t seen many Costa Rican chefs or home cooks add bay leaves to rice, but we definitely use them a lot-especially in caldos (broths), stews, and definitely when making beans (stay tuned, that recipe will be available next week!). Since we use bay leaves so often in other dishes, I started adding them to my rice many years ago, and I absolutely love the flavor they bring. It’s not a typical Costa Rican combination, but hey-I’m Costa Rican, so I’m covered. 😉

🧂 Salt

Ahh! Not much to say about this, other than I only eat unsalted rice when I go to Asian restaurants and similar places. Costa Rican white rice will always be cooked with salt.

💧 Water

Please don’t follow the 2:1 ratio when cooking rice. It means adding 2 cups of water for every cup of rice, and that almost always leads to mushy rice. Unless that’s the texture you want, it’s better to adjust the water depending on the variety of rice you’re using. By following my method—adding only 1 ½ cups of water per 1 cup of rice and then adjusting the water later—you’ll always end up with fluffy white rice. I explain more about this process in the step-by-step photos below.

A round ceramic pot filled with fully cooked rice, surrounded by red bell peppers, a small pot of black beans, and fresh cilantro leaves

💡 Tips for Perfectly Fluffy White Rice

  • Start by rinsing your rice. This step is not mandatory, but when you do it, you remove the starches that make rice sticky once cooked. If that’s the consistency you’re aiming for, then don’t rinse your rice—but if you want light, separate grains instead of one big clump, rinse it 3–4 times or until the water runs clear.
  • Always add hot water to your pan. This speeds up the cooking process and allows the rice to start cooking immediately after you add the water. If you add cold water instead, the stove will have to work harder to heat it up before cooking begins, which can result in mushy rice.
  • Avoid adding ingredients that could stain your rice, such as cilantro or green and red bell peppers. While these add great flavor, their color will leach into the water as they cook, staining the rice. If you want that color, go for it—but if you’re looking for classic white rice, skip these ingredients.
  • Do not stir constantly or remove the lid while cooking. Each time you lift the lid, the temperature inside the pan drops, and every stir introduces cool air—both of which can lead to mushy rice.
  • If you don’t want to manage a pan on the stove, I highly recommend getting a rice cooker. Modern rice cookers do an excellent job, and they’re so advanced that you can set them and walk away—or simply focus on cooking the rest of your meal.
Separating water from rice through a sifter after rinsing to remove starches

Step 1: Rinse your rice

Add plenty of water to a bowl of raw rice. Gently stir to wash away the starches. Drain and repeat 2–3 times, until the water runs clear.

Chopped onions cooking in a large pan while a left hand adds a drizzle of oil

Step 2: Sauté your vegetables

Heat the oil over medium heat. Add the onions and garlic, and cook gently—don’t let them burn. Meanwhile, bring plenty of water to a boil.

Hot water being poured into rice mixed with garlic, onions, and oil in the pan

Step 3: Add Rice and Seasonings

Add the rice, hot water, salt, and bay leaves. Give it a quick stir, then cover with a lid.

A clear glass lid showing rice cooking in water, with bay leaves floating on top

Step 4: Cook the Rice

Cook for 10 minutes, or until the water has evaporated and the rice has absorbed the liquid. Do not uncover the lid during the cooking process.

Stirring rice very gently with a spatula; bay leaves rest on top after being cooked on the stove

Step 5: Stir and Adjust Seasoning

Gently stir the rice, taste it, and season according to your liking.

Adding small amounts of water to finish cooking white rice; rice is almost done and needs a second round of steaming

Step 6: Add a Second Round of Water

Add no more than ¼ cup of water, then cover again with the lid. Cook for 10 more minutes, or until the rice is fully cooked.

💡Frequently Asked Questions

Which rice can I substitute if I cannot find long-grain white rice?

If you can’t find long-grain white rice, you can substitute it with other varieties like jasmine, basmati, or even short-grain rice. Each type of rice has its own unique flavor profile—they’re all delicious, but they will give the recipe a slightly different taste. Ultimately, any of these options will still work beautifully.

How often do Costa Ricans eat white rice?

Every day. There’s no other answer.

What do you do with leftover rice?

Leftover rice is incredibly versatile. Use it to prepare fried rice, add it to soups, make a quick rice bowl with vegetables and protein, or use it as a filling for stuffed peppers. Since the grains become slightly firmer after refrigeration, leftover rice works especially well in recipes that require reheating or sautéing.

How do I reheat rice without it drying out?

If you’re warming it on the stove or in the microwave, add a few drops of water first, then heat until it reaches the desired temperature.

Can I make this recipe in a rice cooker?

Yes, you can. Although I would follow the rice cooker’s instructions for the amount of water to add.

How long does cooked rice last in the fridge?

It can last up to 10 days, but I don’t know precisely—mine never lasts more than 3 days. 😊

Can I freeze cooked rice?

Yes, you can! I actually love to do this. I cook several cups of rice, then put them in the freezer, it thaws beautifully, and you’d never guess it was frozen.

What can rice be paired with?

Literally anything. Costa Ricans pair it with beans, lentils, potatoes, chicken, pork, salads, and more. We even make it into a dessert—have you ever tried rice pudding?

Step-by-Step Photos to Achieve Perfectly Cooked White Rice

Follow the step-by-step photos below to make perfectly cooked rice, every time.

🌿 Bringing It All Together

And that’s it—my way of making perfectly fluffy Costa Rican white rice. It’s simple, comforting, and such a big part of our table. Whether you pair it with beans, serve it alongside your favorite dish, or just enjoy it on its own, I hope it brings a little taste of Costa Rica to your kitchen.

Eat it with this delicious Yucca Flower Picadillo.

Oh, and speaking of beans—don’t miss next week’s recipe for Black Beans Costa Rican Style. They’re the perfect match for this rice, and together they make one of the most loved combinations in our cuisine. Make sure to check out my Gallo Pinto recipe, where they become one of Costa Rica’s most beloved meals.

Besitos (kisses),
Mara

A round ceramic pot filled with fully cooked rice, surrounded by red bell peppers, a small pot of black beans, and fresh cilantro leaves

Fluffy White Rice Recipe

Make perfectly fluffy white rice with this easy Costa Rican recipe. Get all the tips you need for rice that’s cooked just right every time and packed with flavor.
Print Recipe Pin Recipe
Prep Time 10 minutes mins
Cook Time 25 minutes mins
Total Time 35 minutes mins
Course Main Course
Cuisine Costa Rican
Servings 6 servings

Equipment

  • Large Pan
  • Knife and cutting board
  • Rice Cooker Optional

Ingredients
  

  • 2 cups long-grain white rice
  • 2 tablespoons oil
  • ½ cup chopped onion
  • 2-3 bay leaves
  • 2-3 garlic cloves
  • 1 ½ teaspoons salt
  • 3 ¼ cups boiling water

Instructions
 

  • Add plenty of water to a bowl of raw rice. Gently stir to wash away the starches. Drain and repeat 2–3 times, until the water runs clear.
  • Warm up a large pot over medium heat. Once hot, add the onions and oil; cook for 2–3 minutes, or until the onions turn translucent. Add the garlic and cook for about 30 seconds—don’t let it burn. Meanwhile, bring plenty of water to a boil.
  • Add the rice, hot water, salt, and bay leaves. Give it a quick stir, then cover with a lid.
  • Cook for 10 minutes, or until the water has evaporated and the rice has absorbed the liquid. Do not uncover the lid during cooking.
  • Gently stir the rice, taste it, and season according to your liking.
  • Add no more than ¼ cup of water, then cover again with the lid. Cook for 10 more minutes, or until the rice is fully cooked.

Video

Notes

  • Store leftover rice in an airtight container in the fridge. Let it cool completely before refrigerating to avoid excess moisture.
  • Freeze cooked rice in an airtight container or freezer bag. Thaw overnight in the fridge or reheat directly from frozen—add a splash of water and cover to keep it fluffy.
  • When reheating, add a few drops of water and cover to help restore moisture.
  • For a richer flavor, substitute part or all of the water with chicken or vegetable broth.
✨ If you enjoyed this recipe, visit thelatinspoon.com or The Latin Spoon YouTube channel for more delicious recipes.

Yucca Flower Picadillo

Jun 24, 2025 · Leave a Comment

Traditional Costa Rican picadillo with yucca flowers and potatoes, beautifully served in a bowl and topped with a blooming yucca flower

When I first found yucca flowers blooming in my backyard three years ago, I could hardly believe it. I grew up eating them in Costa Rica, and for nearly 15 years after moving to the United States, I thought they were something I would only enjoy during visits back home, not knowing I was able to enjoy them here in the States.

Traditional Costa Rican picadillo with yucca flowers and potatoes, beautifully served in a bowl and topped with a blooming yucca flower

They are different, though. After doing a little research on the internet, I was able to discover that the difference between the yucca plant and flor de itabo (which is the name used in Costa Rica, although other countries call it flor de izote) is supposedly just the name. But when I look at the plant itself, I do see some differences that sent me down a rabbit hole I still haven't been able to come out of.

The one in Costa Rica is super tall, usually 15–30 feet, while the one in my backyard grows much shorter—I can pick the flowers with no problem since they're at chest height. The leaves are also different: on the Costa Rican plant, they grow much closer to the blossoms, whereas on the one in my yard they're more spaced out. The flavor, however, is the same, and because of that I use the names interchangeably—yucca and flor de itabo—in this post.

Watch how to freeze them

What are Yucca Blossoms?

Let’s talk about the flowers. They’re called Yucca filamentosa, also known as Adam’s needle. The flowers can be eaten raw, but some people have reported a bitter taste or even mild throat irritation. Personally, I’ve never eaten them raw — and even when cooked, they still carry a slight bitterness.

That bitterness, however, is exactly what makes them so special. It’s their signature. Don’t let it fool you — that sharp edge is what gives yucca flowers their charm. Some people describe the flavor as a cross between artichokes and asparagus.

So if you’re a fan of those two, you’re in for a real treat. And the best part? You might just find yucca flowers blooming right in your backyard, like I did.

Just a quick note so there’s no confusion: yucca flowers are not the same as yuca — also known as cassava. Cassava is a starchy root that’s also edible, but it comes from a completely different plant. It doesn’t produce edible flowers, and its leaves are not safe to eat either.

What is "Picadillo"?

Picadillo is a beloved dish all across Latin America — and while every country, and even every region, has its own version, the word picadillo always signals something special. It means the cook knew what they were doing. It means time, intention, and flavor.

Picadillos are often slow-cooked, giving the ingredients time to release their flavors and — if there’s meat involved — to become juicy and tender. These are not rushed meals. They’re the kind of food you make when you want to feed people well.

But what exactly is picadillo? Let’s break it down: the word comes from the Spanish verb picar, which means “to chop,” and the suffix -illo, which implies “small.” So picadillo basically means “a bunch of small chopped things” — but don’t let that simplicity fool you. It’s not just a pile of diced ingredients; it’s a dish where everything is cooked together, slowly, with herbs, seasonings, and care. The result is comforting, flavorful, and deeply rooted in tradition.

Ingredients for the Yuca Flower Picadillo

🌸 Yucca Blossoms

In Costa Rica, we call them flor de itabo. In Mexico and El Salvador, people know them as flor de izote.
Fully bloomed petals tend to be less bitter than the closed ones, so if this is your first time trying them, I recommend using only the fully opened flowers.
Some people soak them overnight to reduce the natural saponins, but blanching them in hot water for a couple of minutes works perfectly for me every time.

🥔 Potatoes

For this recipe, I’m using golden potatoes, but any type of potato will work here. They help balance out the flavors — since potatoes are mild and starchy, and the flowers are bold and slightly bitter, the combination creates a beautiful contrast in every bite.

🧅🌶️ Onions and peppers

Any type will work just fine, but I recommend using red bell peppers — their color pairs beautifully with the red hue of achiote. You can also use red onions, or swap in green or yellow peppers depending on what you have on hand.
Onions and peppers are the base of most picadillos, not just because they’re affordable and easy to find, but because they build a flavor foundation that makes everything else shine. Learn how to make sofrito here.

🧡 Achiote (annatto)

We call it achiote, but you may know it as annatto. It’s a staple in Costa Rican cooking and popular in many other Latin American countries too.. It adds not only a beautiful reddish-orange color, but also a mild earthy flavor, with hints of nuttiness and warmth.
It’s easy to find — not just in Mexican or Latin stores, but in most regular supermarkets across the U.S. You probably just haven’t noticed it because you weren’t looking for it... until now.
👉 You can also find it right here on Amazon if you prefer to order it online.

🌿 Cilantro

Cilantro is a delicious and aromatic herb that we use all the time in Costa Rican and Latin American cooking.
I like to add my cilantro at the very end of this yucca flower picadillo, since it’s sensitive to heat and its flavor can disappear quickly when cooked. Plus, tossing it in fresh adds a pop of color and brightness that really elevates the final dish.

🧂 Salt and black pepper

Simple, but essential. A good pinch of salt brings out the flavor of the flowers, potatoes, and everything else in the pan. A touch of black pepper adds just the right amount of heat and depth. Adjust both to taste — you know your palate better than any recipe does.

🧈💧 Butter and water

I like to start with a bit of butter to sauté the onions and peppers — it adds richness and depth. Then, once the potatoes are already cooked, I add about 1 cup of water to the pan.
Why water? Because this is what brings it all together. The water helps the potatoes absorb the flavors of the achiote, onions, and peppers as everything simmers gently. That slow cooking is what makes a picadillo feel like home — all the ingredients coming together into one delicious, unified dish.

💡 Extra tips for the perfect Yucca Flower Recipe

  • Keep the heat low and let the flavors come together slowly. A good picadillo needs time — don’t rush it.
  • Let the potato pieces soften and melt into the achiote base. That creates a slightly creamy texture that ties everything together.
  • Use a wide pan so your ingredients cook evenly, instead of steaming in a crowded skillet.
  • Taste the flowers before serving. If they’re still too bitter, balance it out with a bit more salt — or even a tiny pinch of sugar.
  • Squeeze some lime on top before serving. It’s not traditional, but it adds brightness and contrast that works beautifully.
  • Serve it with warm tortillas or plain rice. This dish was made to be scooped and savored with something soft on the side.

How to cook Yucca Flower Recipe – Step-by-step photos

Here’s a quick visual guide to show you how I make this traditional Costa Rican dish. These step-by-step photos walk you through the process — from preparing the flowers to building the final picadillo. It’s simple, cozy, and full of flavor.

Step 1: Boil the potatoes

Boil the potatoes in plenty of water with 1 teaspoon of salt. Cook them for 20–25 minutes, until they’re tender but not too soft — you want them cooked through, but still firm enough to hold their shape in the picadillo.

Step 2: Blanch the yucca flowers

Remove the potatoes and set them aside. Then, using the same water, cook the yucca flowers for just 2–3 minutes.

Once done, discard the water completely and set the flowers aside as well.

Step 3: Make the sofrito

In a large saucepan, add the butter, onion, peppers, and achiote. Cook over medium heat for about 5 minutes, until the vegetables are soft and have taken on a translucent, golden color. This is the base of the flavor — take your time and let it develop.

Step 4: Add the potatoes, water, salt, and pepper

Add the diced potatoes — medium-sized cubes work best. Pour in about 1 cup of water, season with salt and black pepper, and let everything cook together over low heat for 5 to 7 minutes, stirring occasionally to keep the potatoes from drying out.

Step 5: Add the blanched yucca flowers

And stir gently until they’re fully coated with the reddish color from the achiote. Let them cook with the potatoes for a couple of minutes. Add a little more water, salt, or pepper if needed to adjust the consistency and flavor.

Step 6: Final simmer and cilantro

Cook for 5–7 more minutes, until everything is well combined. The potatoes should still hold their cube shape. Add fresh cilantro at the end for extra flavor and color.

🌿 Final thoughts on making Yucca Flower Picadillo
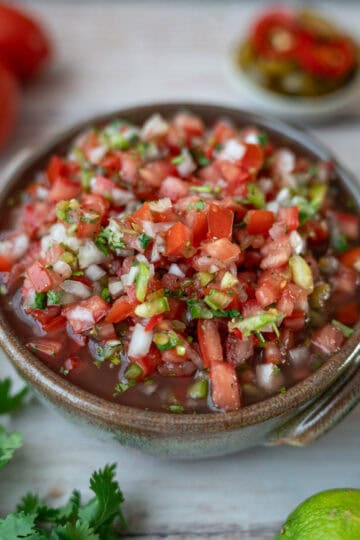
If this is your first time trying yucca flowers, I hope this dish surprises you — in the best way. It’s earthy, bold, and comforting, all at once. And if you grew up eating this, maybe it brings a bit of home back to your table. And for the perfect Costa Rican experience, serve this picadillo with a side of:
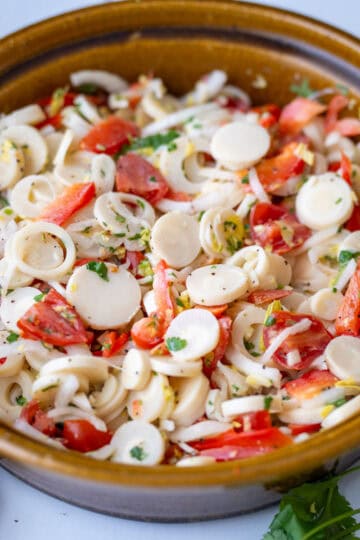
White Rice
Black Beans
Corn Tortillas

Thank you for being here and cooking with me. If you try this recipe, share it with me on Instagram — I’d love to see your version!

Besitos (kisses),
Mara

Traditional Costa Rican picadillo with yucca flowers and potatoes, beautifully served in a bowl and topped with a blooming yucca flower
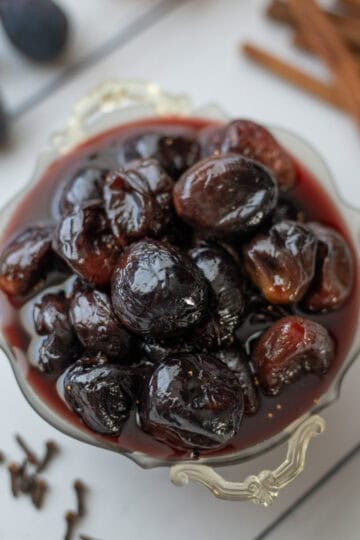
Yucca Flower Recipe

This traditional Costa Rican recipe features flor de itabo — also known as yucca flower or flor de izote — cooked into a flavorful picadillo with potatoes, achiote, onions, and peppers. Slightly bitter and deeply savory. It’s comforting, unique, and perfect with rice or tortillas.

Print Recipe Pin Recipe
Prep Time 20 minutes mins
Cook Time 30 minutes mins
Total Time 50 minutes mins
Course Side Dish
Cuisine Costa Rican
Servings 6 servings

Ingredients
  

  • 1 pound yucca flowers
  • 3 medium-size potatoes
  • 3 tablespoons butter
  • ½ medium-size onion chopped
  • ½ red bell pepper chopped
  • 1 teaspoon achiote annatto
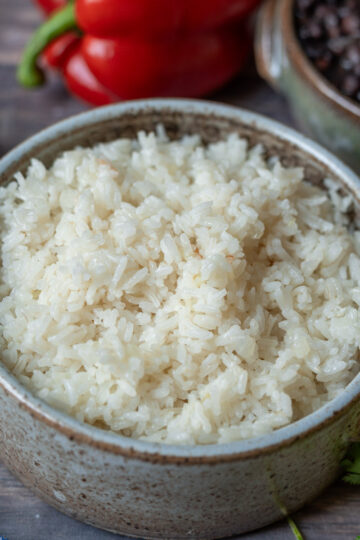
  • 1 cup water
  • 2 teaspoons salt plus 1 teaspoon for boiling the potatoes
  • 1 teaspoon black pepper
  • 1 bunch fresh cilantro chopped

Instructions
 

  • Boil the potatoes in a large pot with plenty of water and 1 teaspoon of salt. Cook for 20–25 minutes, until fork-tender but not falling apart.
  • Remove the potatoes from the pot and set aside. In the same water, blanch the yucca flowers for 2–3 minutes to reduce bitterness and remove saponins. Drain and discard the water.
  • In a large saucepan, melt the butter over medium heat. Add the onion, bell pepper, and achiote, and cook for about 5 minutes, until the vegetables soften and take on a reddish color.
  • Cut the potatoes into medium-size cubes, then add them to the pan along with 1 cup of water, salt, and black pepper to taste. Let everything simmer on low heat for 5–7 minutes, stirring occasionally so the potatoes stay moist and don’t dry out.
  • Add the yucca flowers and gently stir until they’re coated with the achiote base. Add a splash more water, salt, or pepper if needed.
  • Cook for another 5–7 minutes, or until the flavors have come together and the texture is to your liking. The potatoes should still hold their cube shape.
  • Turn off the heat and stir in the chopped cilantro. Serve warm with rice or tortillas.

Video

Notes

  • Yucca flowers are also known as flor de itabo in Costa Rica and flor de izote in countries like Mexico and El Salvador.
  • If it's your first time trying them, use fully opened flowers; they're less bitter than the closed ones.
  • Blanching the flowers in boiling water for 2–3 minutes helps reduce bitterness and remove saponins.
  • Cilantro is added at the end to preserve its fresh flavor and color.
  • This dish is seasonal — yucca flowers bloom once a year in spring (around May or June in the U.S.), so don’t miss your chance when they show up! 📍For more Costa Rican recipes, visit thelatinspoon.com.
Keyword Picadillo, Stew

Primary Sidebar

  • YouTube
  • Instagram
  • Facebook
  • Pinterest
  • Amazon

  • Costa Rican Recipes
  • About Mara
  • Work with me
  • Your Privacy at TLS

Copyright © 2026 thelatinspoon.com